1.1 Github Setup
This tutorial will go through the process of setting up your Github repository so you can share your work in this class online.
Step 1: Make a Github account
Navigate to github.com and set up an account if you do not have one yet. You should be able to sign up from that page. Make sure you use an email address you use and a password you will remember. You will have verify your email so make sure you do that too.

Step 2: Make a Github Repository
Step 2A: New Repository
Once you have made and verified your account, sign in to Github. On the main page you should see an option to create a repository. Wherever that might be, click it to start the process of creating a new repository. On the screenshot below it is the green button that says “new” over in the left sidebar.

Step 2B: Create Repository
On the next screen you need to fill in a few pieces of information. You need to fill in the repository name. This can be anything but I would recommend something like “avt217” or “introtoweb” or something similar. I would keep it all lowercase and don’t use any spaces. You do not need a description and keep the repository public. The final step here is to check the box that says “Initialize this repository with a README.” Not checking this box will force you to delete the repository and start over so make sure you check it.
Once you have a repository name and have checked the box, click “Create repository.”

Step 2C: Create gh-pages Branch
After you click “Create repository” it should take you to a page that looks like this:
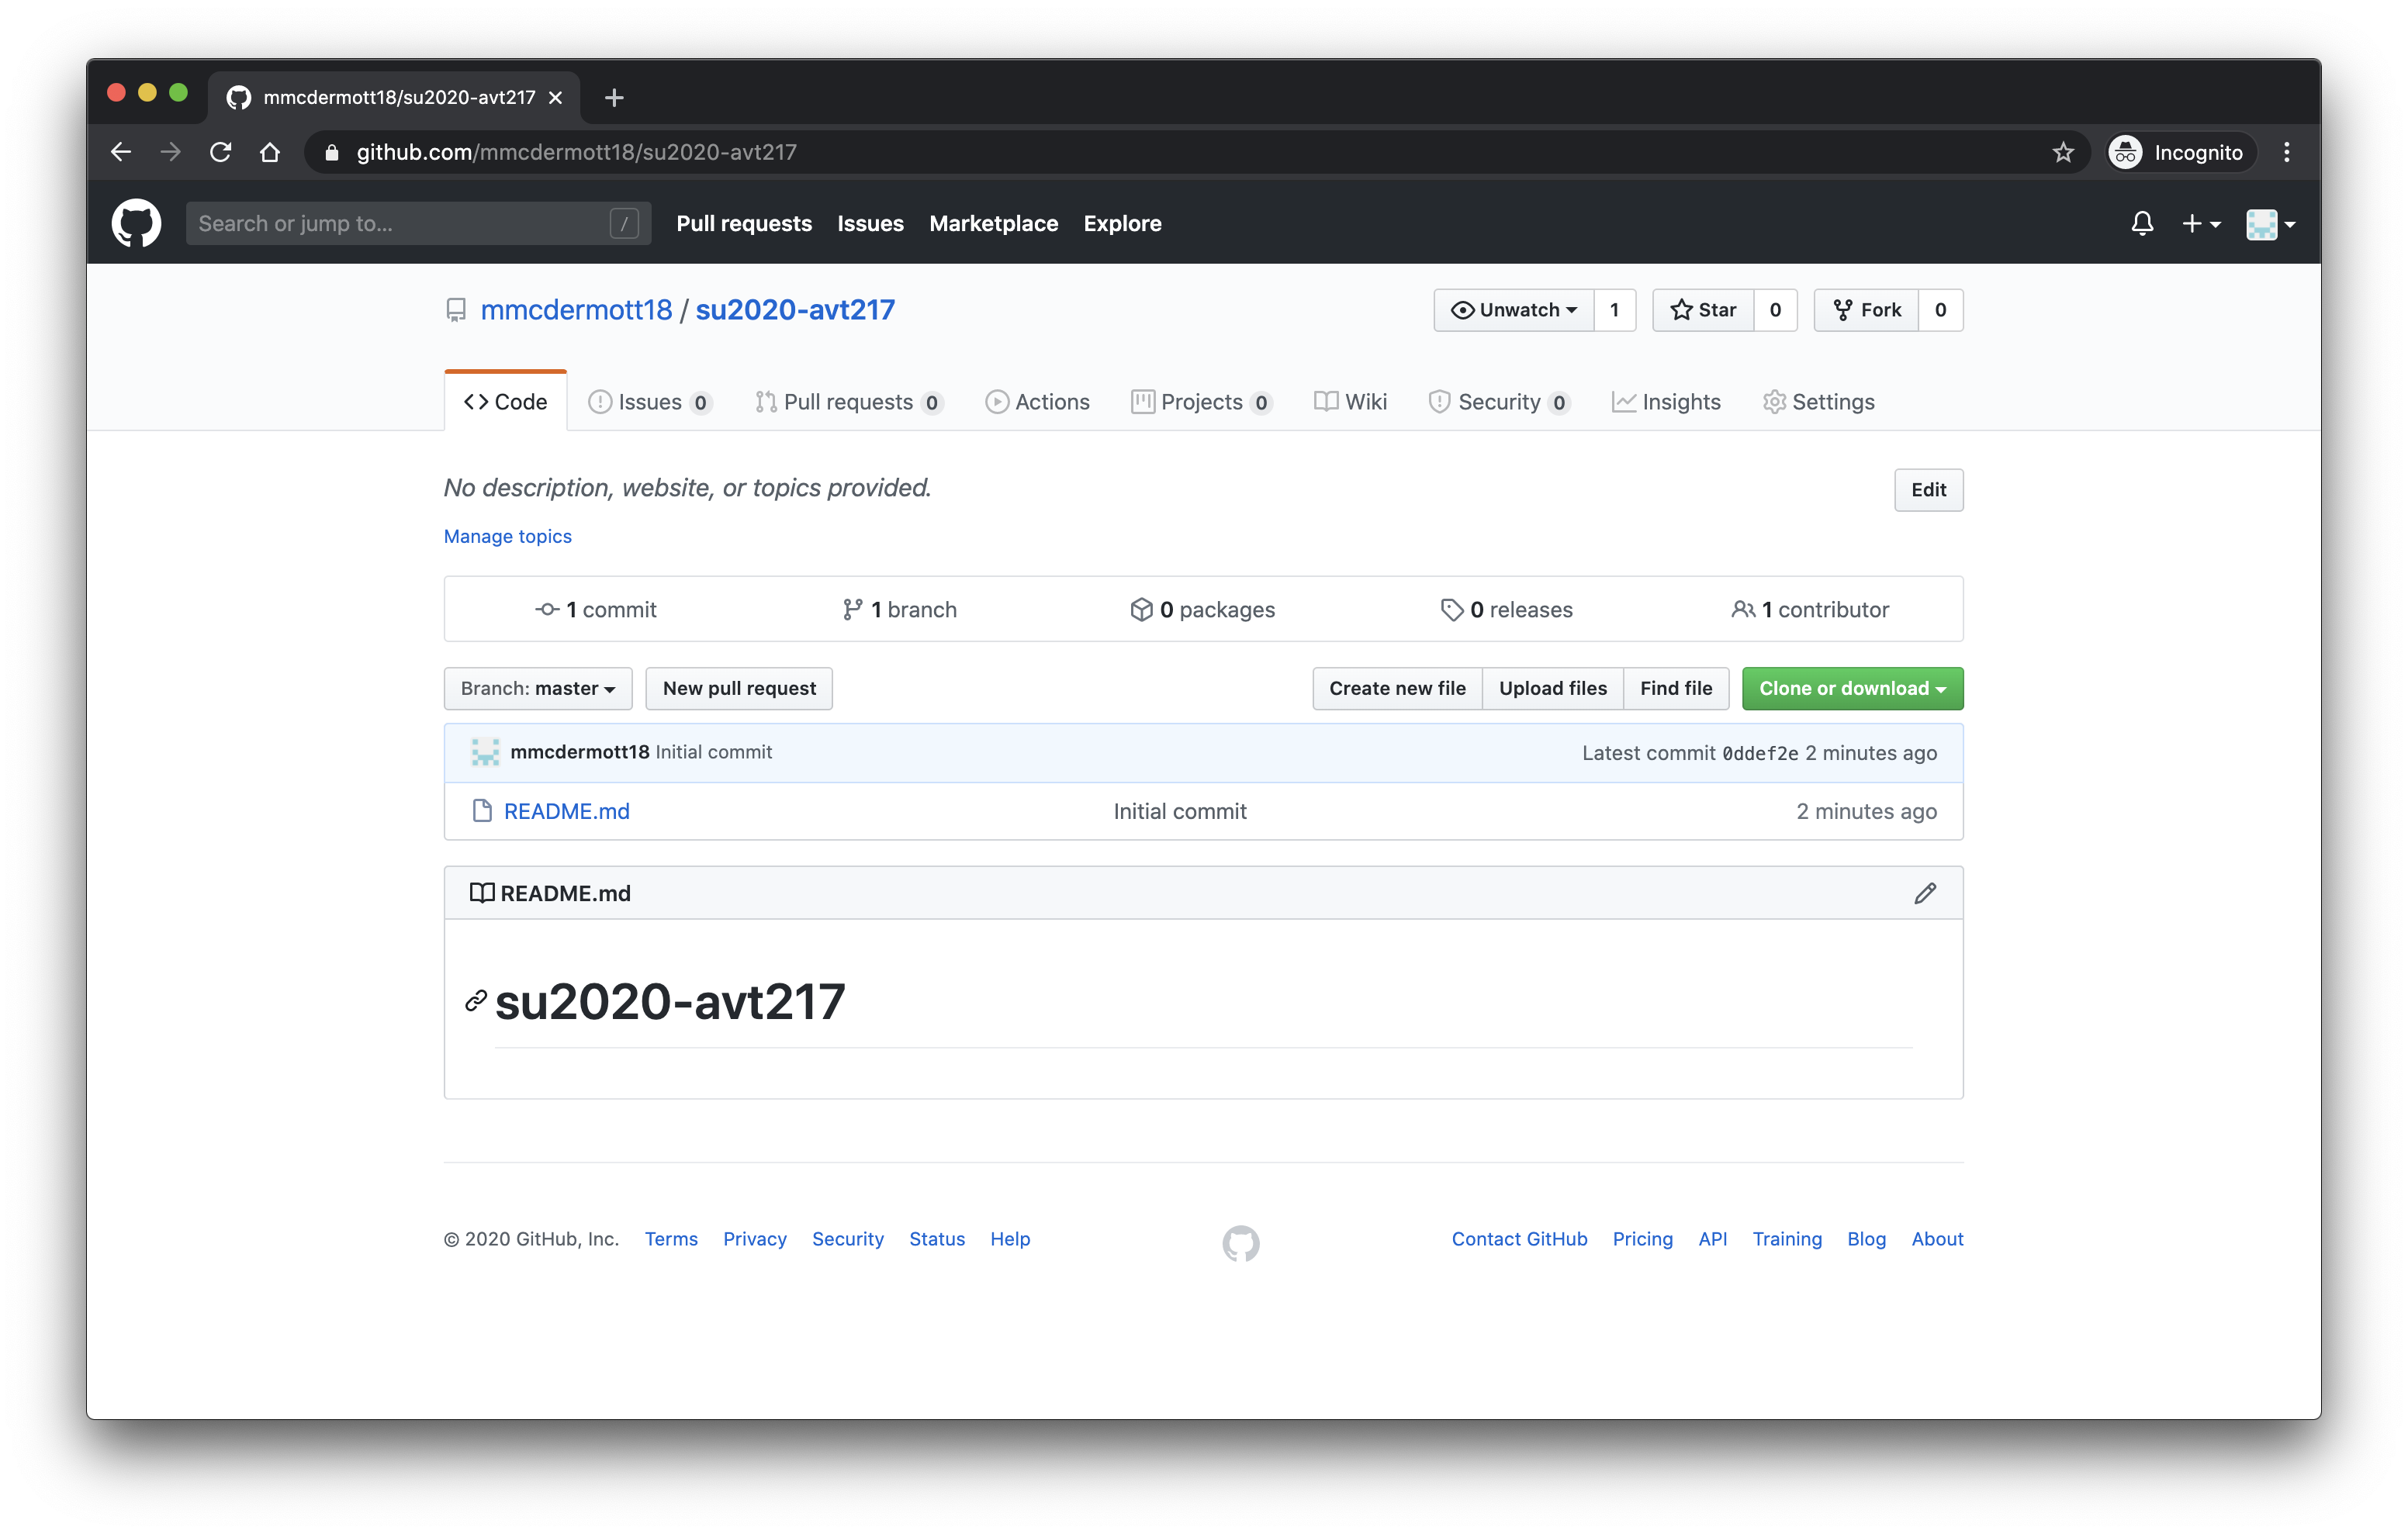
If your page does not look like that image you need to make a new repository and make sure you check the “Initialize this repository with a README” box.
Once your repository landing page looks like the above screenshot look for the button around the middle of the page on the left side that says “Branch: master” and click it. In the text field that pops up type “gh-pages” and then click “Create branch: gh-pages from ‘master’”.
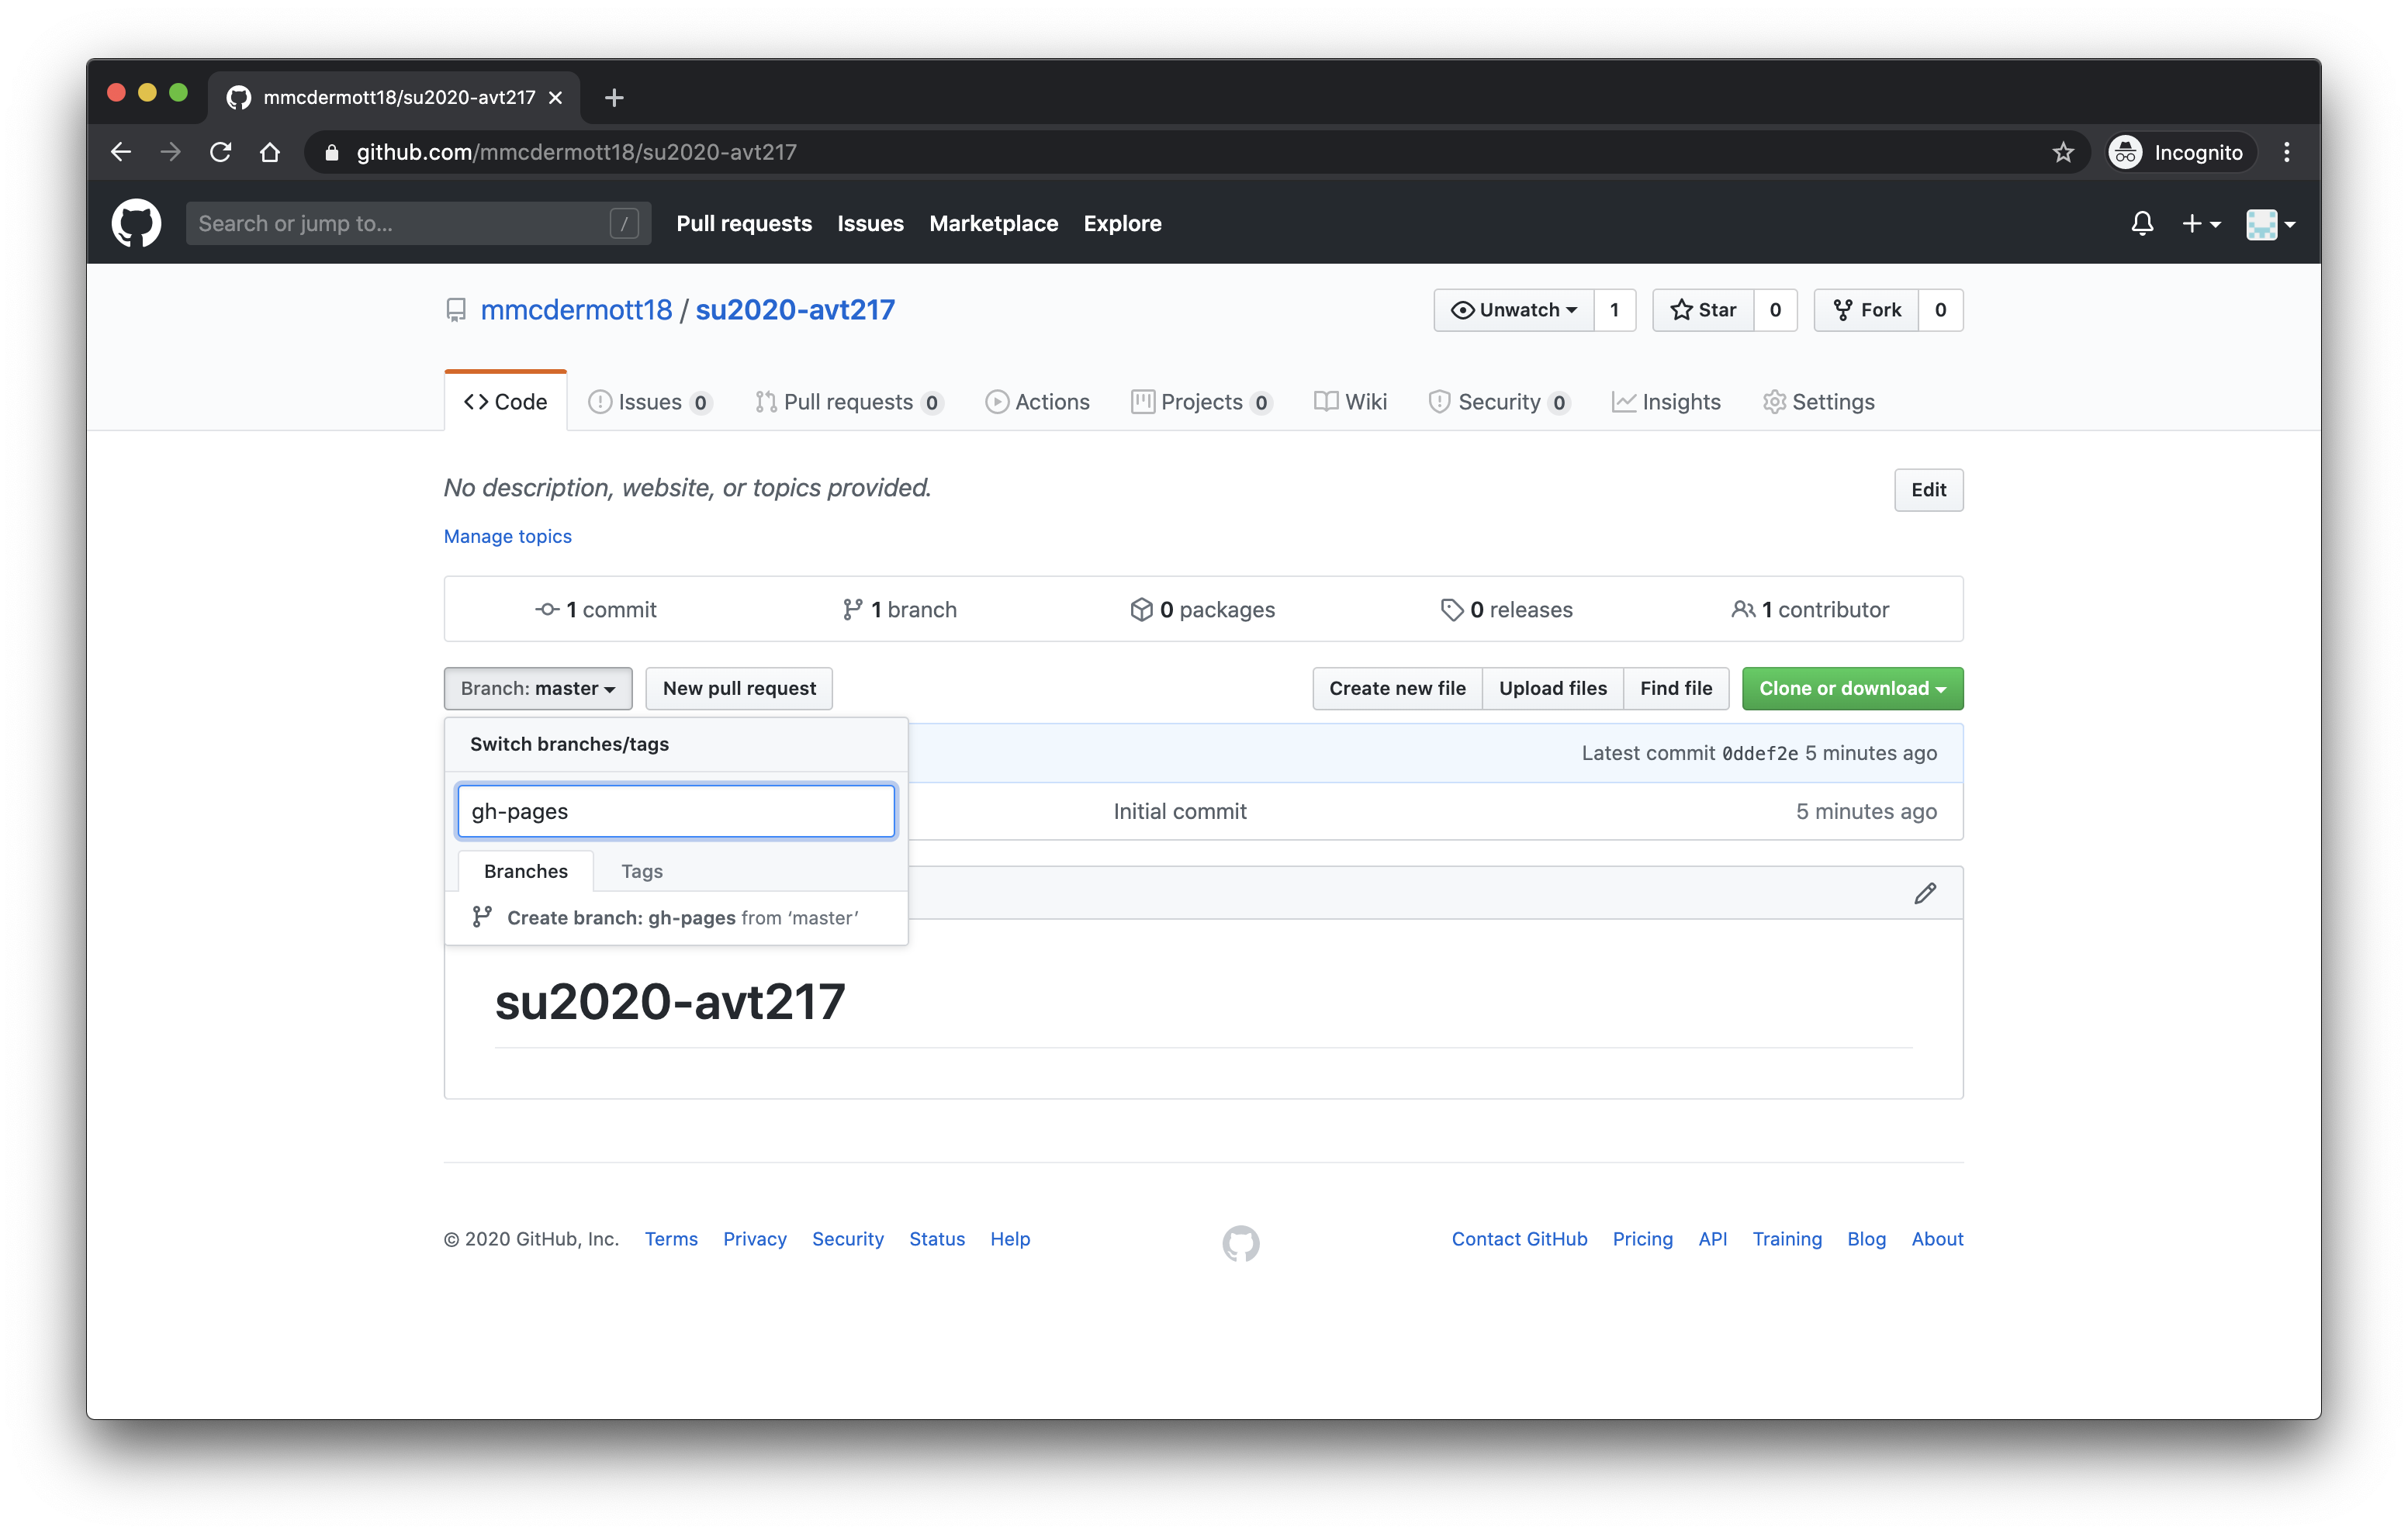
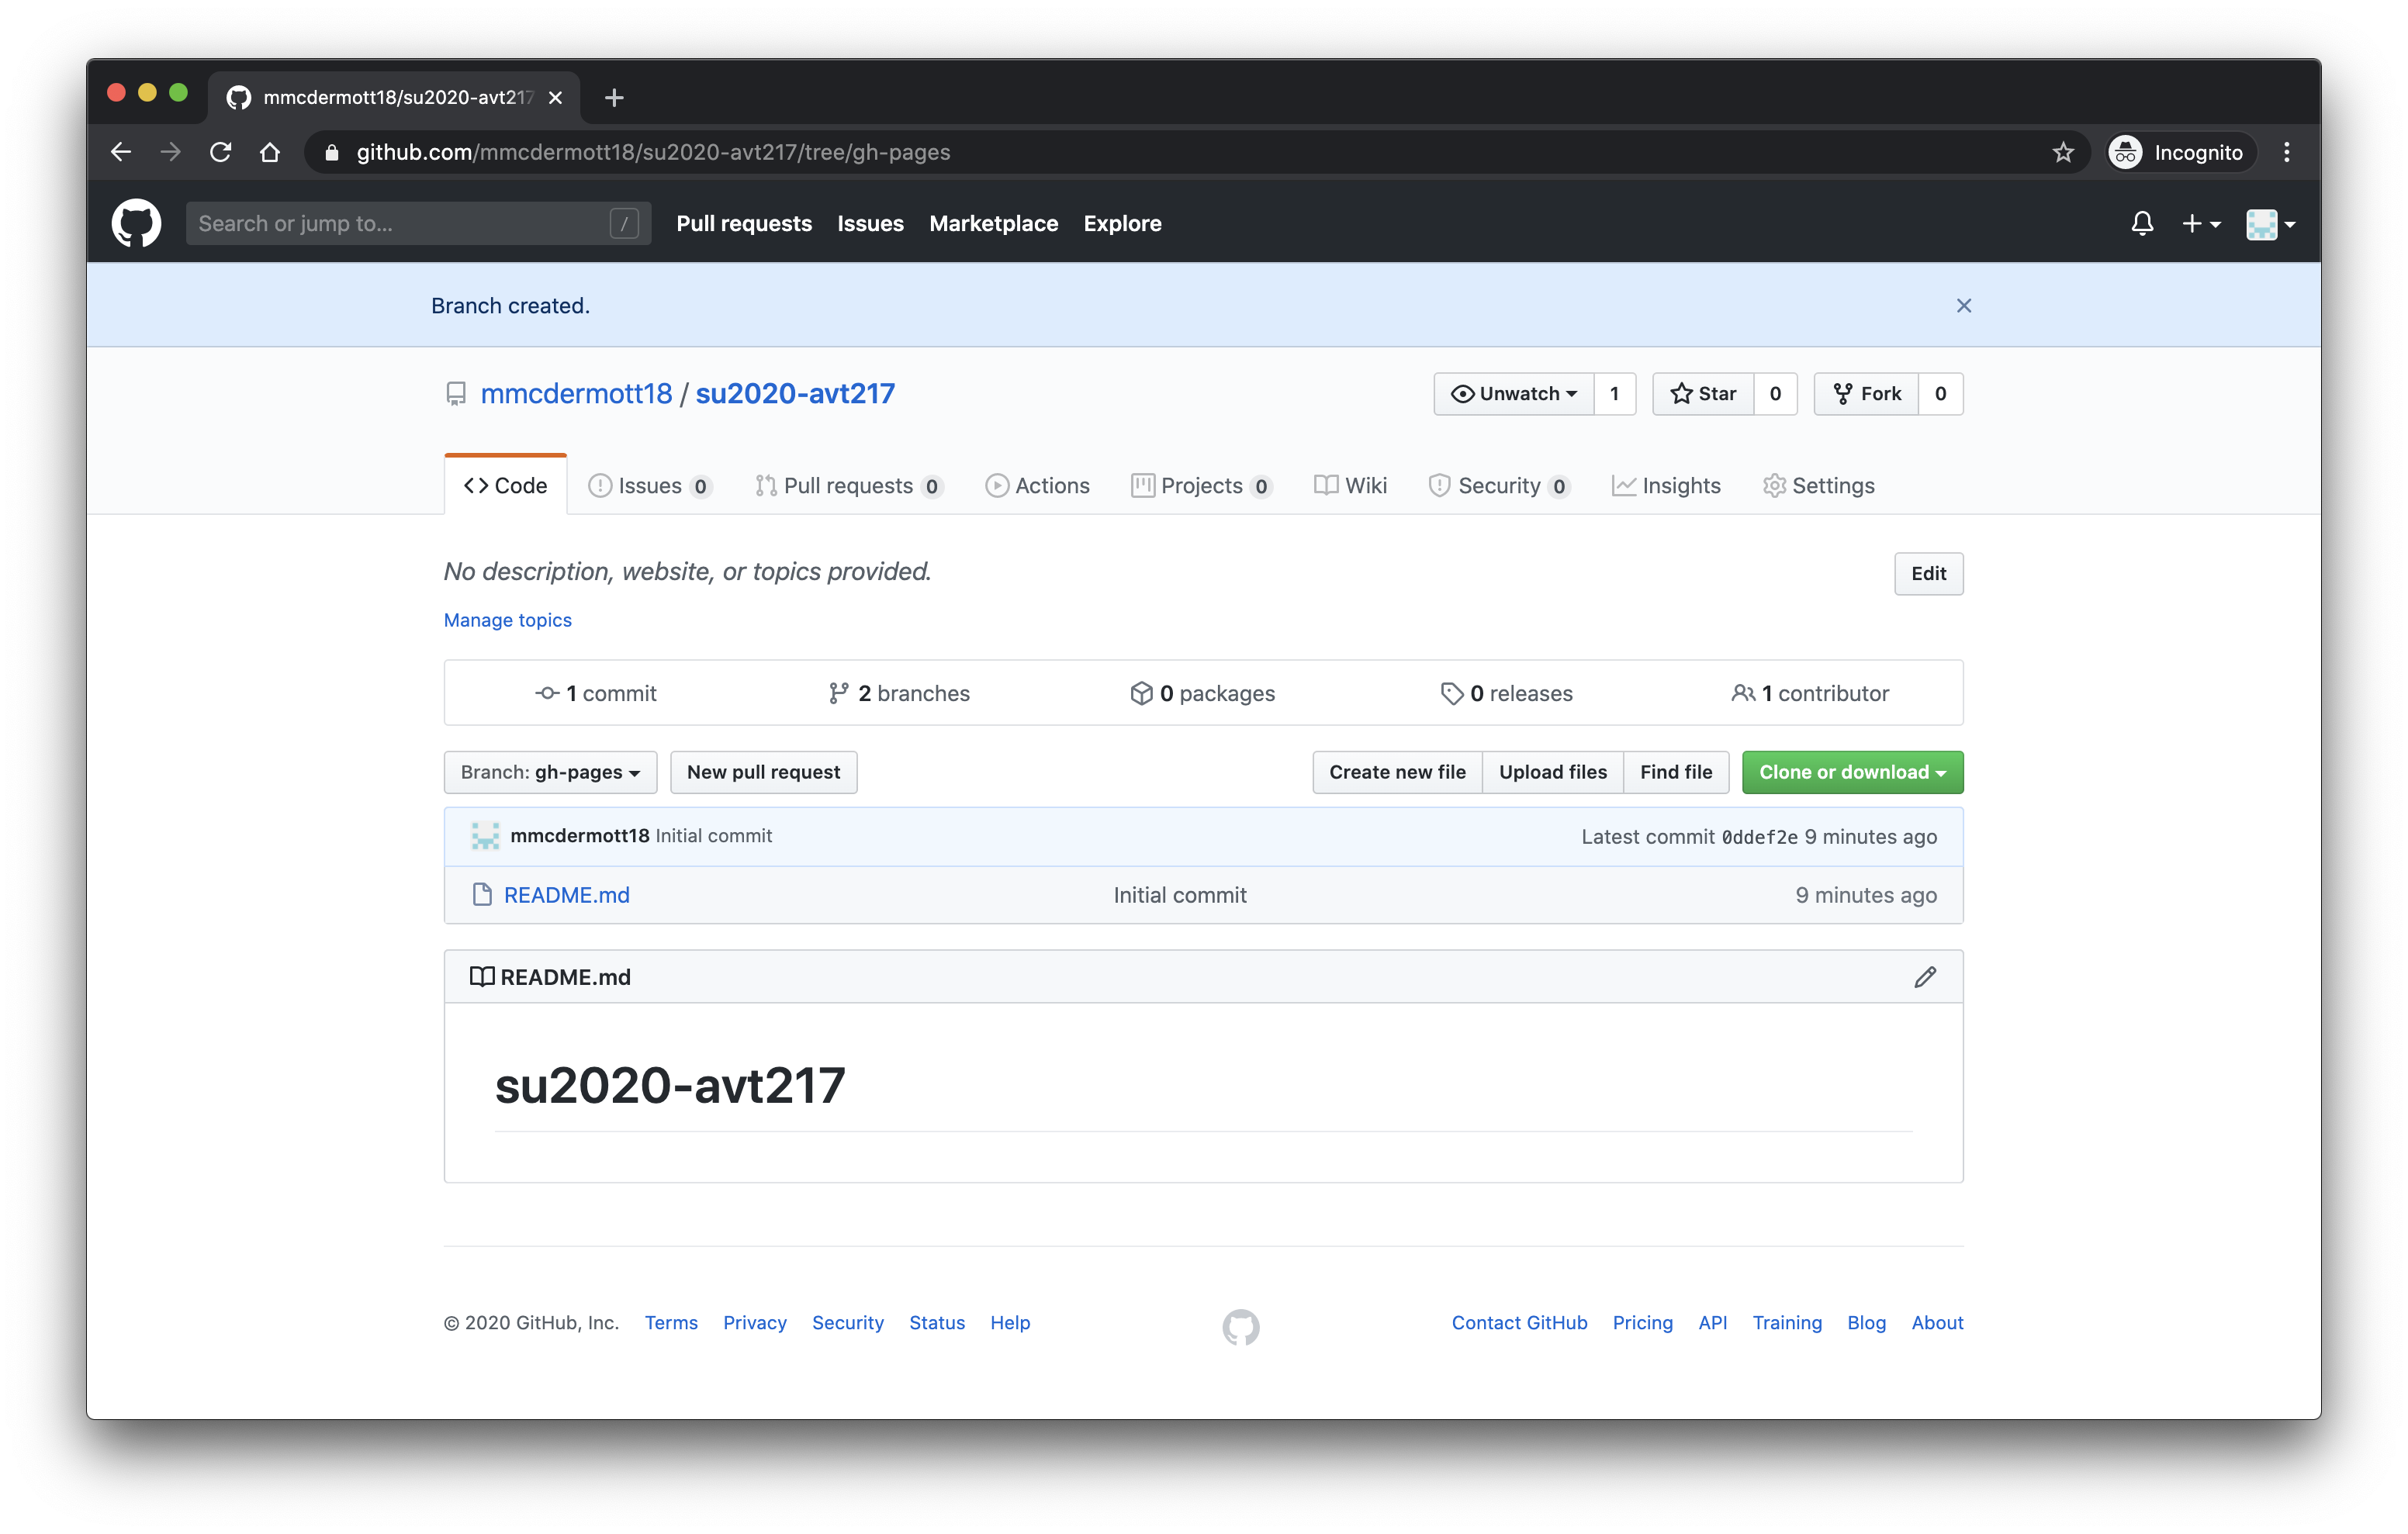
The screen should look generally the same but you should have a “Branch created” banner at the top and the button that used to say “Branch: master” should now say “Branch: gh-pages”.
Step 3: Download the Github Desktop app
Go to desktop.github.com and download the Github Desktop app. This screen should recognize the operating system you are using and present you with the appropriate download option.
Once you have downloaded it, install it on your computer, open it up, and log in with your github.com account.
Step 4: Clone your repository
Now that you are logged in to your account go to File > Clone Repository which should bring up a pop up showing your repositories. Find the repository you just created for this class (if it is the only repository you have it should be the only repository on the list) and select it.
Once you have it selected click the “Choose…” button to select where you will put the repository on your computer. This needs to be a permanent location. Once you have cloned it to that location you cannot move the folder or you will break the link and have to reclone your repository. I have a folder called “Repositories” in my “Documents” folder where I clone all my repositories. So choose the location you are cloning this to on your computer carefully.
Once you have your Local Path chosen, click “Clone.”

After you clone your repository you should have a screen that looks like this.
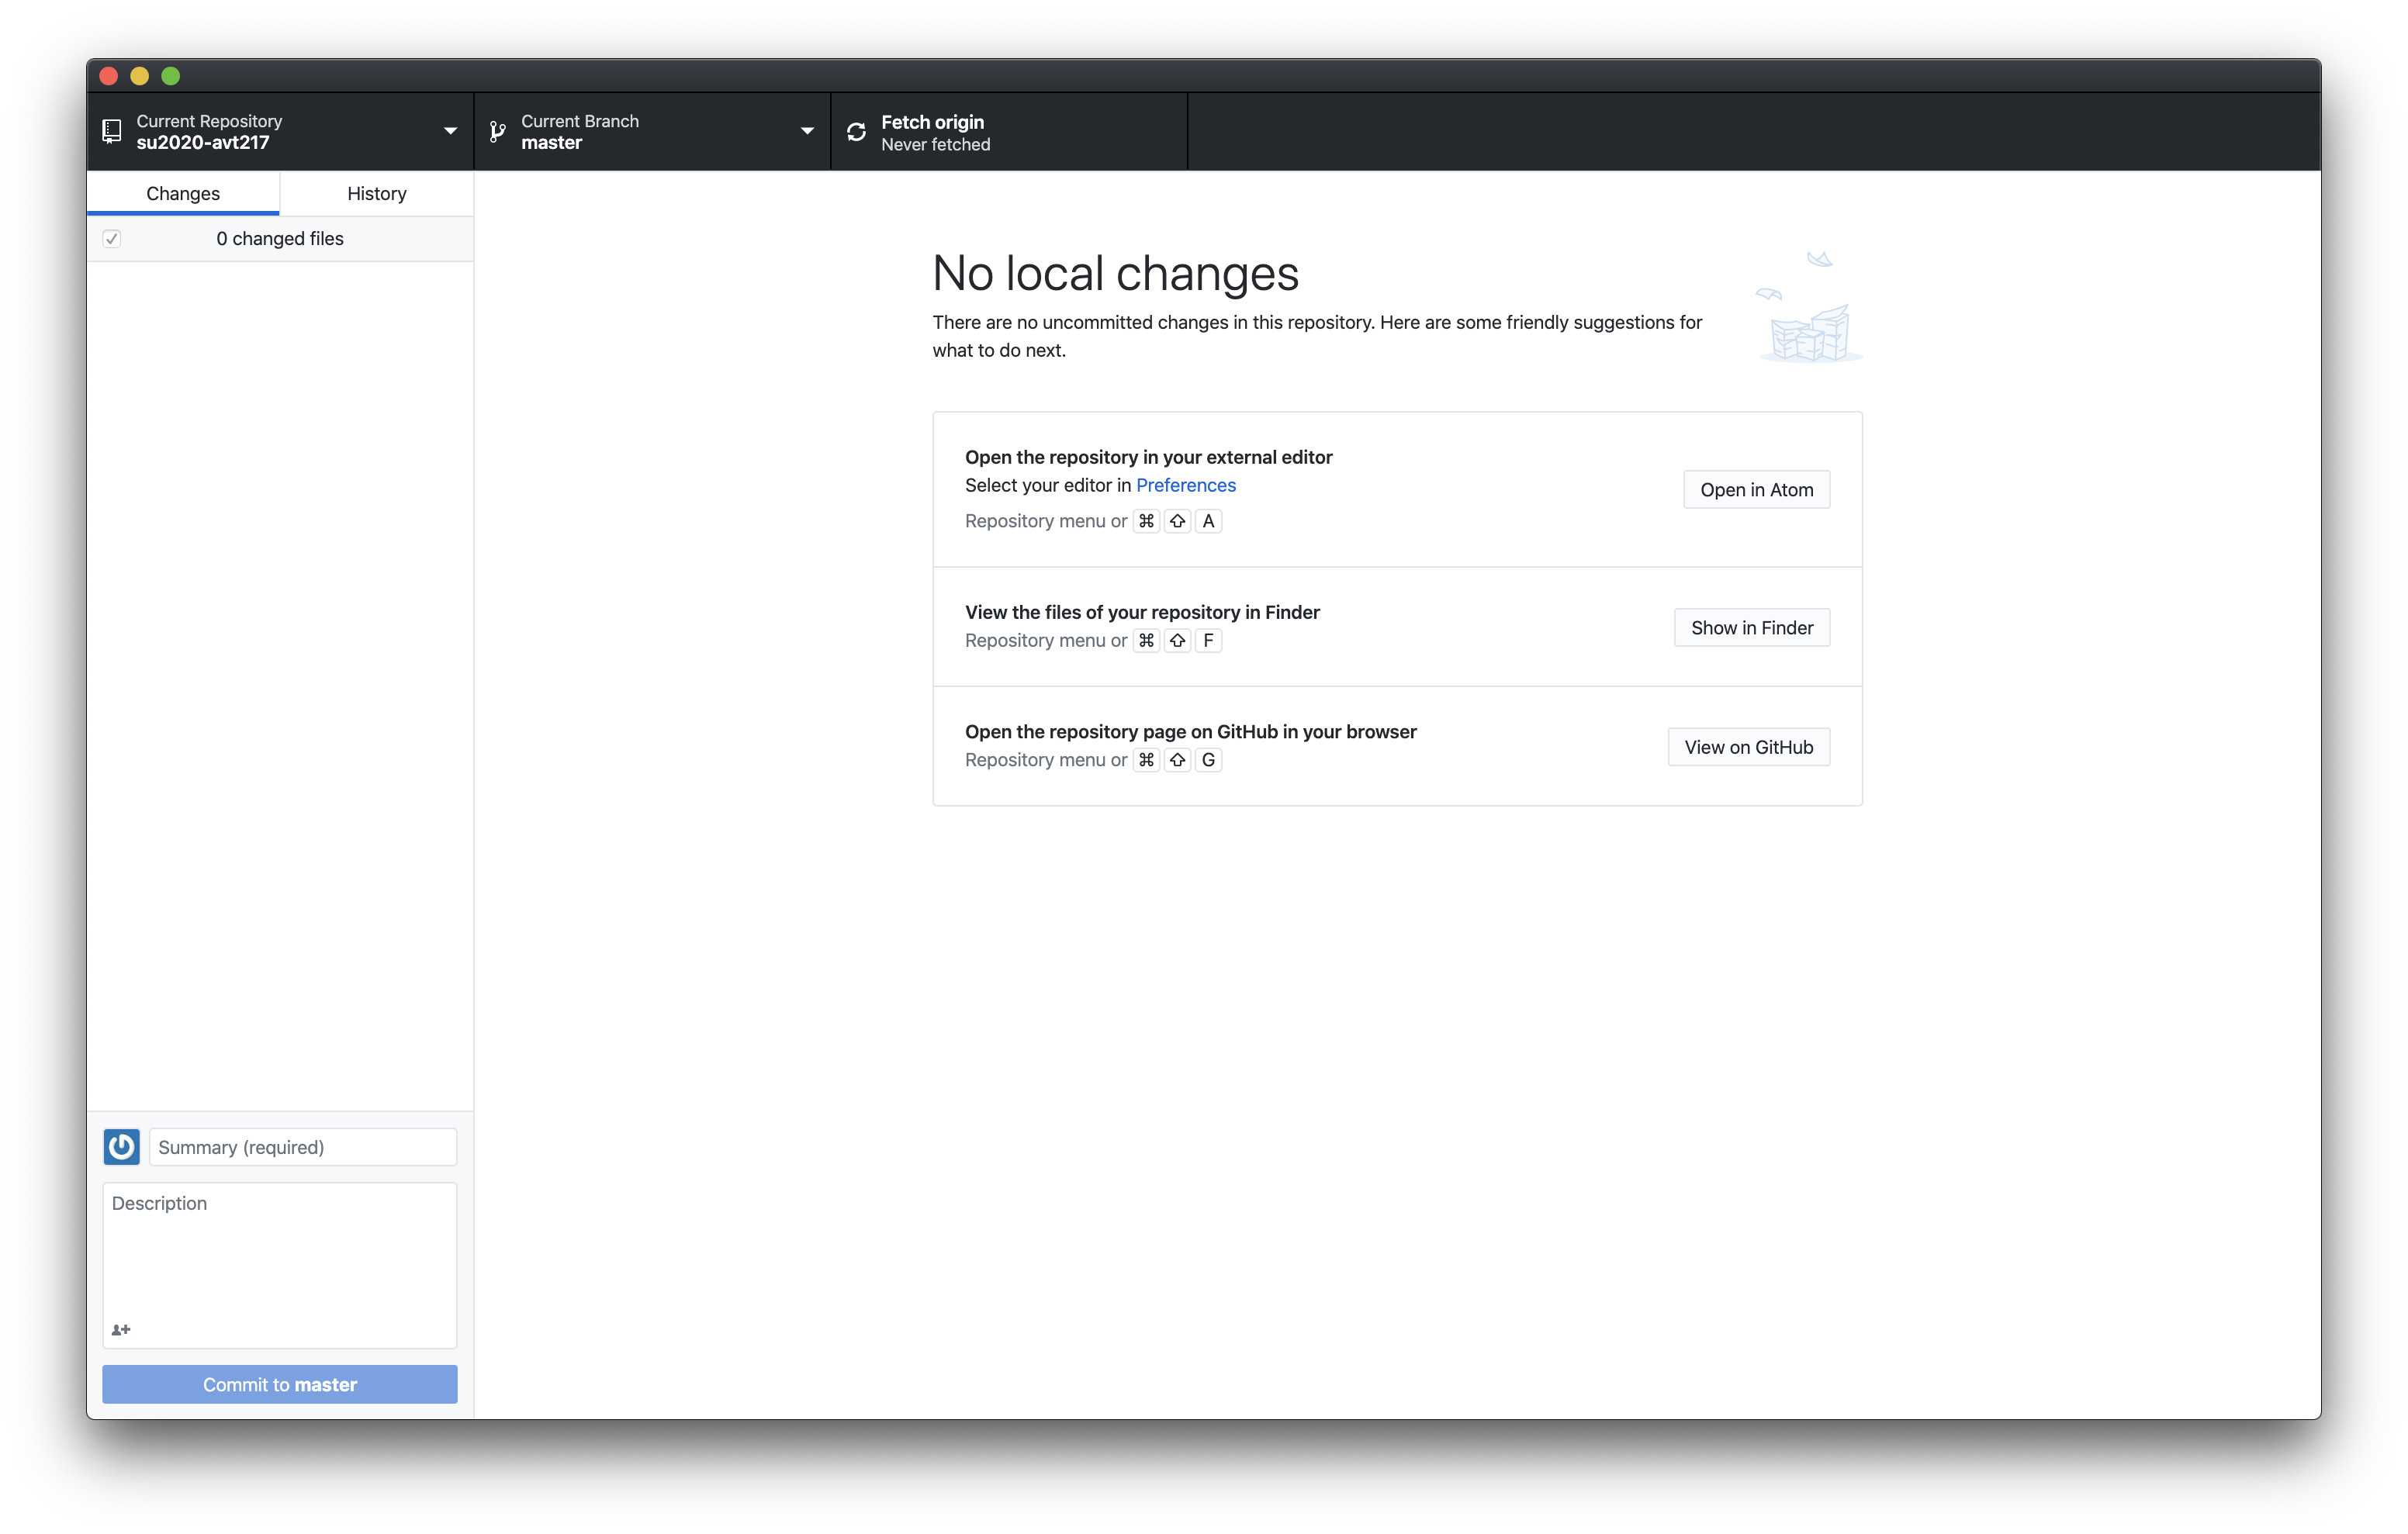
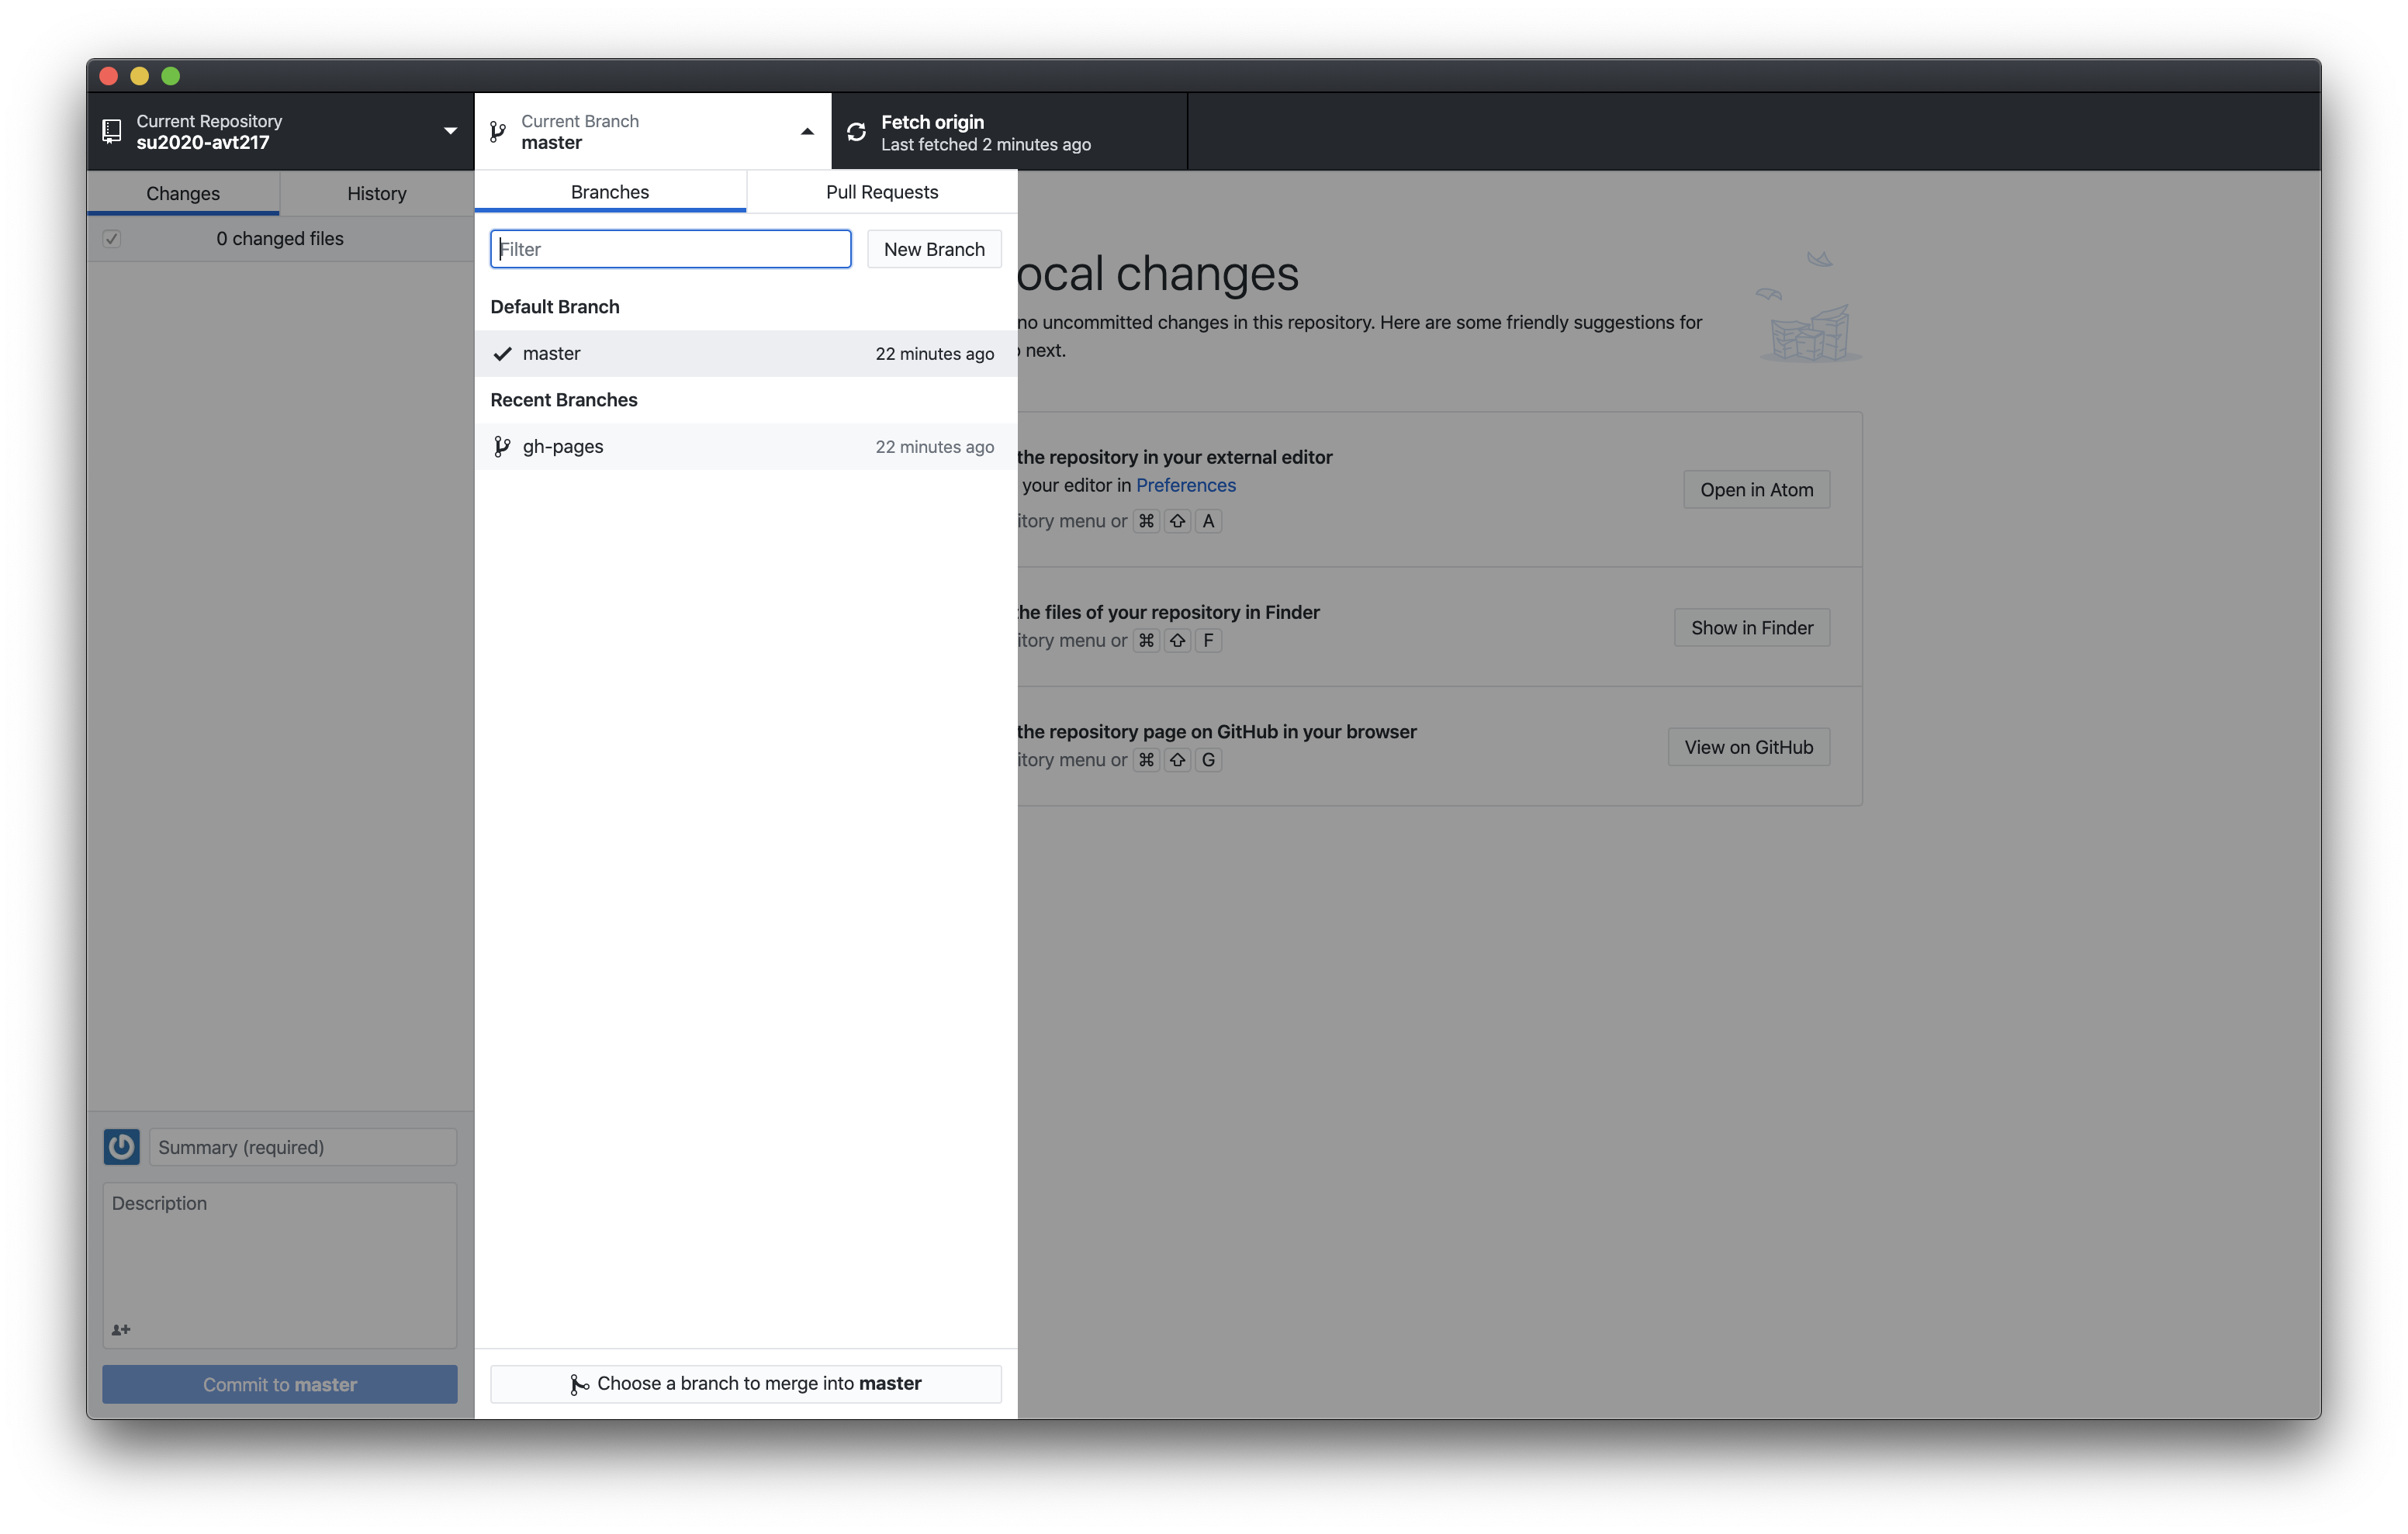
The last thing you want to do here is switch to the gh-pages branch you created. To do that, click on the dropdown that says “Current Branch” and select the origin/gh-pages branch from the “Other Branches” section.
Step 5: Pushing work
Now you can start to add work to your repository which will allow those files to show up as a live website you can share. The Github Desktop app basically is an app that tracks additions, deletions, or changes to the files in your local repository (the folder on your computer you just cloned). It is not an editor. When you change something in your repository the app will recognize that, show you what changed, and then wait for you to push those changes to the cloud based repository that the live site is built from.
If you don’t have any work to add to the repository right now that is fine but when you do come back to this step.
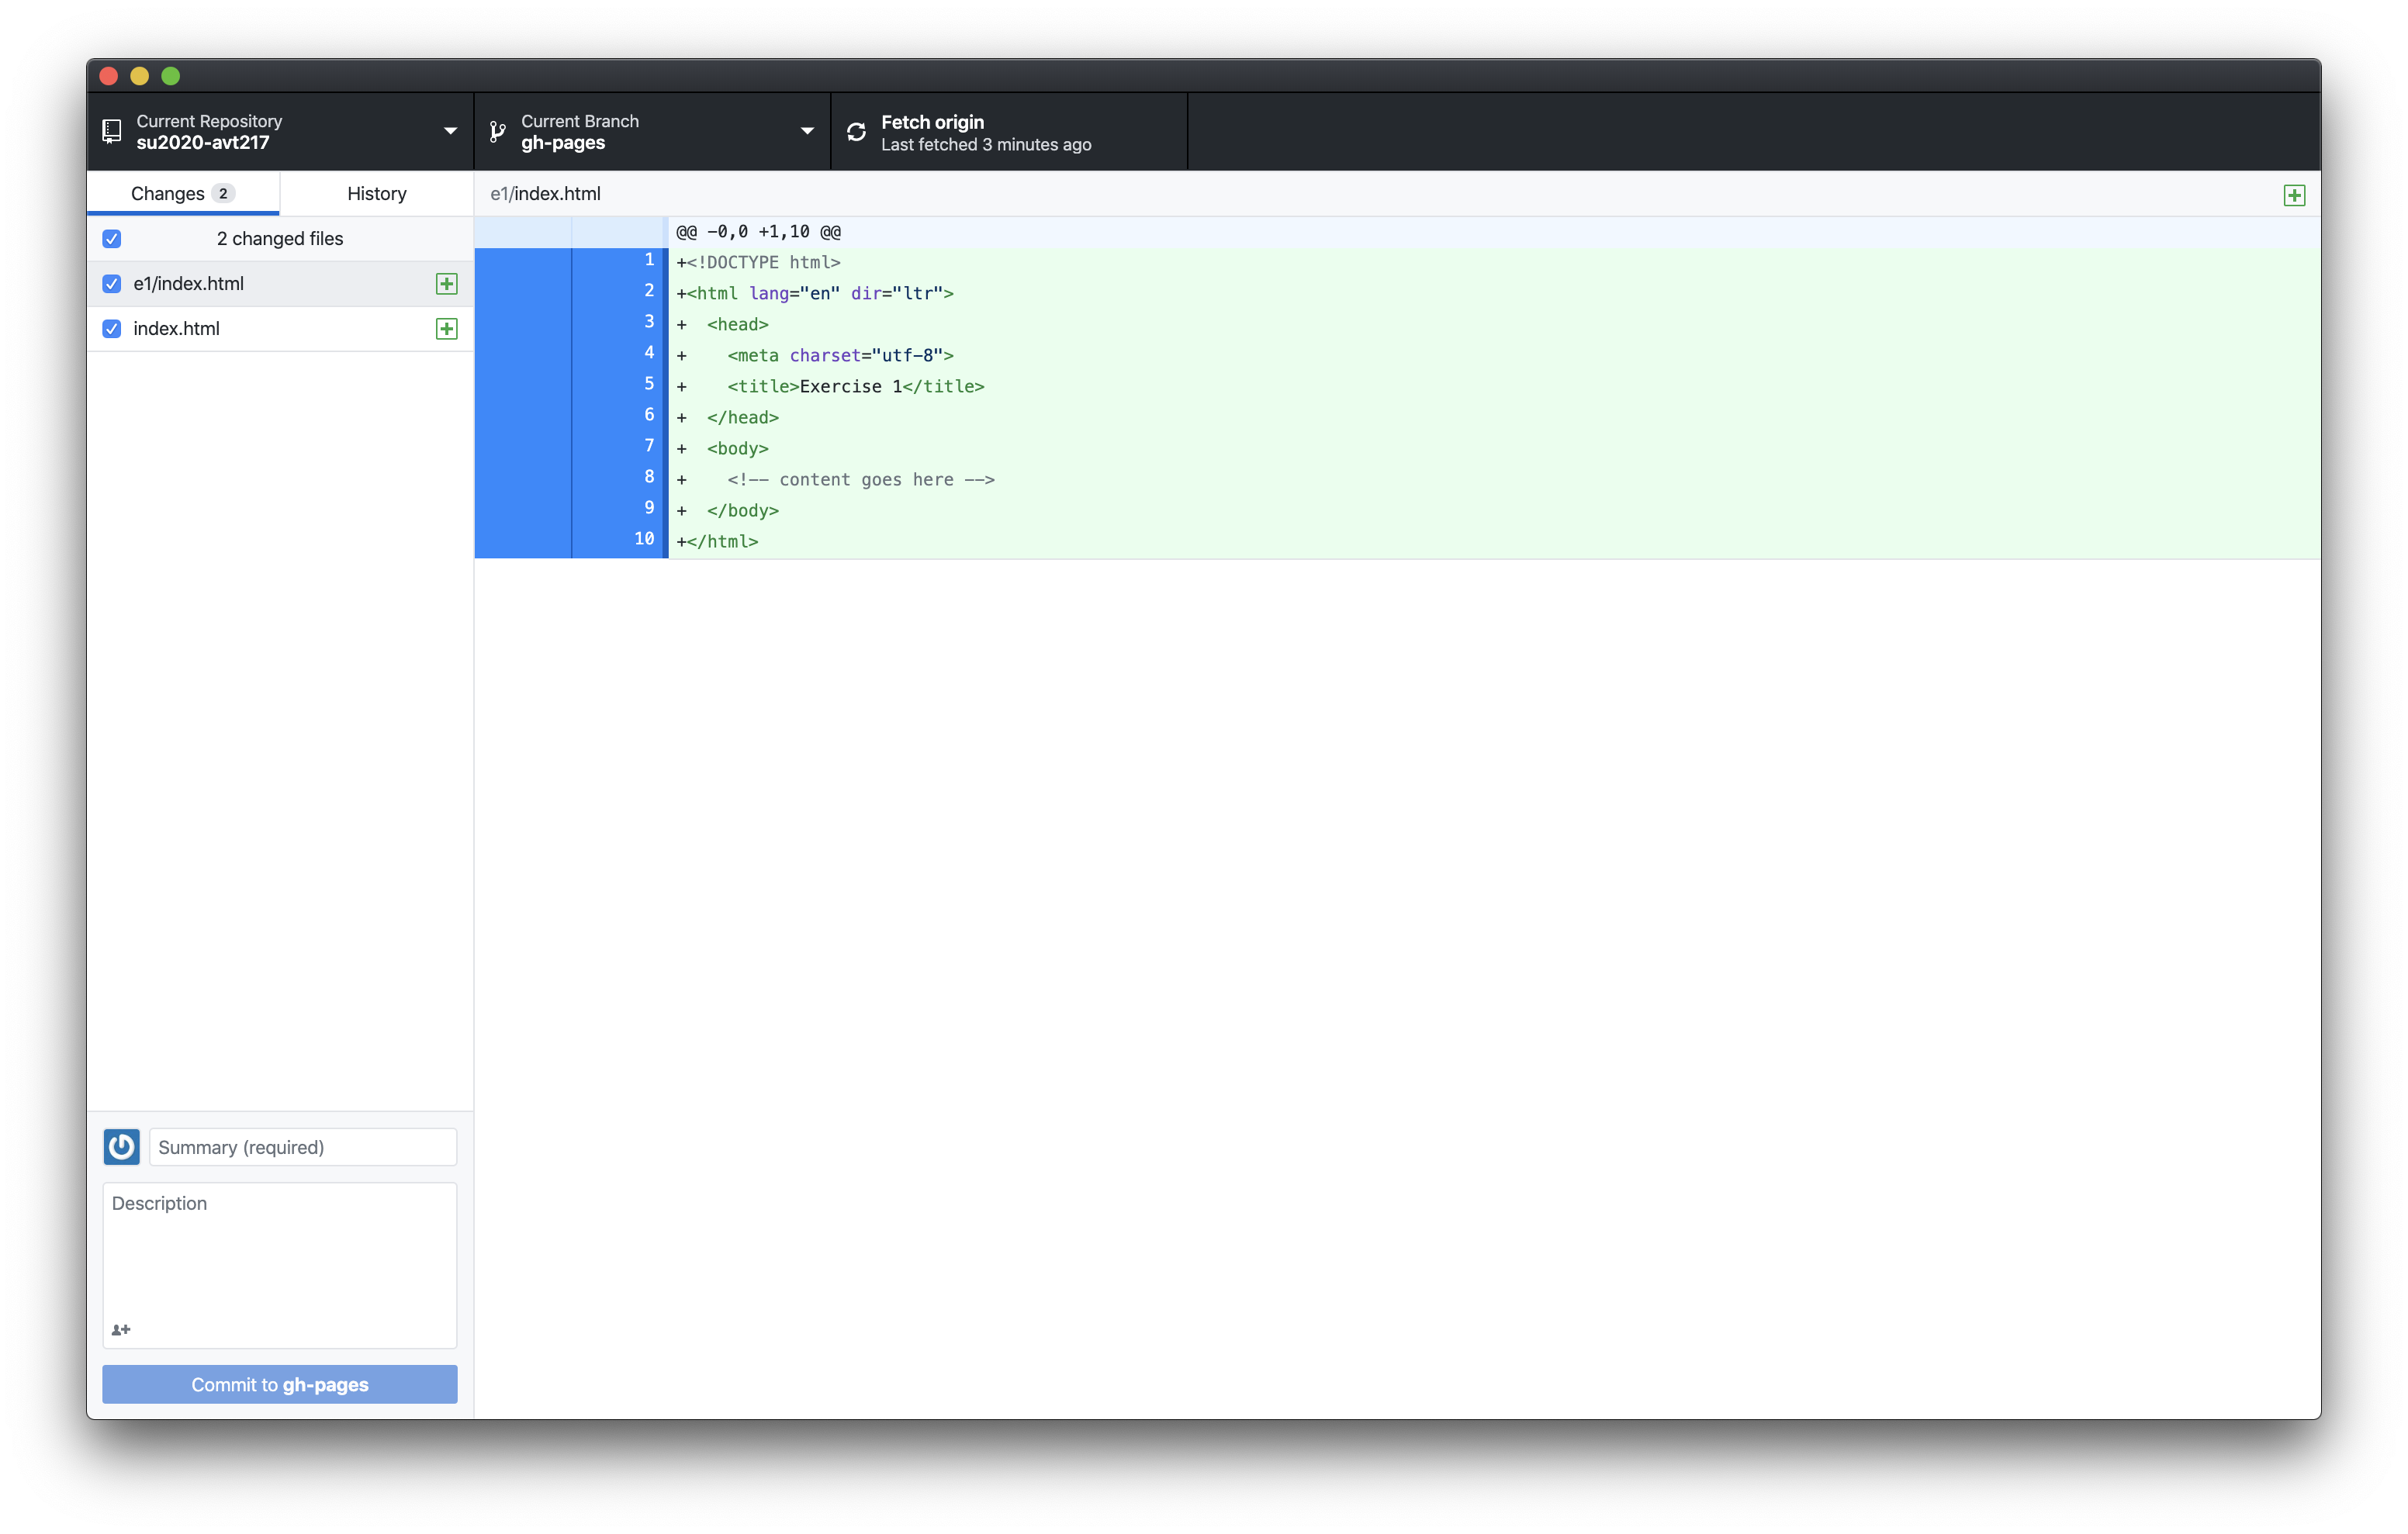
When you have made any changes to your local repository you need to push them to the repository stored on Github. You will know there are changes because in the left sidebar you will see the changes.
Step 5A: Give the Commit a Summary (Name)
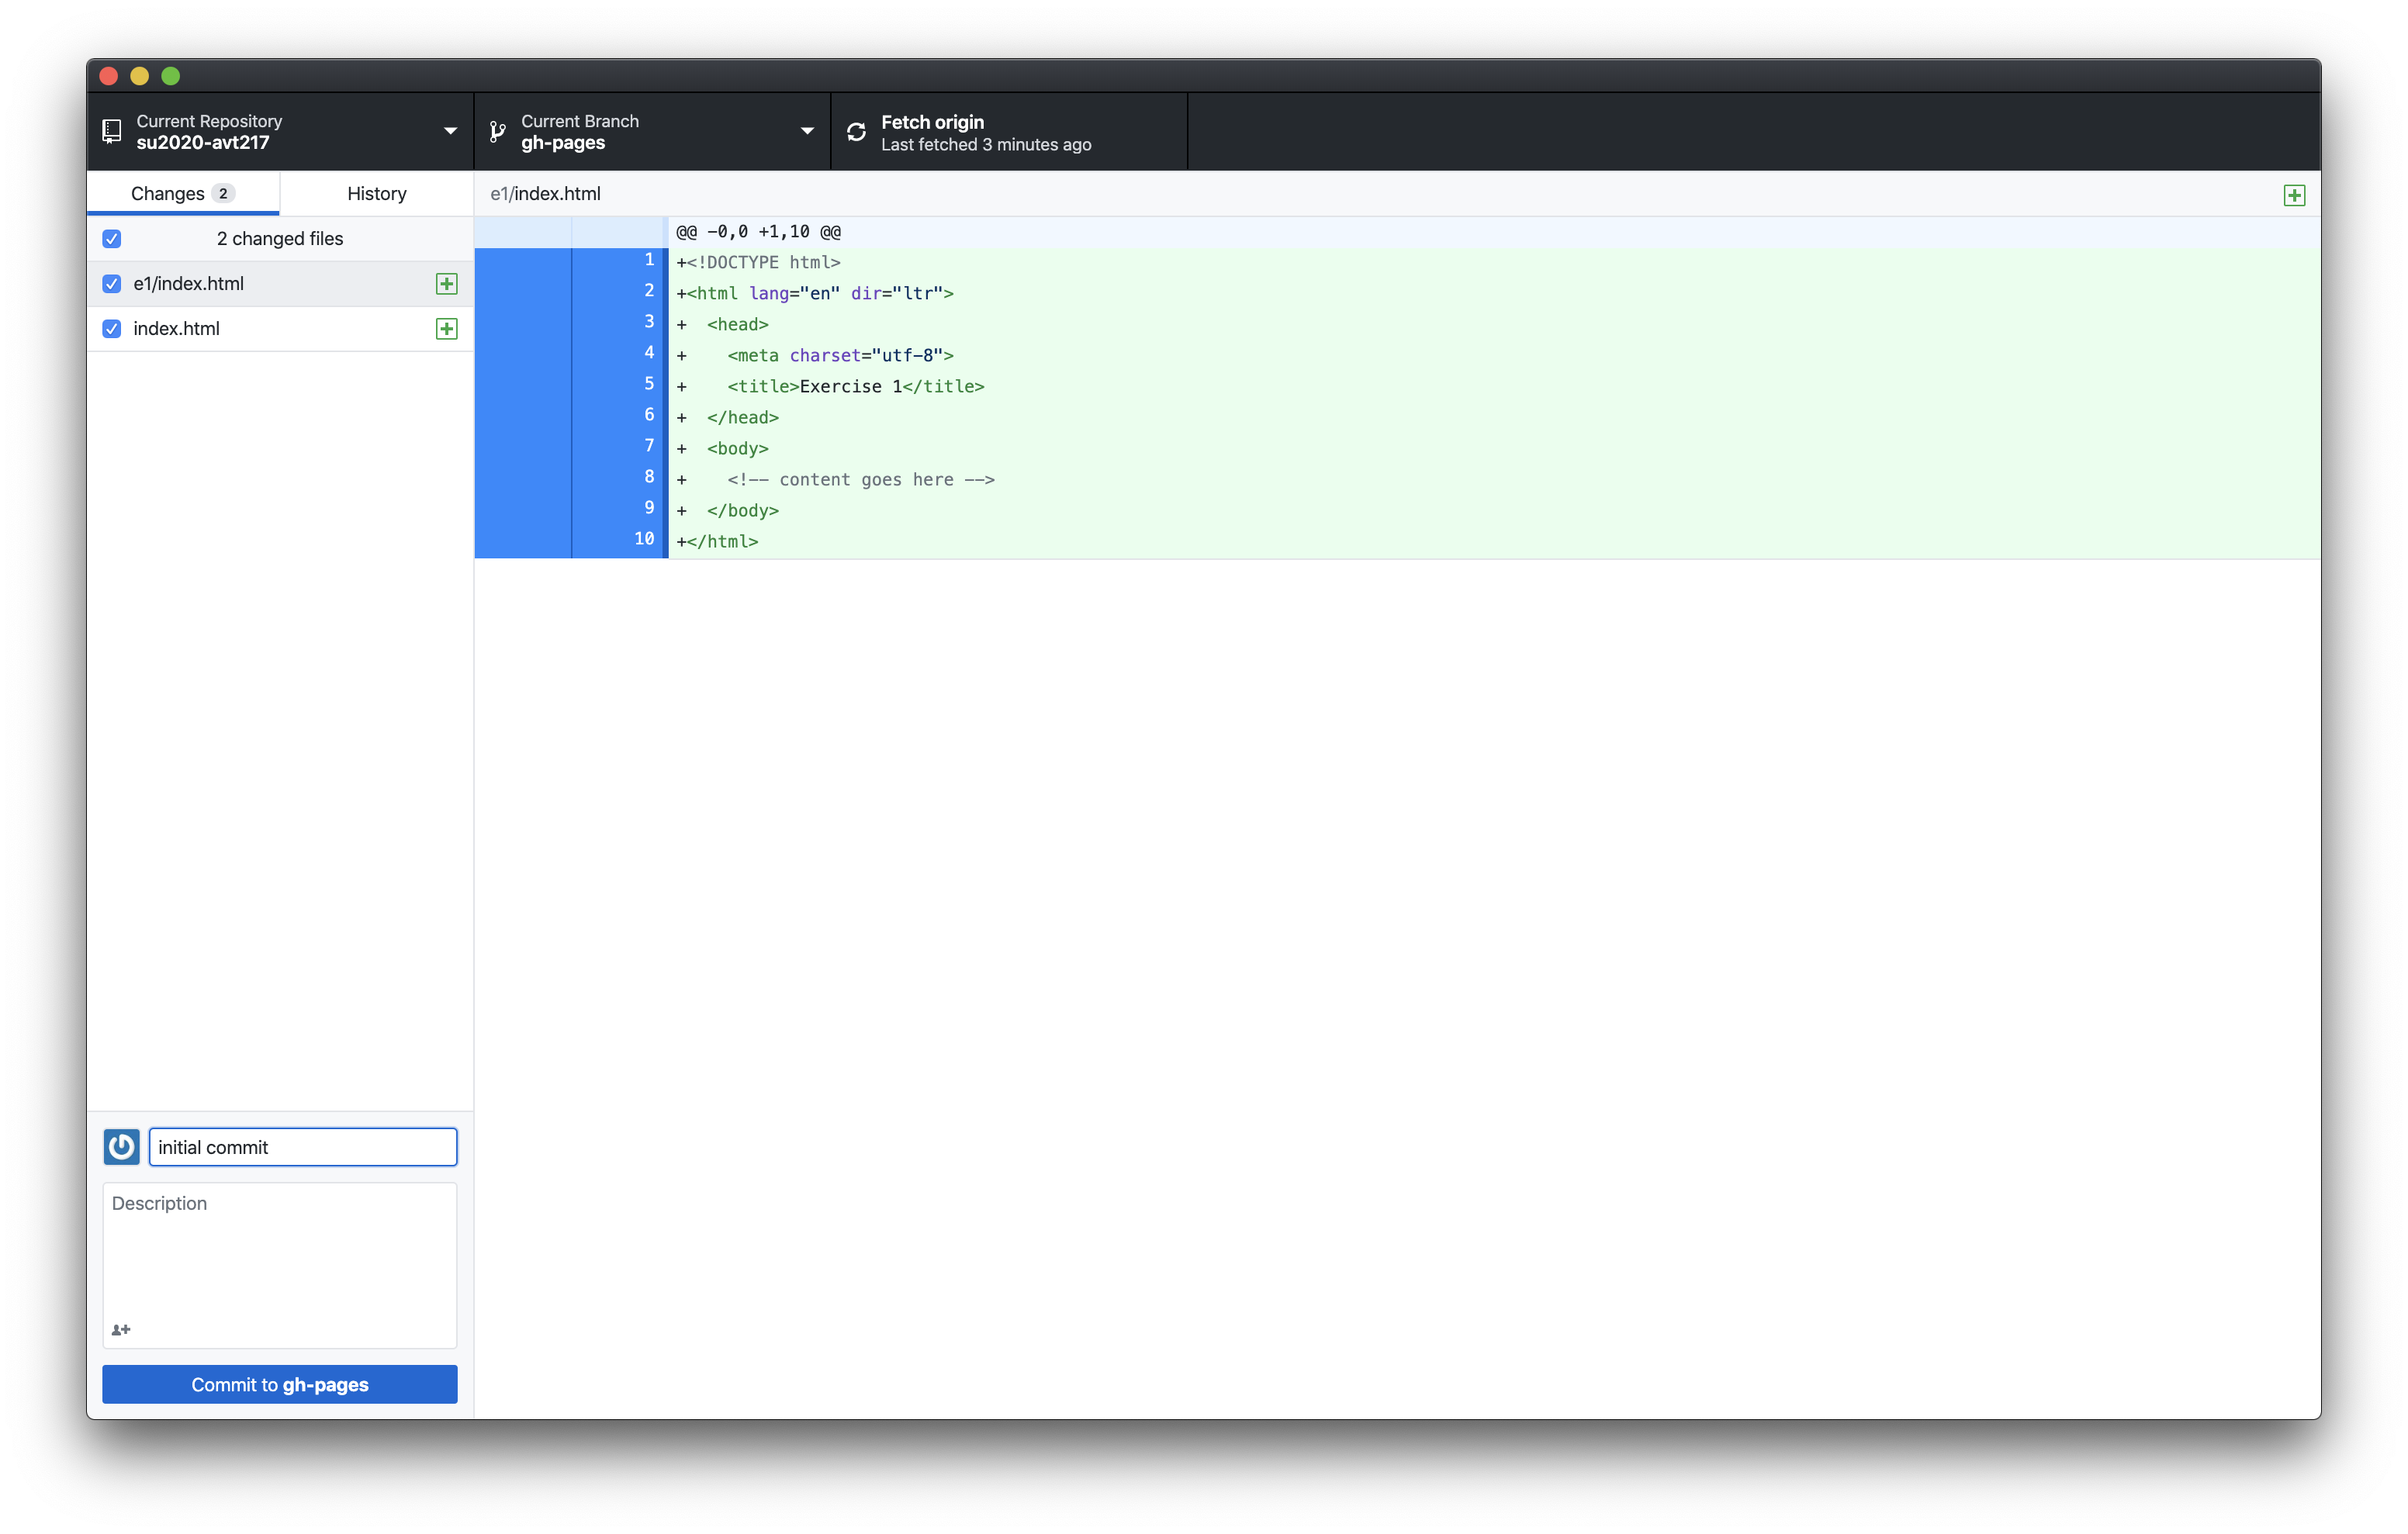
There are three steps to this process. First you need to fill in the “Summary (required)” field in the lower left. This is the name that you can use to track the changes you made for this commit. If for any reason you needed to go backwards in your repository these names could be helpful. So try and give this a useful name.
Step 5B: Commit the Changes
Once you have given your commit a summary the “Commit to gh-pages” button should turn blue and you can now click it. This will commit the changes you made to your repository.
Step 5C: Push the Commit
After you click commit, the screen will change and you can now click the blue “Push origin” button or the “Push origin” tab in the top bar of the window. Either will work.
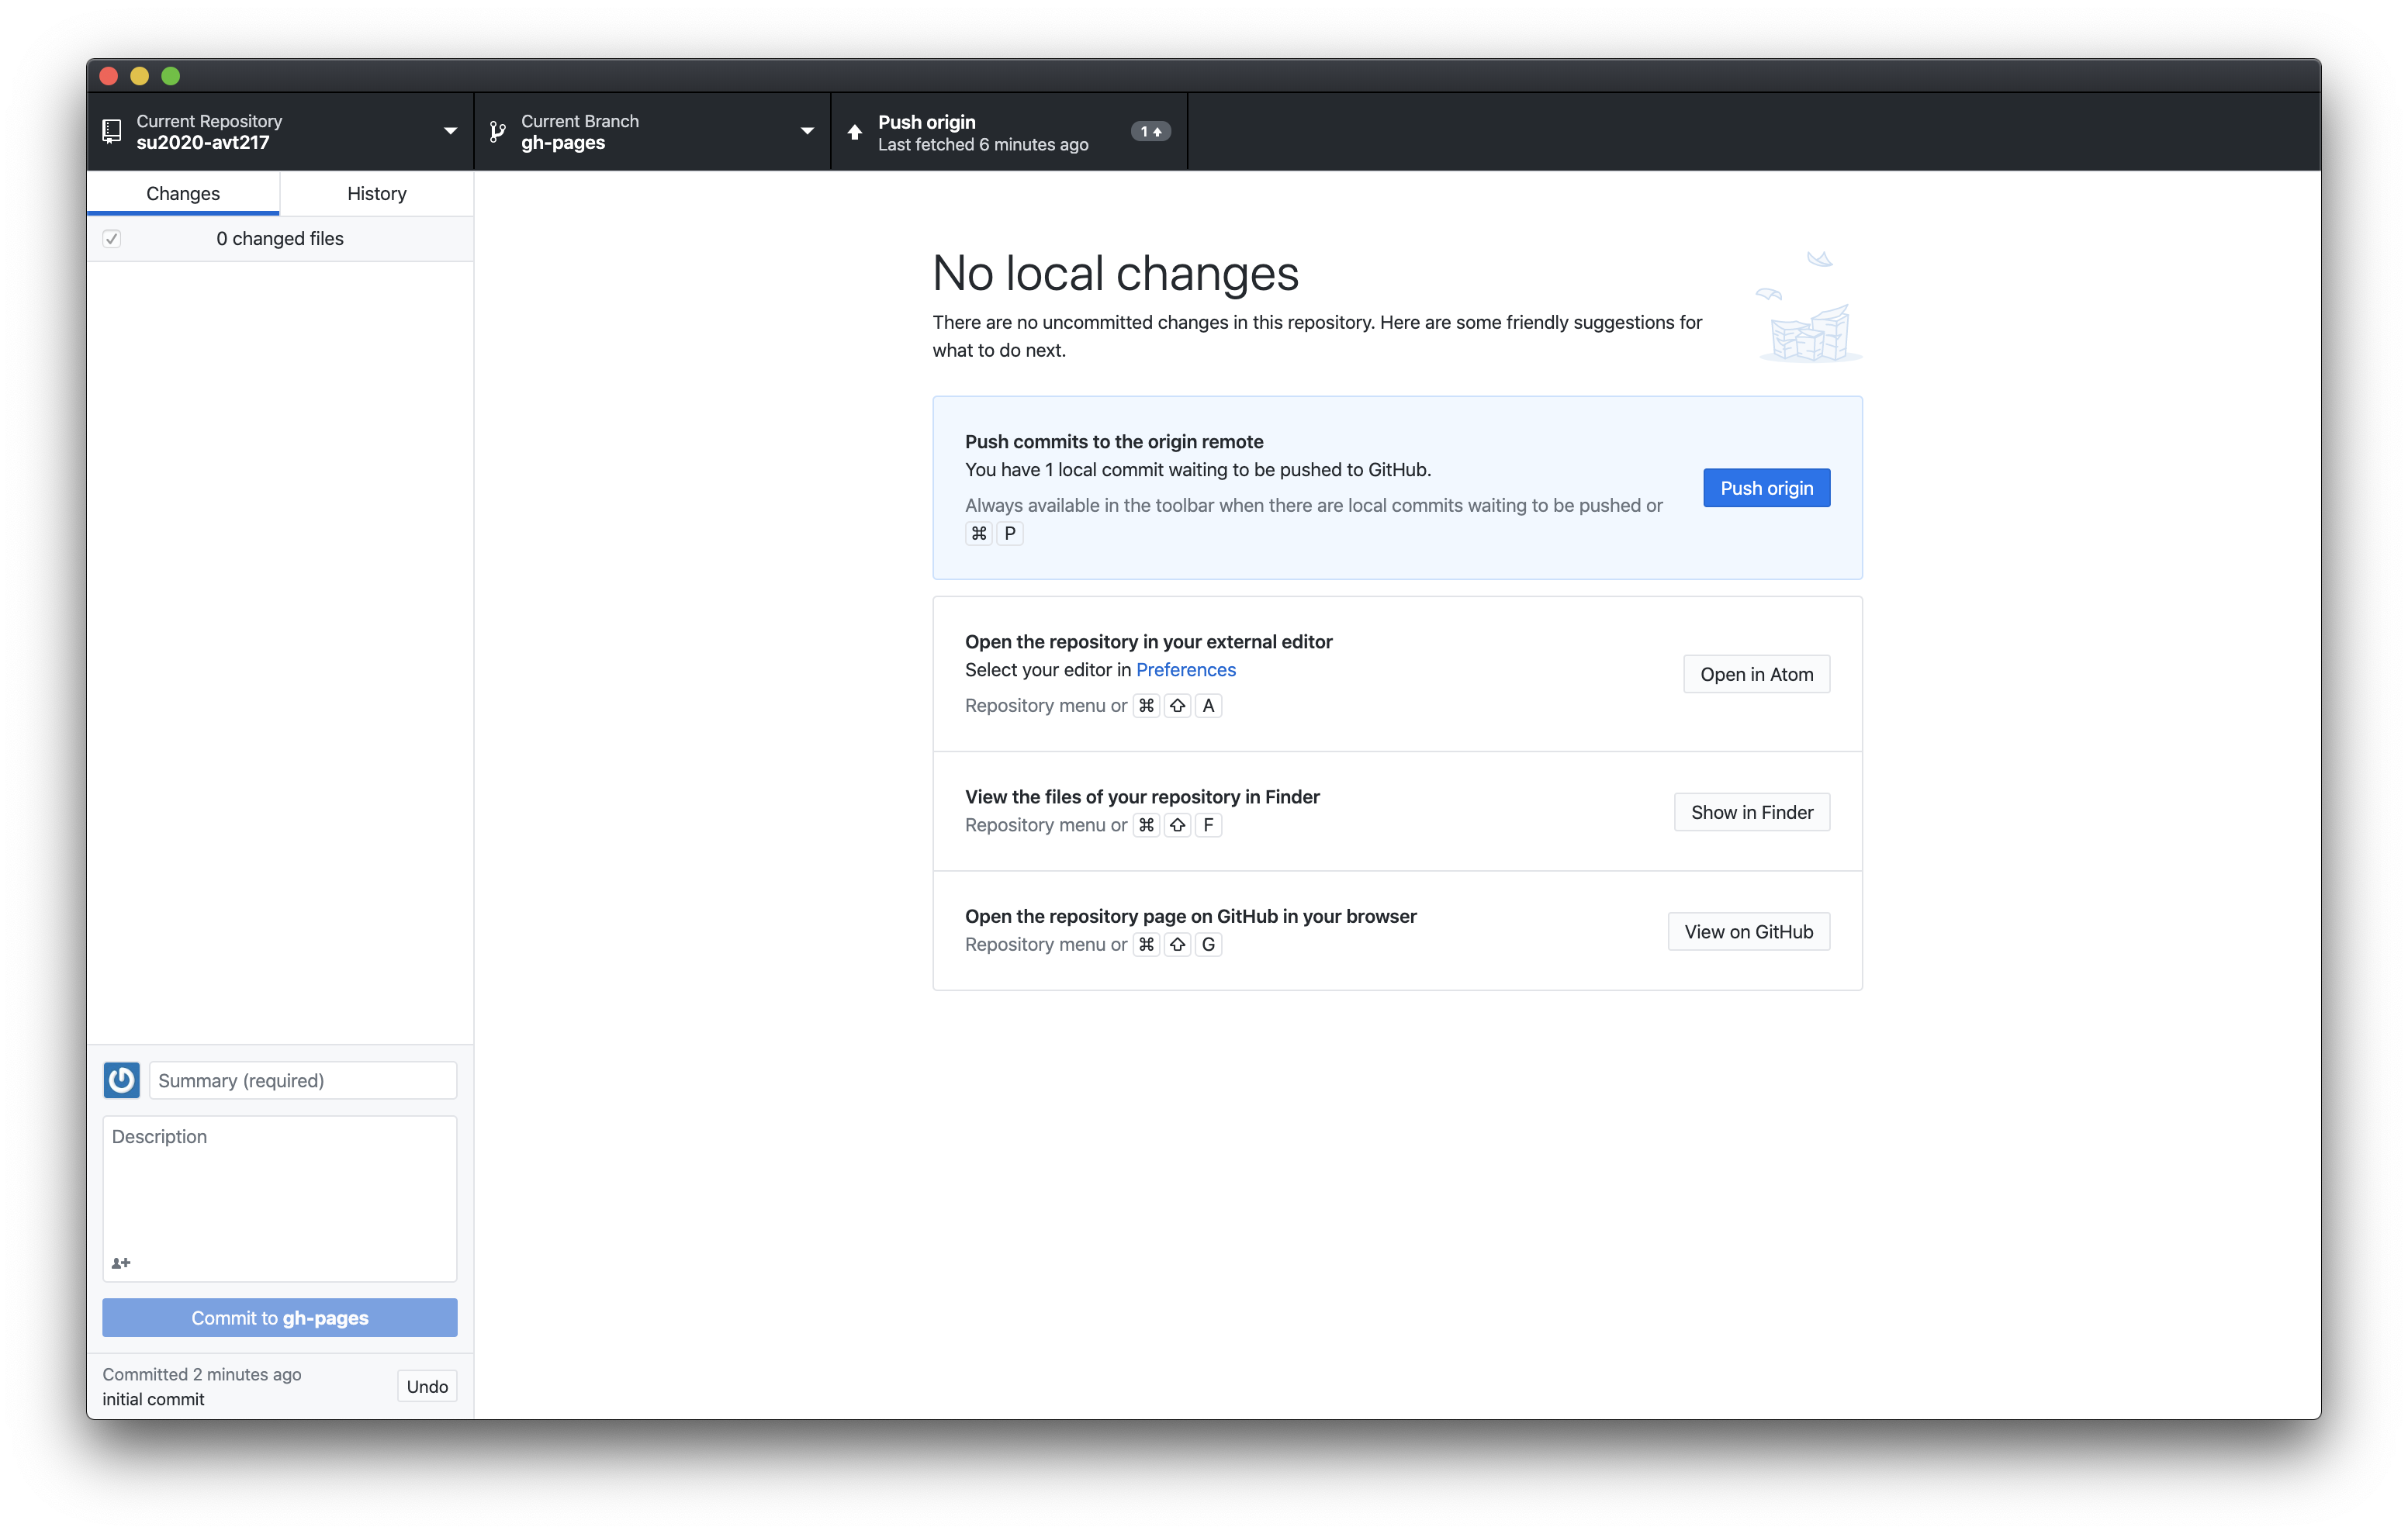
It will take a second to push the changes to the repository and once that process finishes you will go back to a window that shows no changes. The next time you have changes to your local files you can repeat this process.
A Few Notes
Once you have pushed your commits it takes a couple minutes for those changes to be reflected on your live website. Give your site a little time for it to refresh before thinking something went wrong (if 10 minutes of refreshing hasn’t changed anything there might be an issue). You also do not need to push every change you make. I often make commits based on finishing the task I was working on and push when I want to see those changes live, rather than pushing commits every few minutes.
Back to Tutorials