1. Build a Web Page
This tutorial will go through the set up every HTML page uses (steps 1–6) and how to get text to display on screen. It will also help you get E1: 20 Questions started if you need some extra guidance.
Note: depending on the width of your screen some text that represents code (white text with a black background) might be broken across two lines. If that happens know that the actual code is not broken across two lines, it should all be on one line. Check the screenshots at the end of each step to compare your code to the correct code.
Step 1: Create HTML file
Open your text editor and start a new file. To create a new file you can go to File > New File or use cmd+n. Now before you do any typing in the document you need to save the file by going to File > Save or using the key command cmd+s. When you save a file you need to name the file and give it a file type/extension. Name this file e1.html and save it to your desktop. e1 is the file name and .html is the file extension. Remember that you need to type the file extension so the text editor knows what kind of file it is working with.

Step 2: Add doctype
Now that your text editor knows what kind of file it is working with you can start writing in HTML. On line 1 of your document type <!DOCTYPE html>. This is the document declaration type which lets the browser know which HTML specification to use to interpret the document. In this case you are writing in HTML5.

Step 3: Add html element
Now that the browser knows what HTML specification you are writing in you can start to write your HTML. The first element is going to be the html element. The html element is called the root element because it contains all the elements in the document.
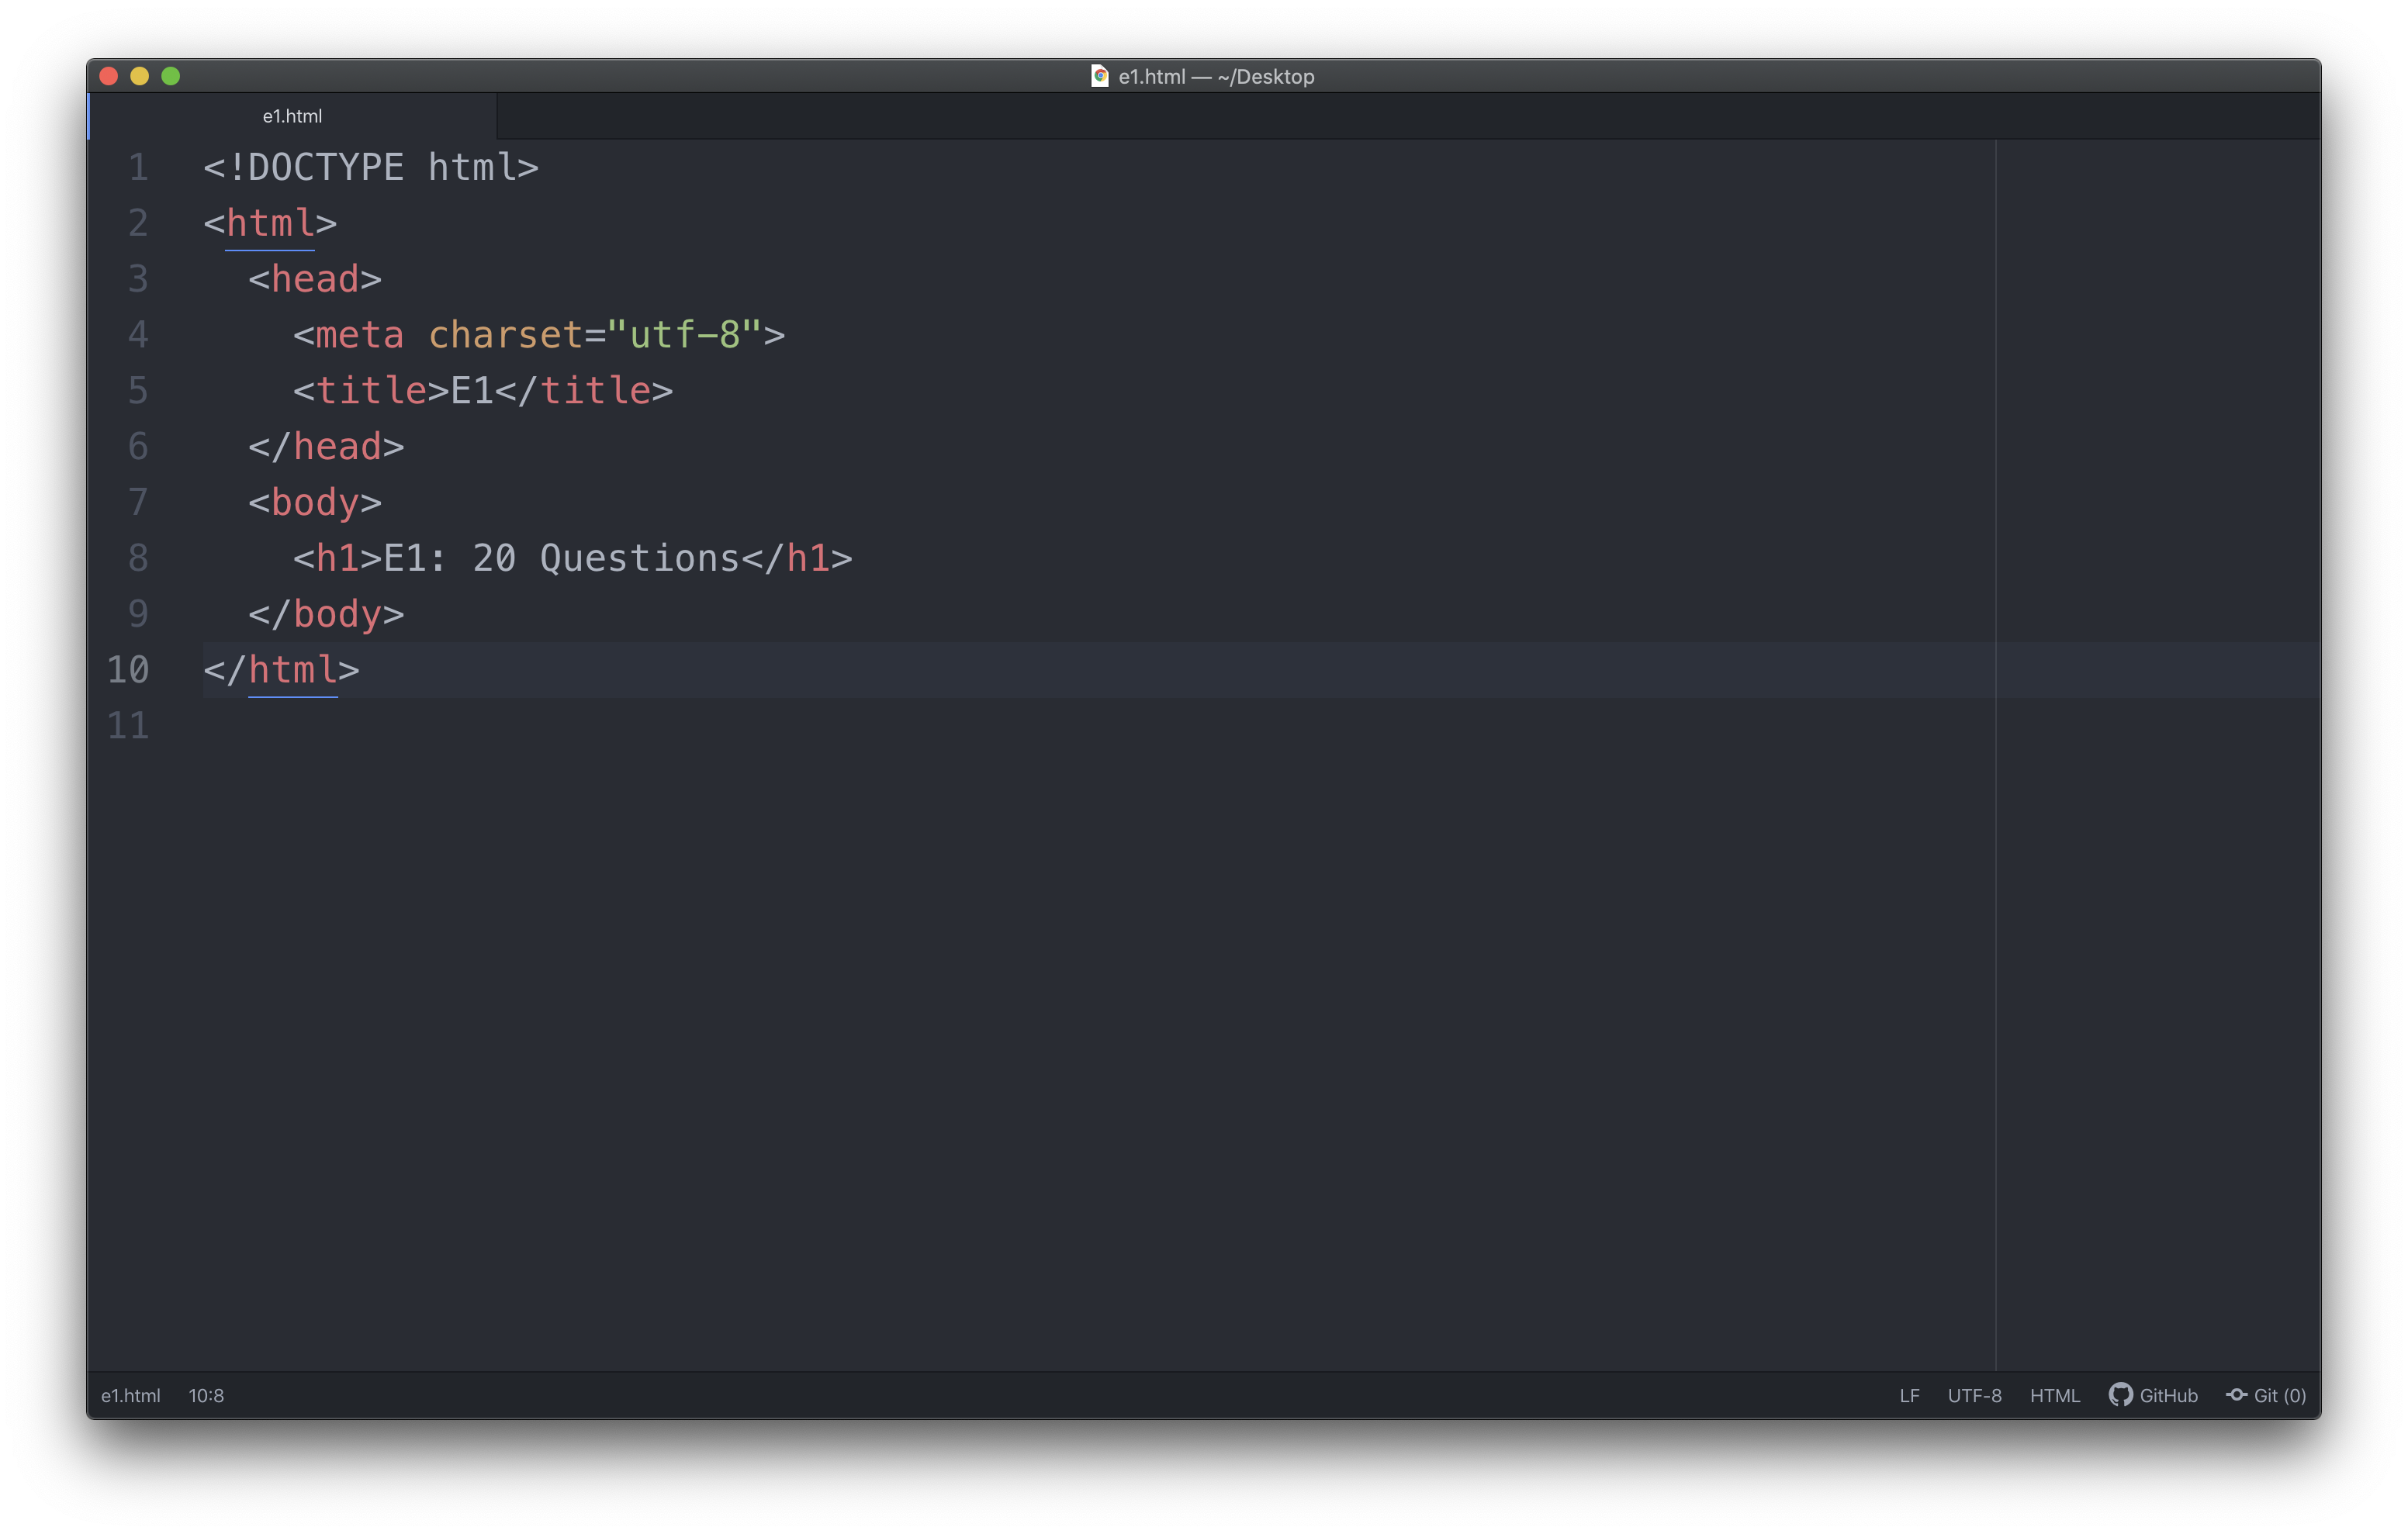
On line 2 write the opening tag <html> and on line 3 write the closing tag </html>. Remember that almost every HTML element you write will have an opening tag and a closing tag.
Save the document by pressing cmd+s. Saving with the key command instead of going to File > Save is going to be faster and make saving easier.

Step 4: Add head element
There are a few more elements you need to add before you can start adding content to the page. Put your cursor at the end of line 2 and press return which will add a new blank line between the html element. Now press tab to indent the cursor one level on line 3. Indenting is an important part of coding that allows humans to quickly see the structure of a document. Now add the head element to your page. On the indented line 3 write the opening tag <head> and then press return and write the closing tag </head> on the indented line 4. Depending on your code editor you might need to indent the line one level yourself by pressing tab. Once you have the opening and closing tag on the page make sure the opening and closing tags are at the same indent level as each other.
The head element contains elements that pertain to the document that are not rendered as part of the content, such as its title, style sheets, scripts, and metadata.

Step 5: Add meta and title elements
Put your cursor at the end of line 3 and press return which will add a new blank line between the head element. Depending on your text editor this might automatically indent or you might need to indent it to two levels. The indent this time is two levels because you are writing inside the head element.
On line 4 write the meta tag that specifies the character encoding used in the document <meta charset="utf-8">. Notice this element does not have a closing tag.
At the end of line 4 press return and make sure you are two indent levels in and add the title element. This can be done all on one line and will look something like this <title>E1</title>. The title element has an opening tag <title>, some content (in this case E1), and a closing tag </title>. The title should describe the title of the page you are working on and appears in the tab of the browser which you will see once you preview the page.

Step 6: Add body element
The last step before you start adding content to the page is adding the body element. The body element contains everything you want to show up in the browser window.
Add the body element below the closing tag of the head element. The body element needs an opening tag <body> and a closing tag </body> and should be at the same indent level as the head element. If you want you can leave a blank line between the opening and closing tag since you will be adding content there.
If you haven’t saved since step 3 now might be a good time (cmd+s).

Step 7: Add content
Now that your document is setup you can start adding content. For a reference of text elements we have talked about so far, look at the Lesson 1.2 PDF on Blackboard. Remember, every piece of text you want to show up on the live page should be contained in an text element.
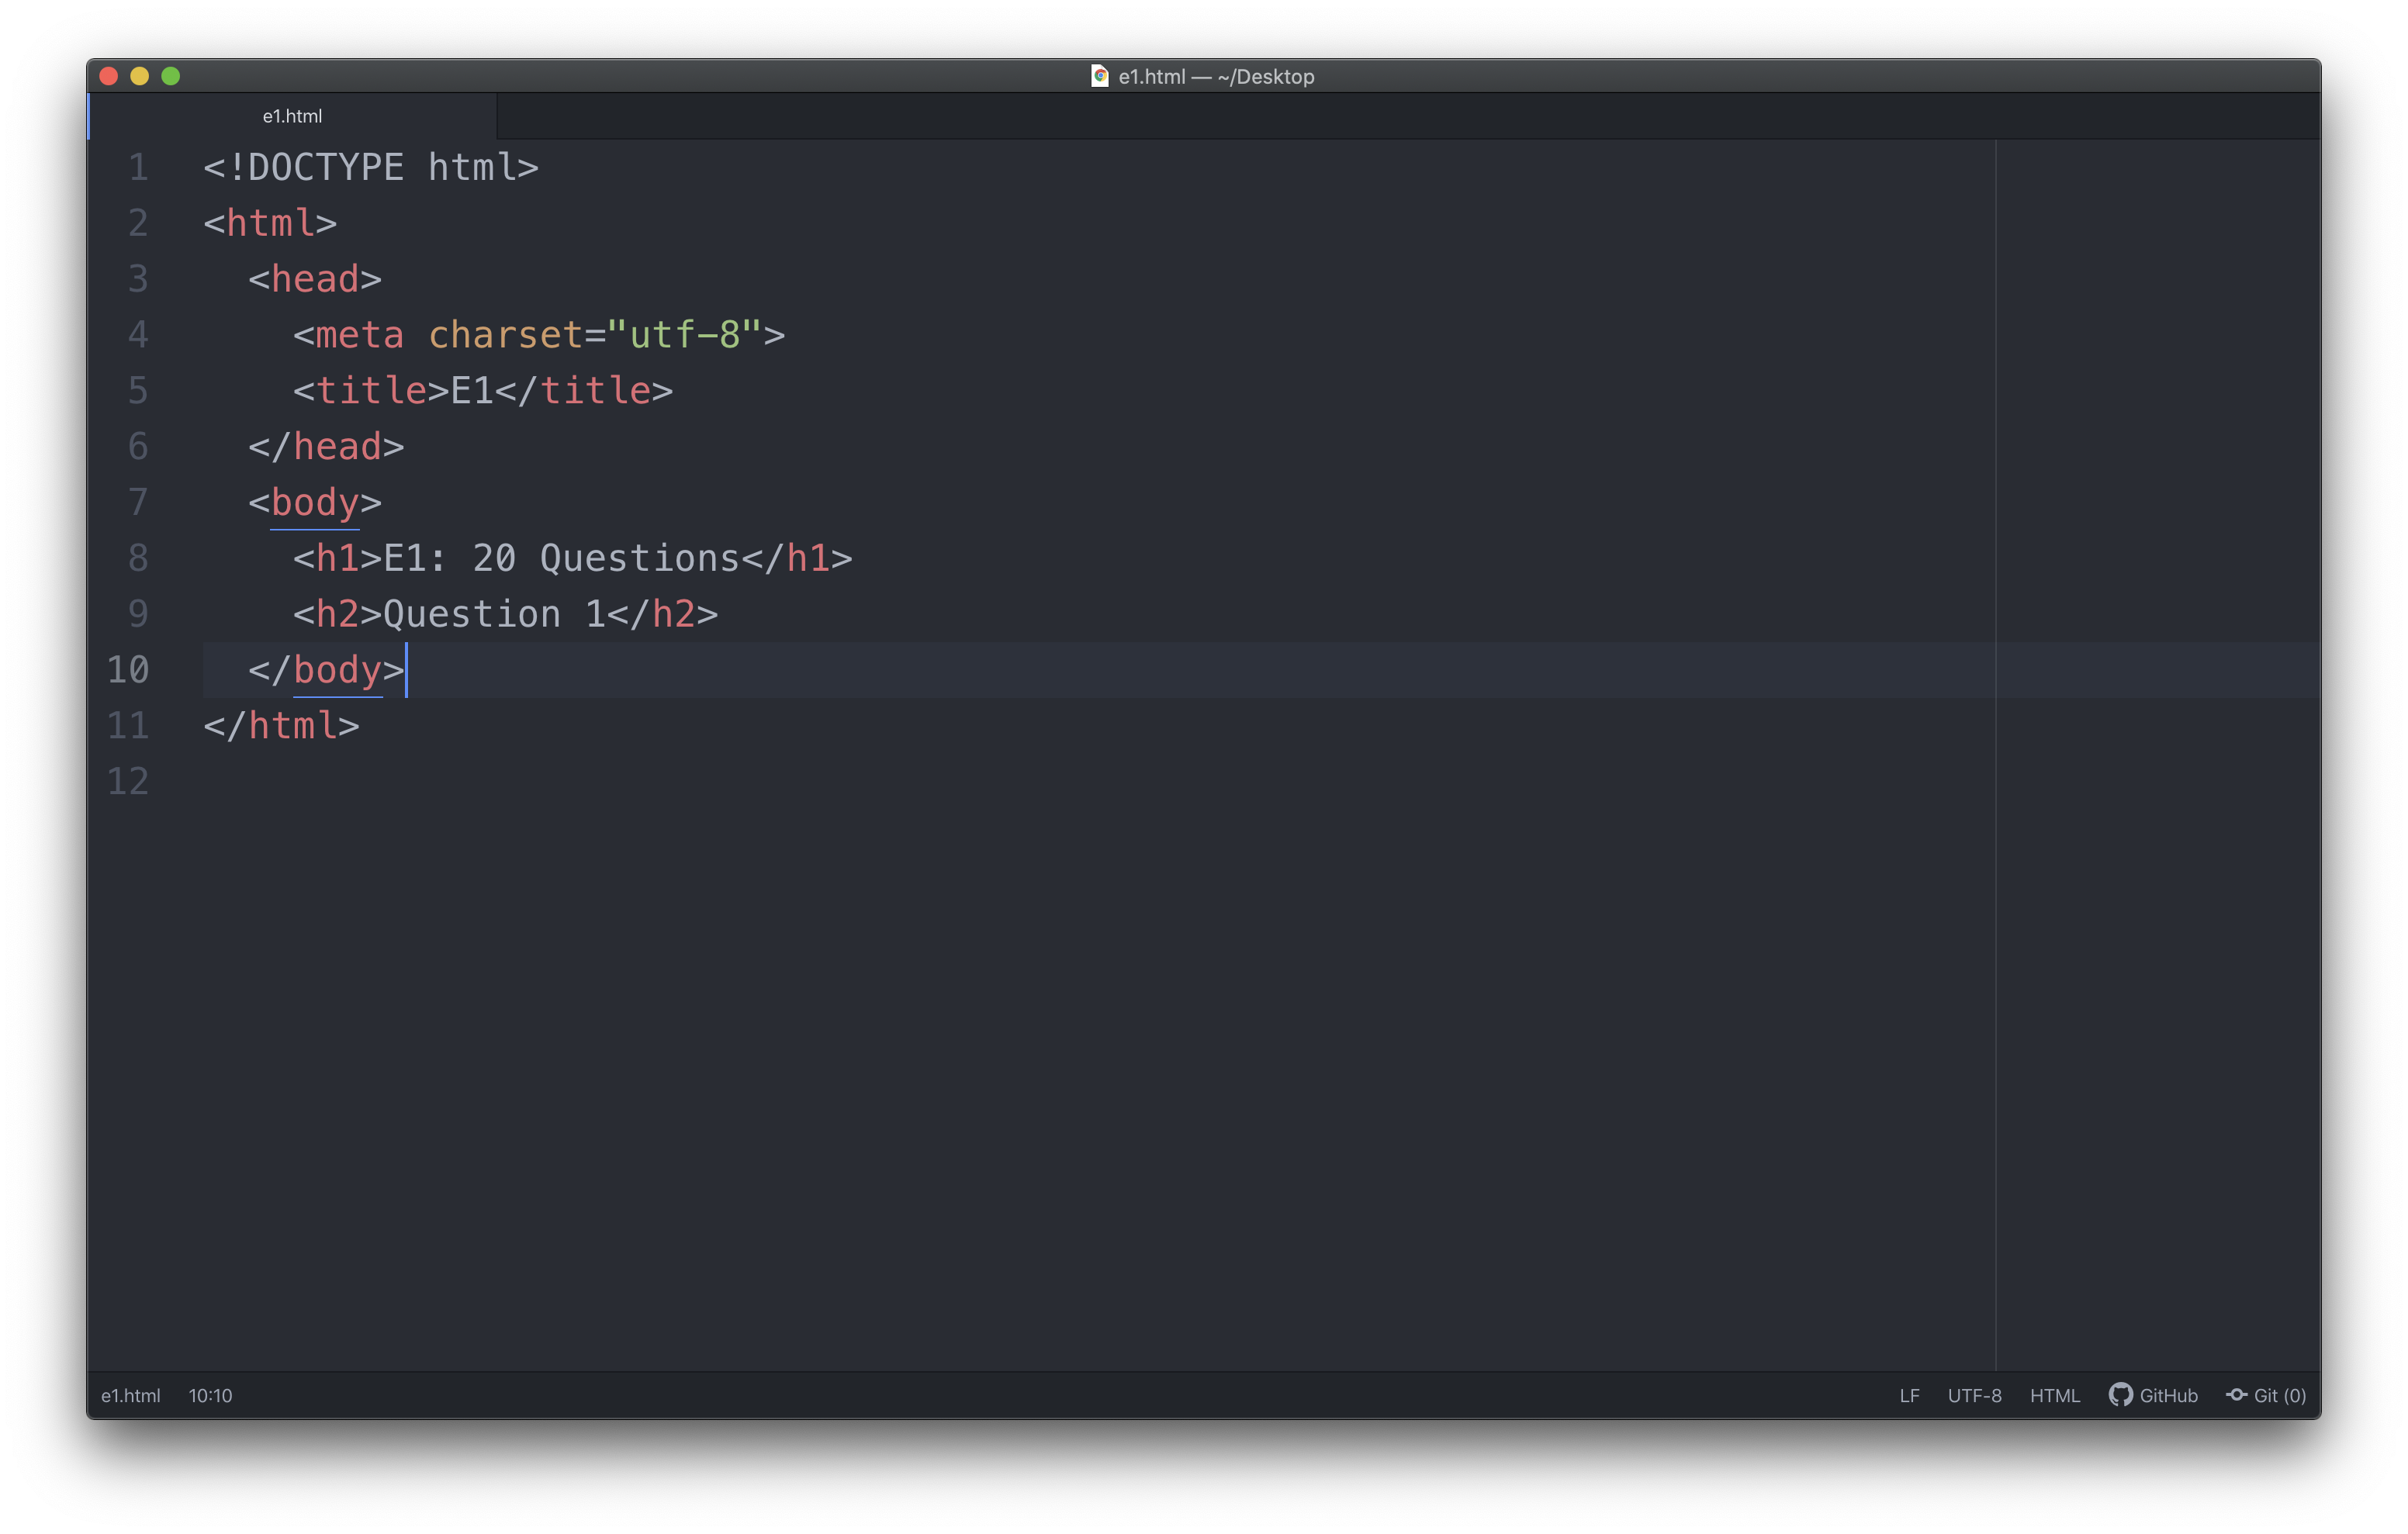
The first bit of content you should add inside the body element is a some kind of main heading that tells a viewer what this page is. The best element for this is the h1 element which is used to identify the primary heading on the page. Since you might be working on Exercise 1, perhaps your text could be E1: 20 Questions and look something like this <h1>E1: 20 Questions</h1>. Remember to include the opening tag <h1>, content (E1: 20 Questions), and closing tag </h1> here. This should be written on line 8, inside the body element, and be indented 2 levels.

Next add a heading identifying the question number, a question, and your answer to that question. Remember, the way shown below is one way to approach this but like with most things in design and coding there are many solutions.
So what text element should you choose if you want text that says “Question 1”?
How about an h2 element? Since you used an h1 for your primary heading using the next heading element seems like a logical choice. You can also use this heading element as many times as you want so it will work nicely as a heading element for identifying the question number.
Make sure you are writing in the body element, on a new line below your h1 element, indented to the proper level (two levels), and write <h2>Question 1</h2>.
Don’t forget to save (cmd+s)!

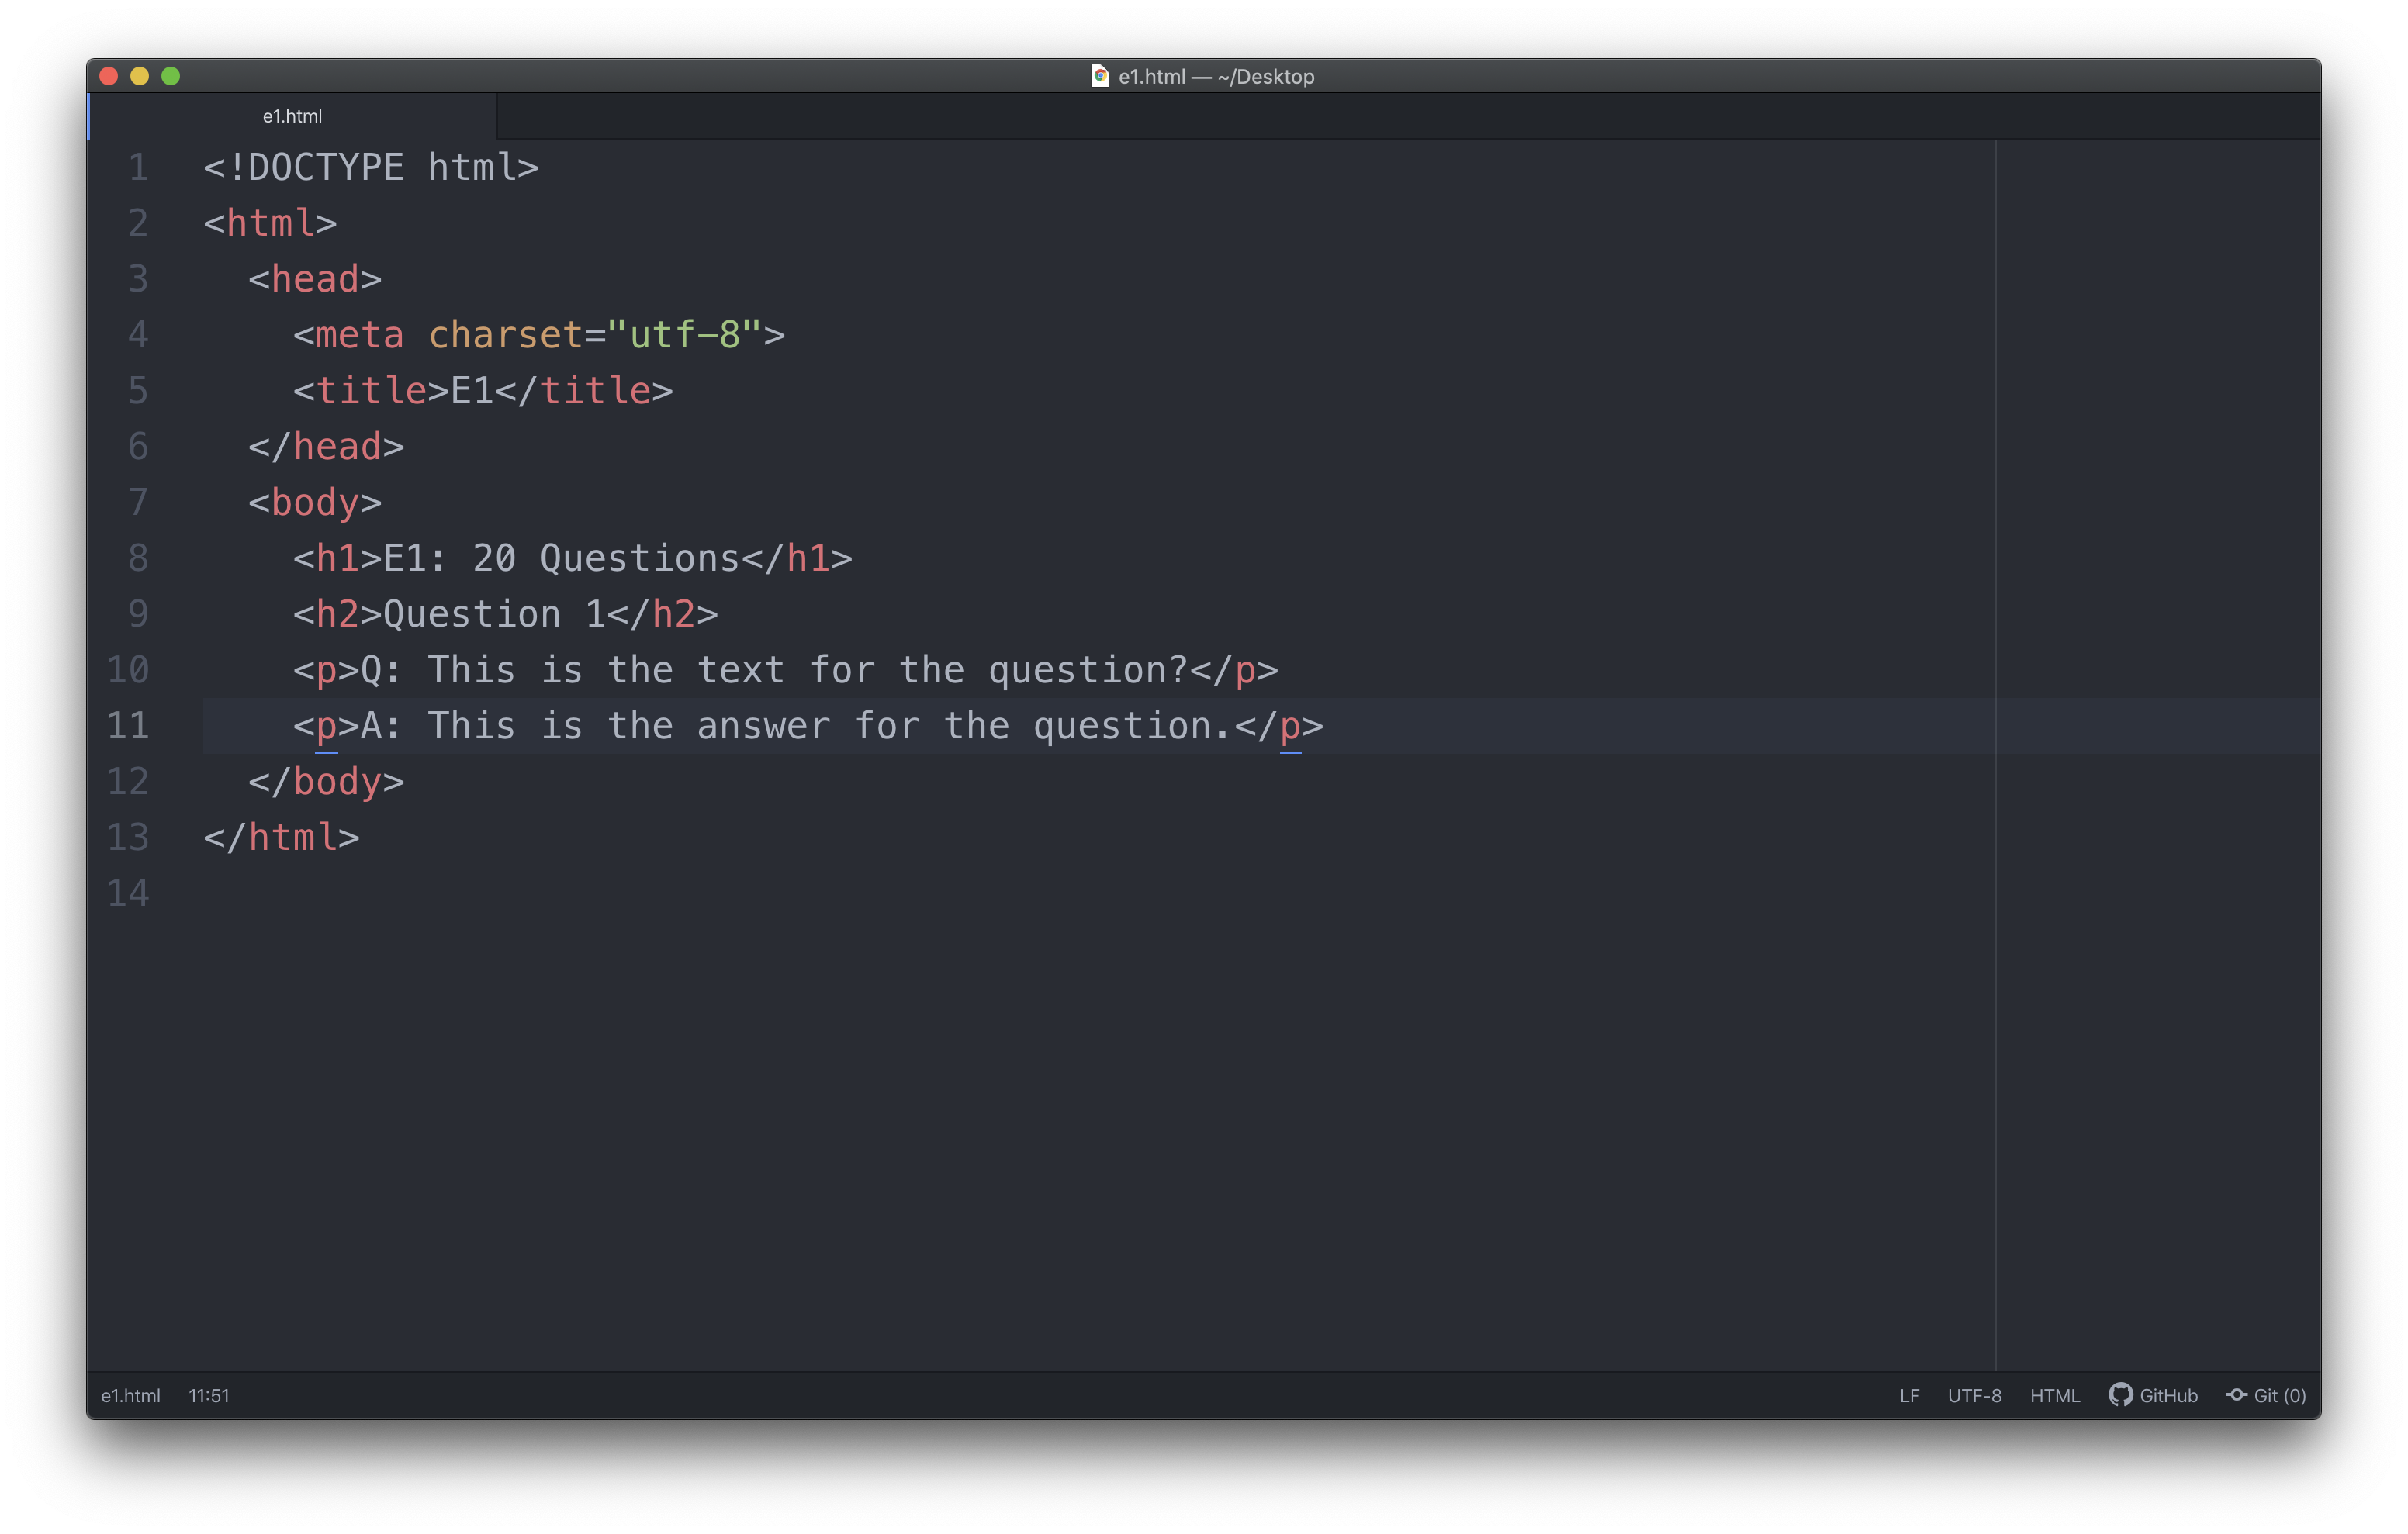
Finally add the question text and your answer. Again, there are a lot of ways you could do this but here is one approach using the p element (p stands for paragraph). Make sure you replace the text inside the p element below with an actual question and an actual answer. Each p element should be on its own line and indented to the proper level (two levels).
<p>Q: This is the text for the question?</p>
<p>A: This is the answer for the question.</p>

Step 8: Previewing the page
Now that you have a document with the proper structure and content with the proper mark up it’s time to see what the page looks like! Make sure you have saved (cmd+s) before you preview the page or you won’t see the most current file.
One way to preview your file is to find the file on your desktop and drag it into a browser or double click on it. That should open it up in your default browser. The other way is to click and drag the icon next to the file name in the top bar of the Atom window into the browser. This is a little tricky sometimes but once you get the hang of it is a lot faster. However you get the file open in the browser you should have something that looks like this.

This page is using the default browser styles which for now is fine. The goal of this lesson is to create a simple HTML page with a good structure and marked up correctly. As the class goes on you will learn more about styling the page.
To finish the exercise you can repeat step 7 for each new question until you have all your questions and answers all on the page.
Back to Tutorials