5. Bringing in Fonts
This tutorial will explain how to bring in fonts from fonts.google.com and fonts.adobe.com. This tutorial will use your main index.html file and its associated CSS file to bring in the fonts.
Step 1: Open Your Repository and Files
Open your repository in Atom and then open up your main index.html file and CSS file associated with it by double clicking on the files in the tree view.
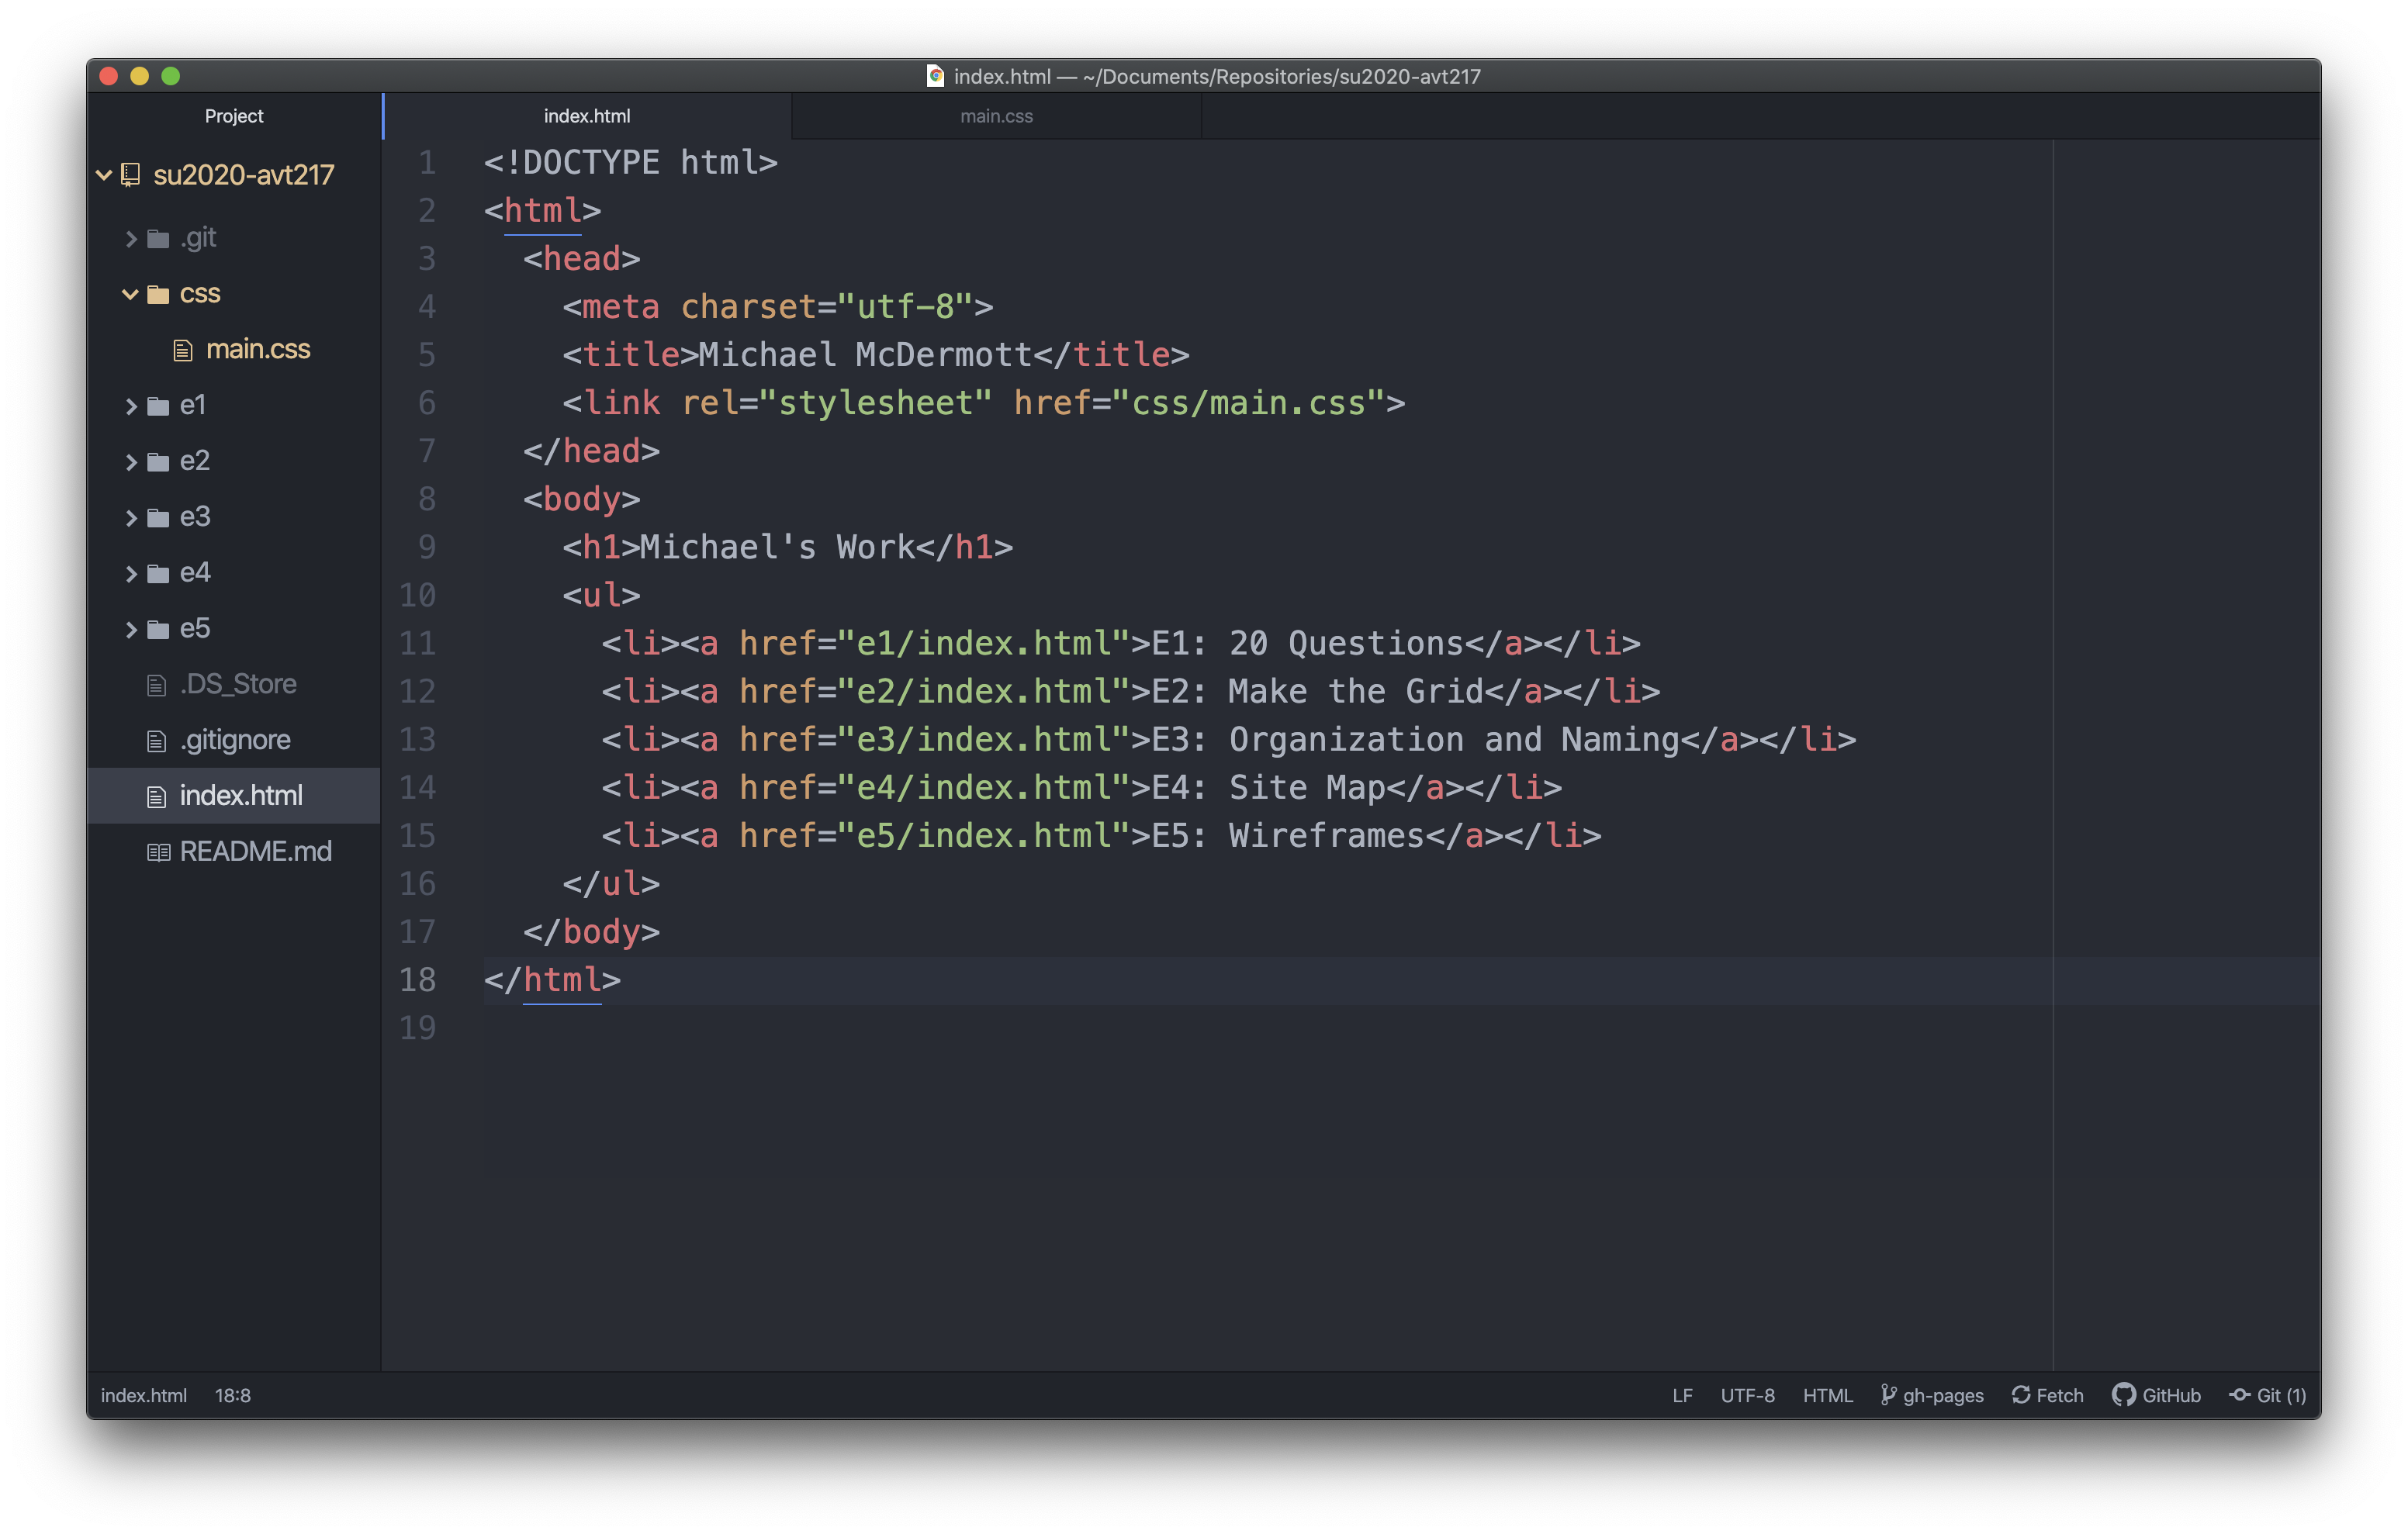
Once both are open you can view them side by side by dragging the the tab with your CSS file to the right until the right column is highlighted. Once it is highlighted you can let go and you should be able to see both files as a split screen in Atom. If you don’t want to work this way that’s okay.
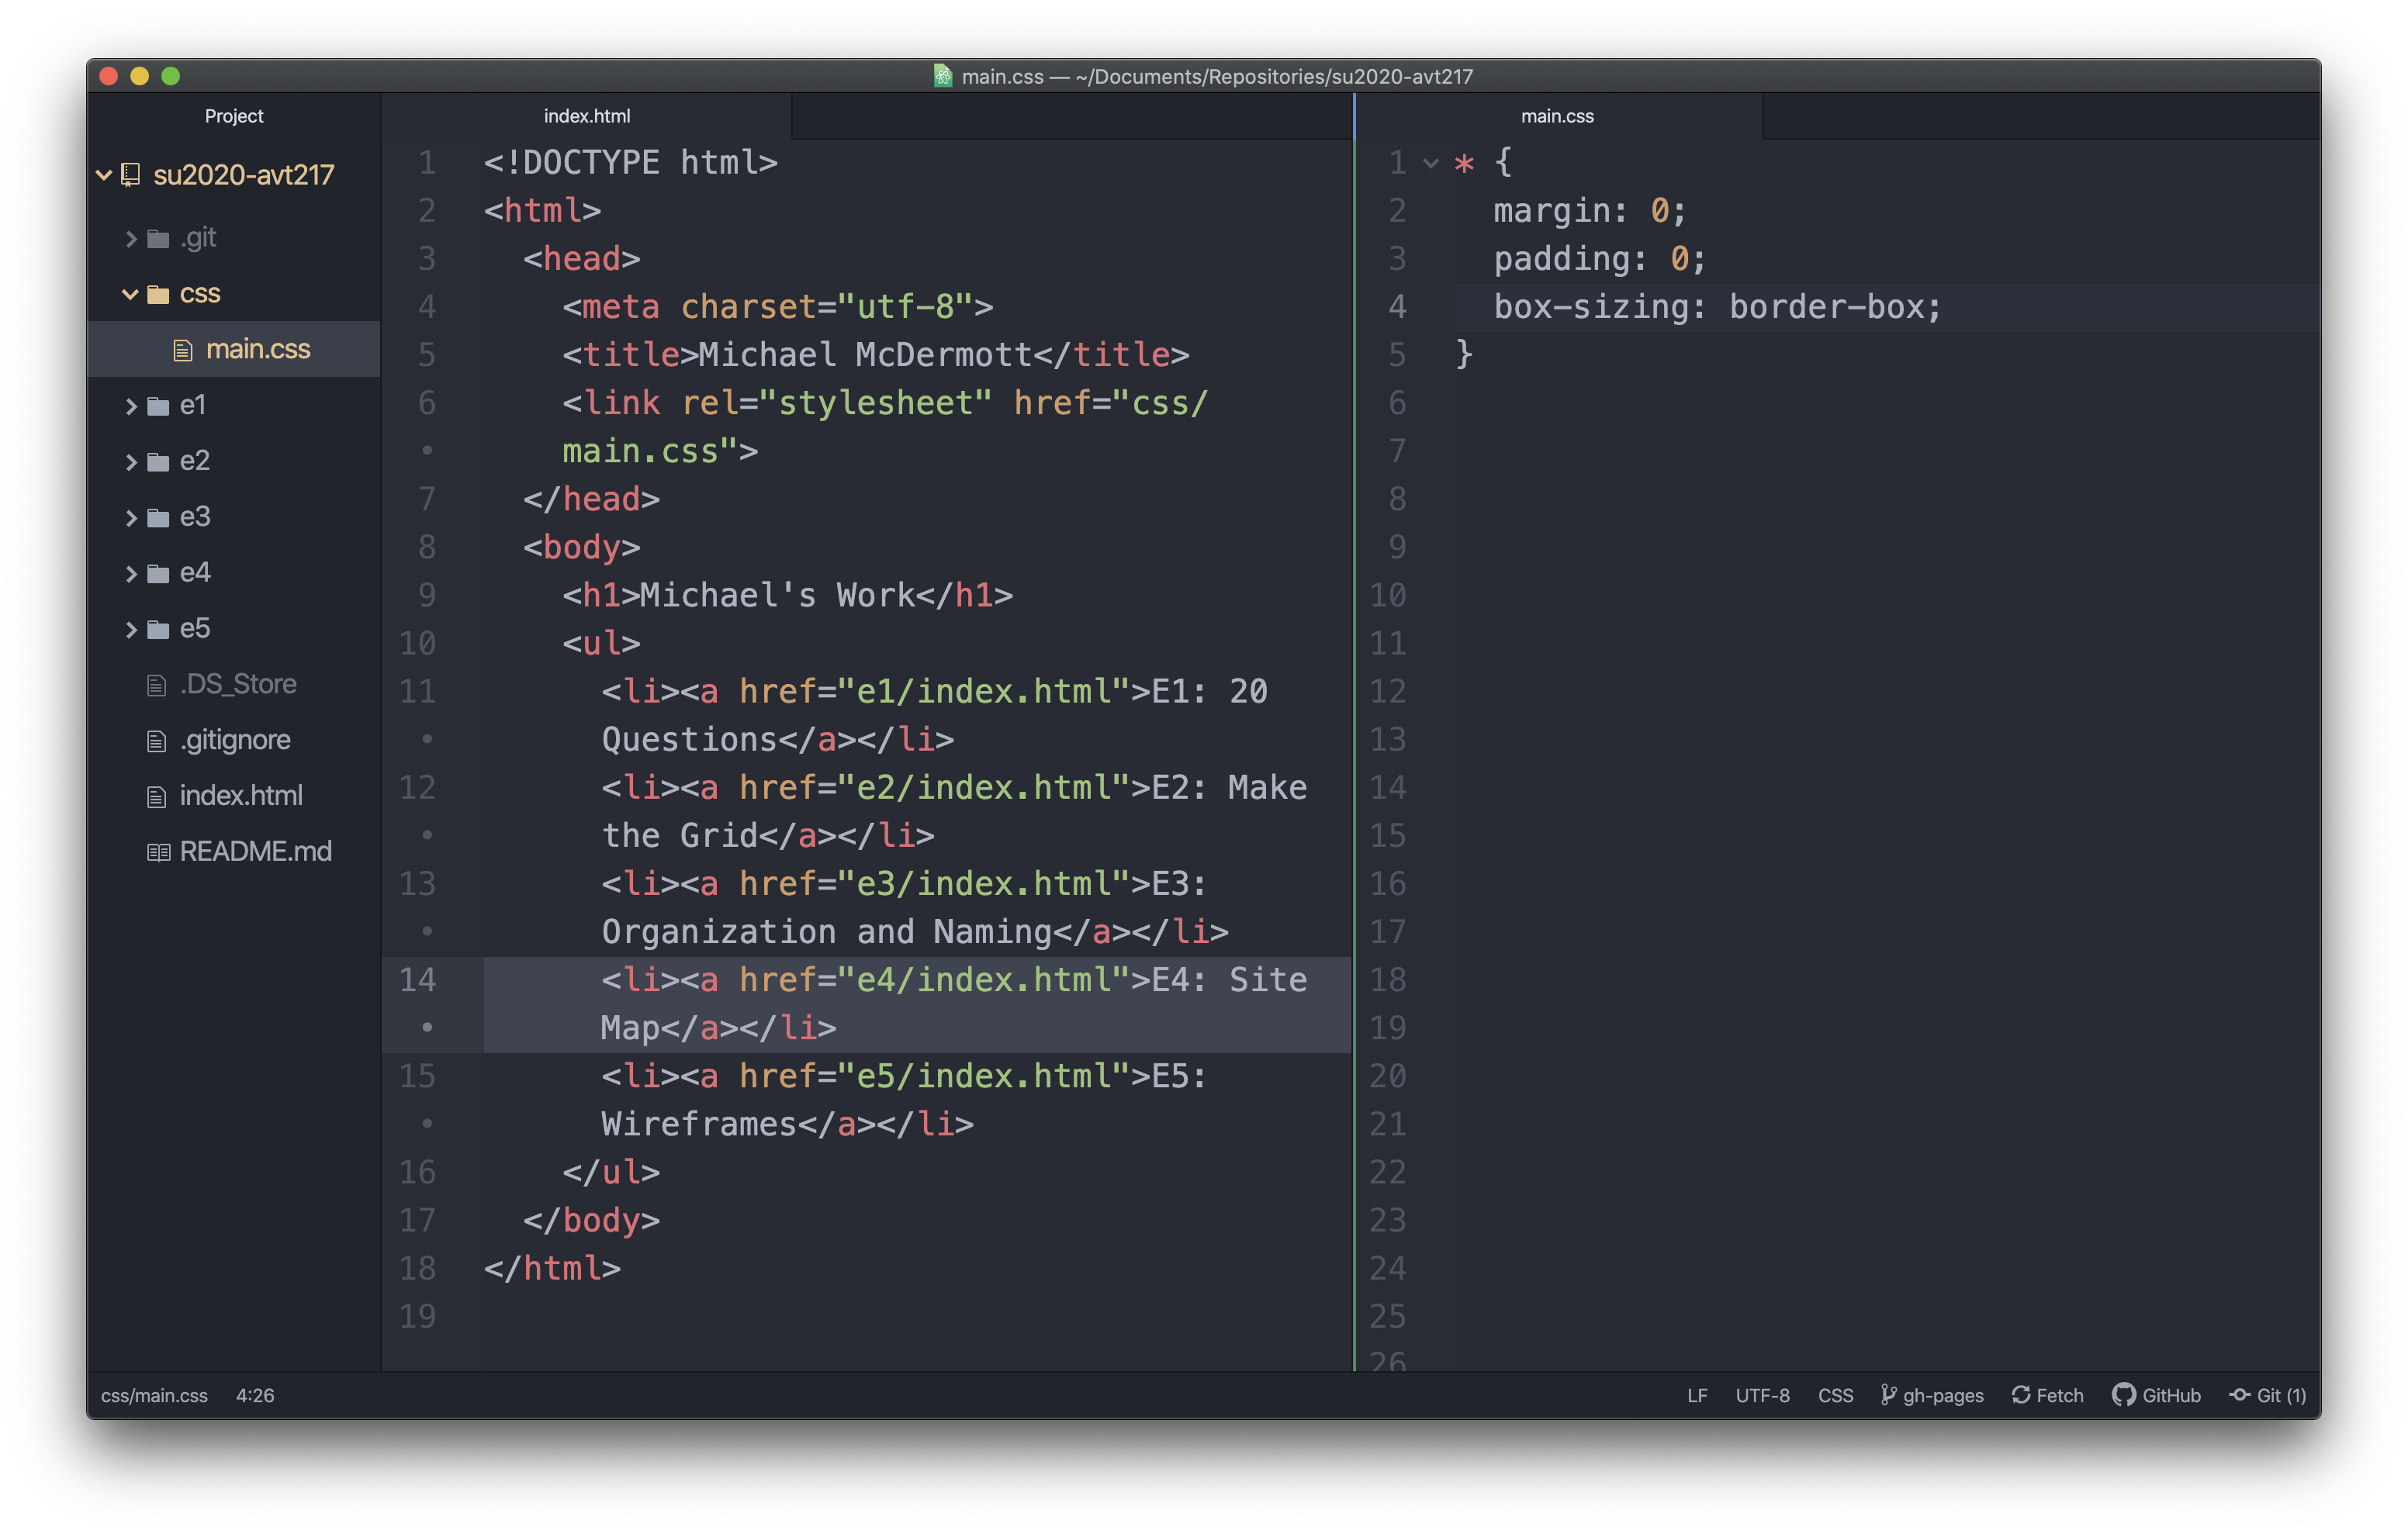
In that screenshot you will notice that I have reset some of the default styles that we talked about in The CSS Box Model lecture.
Step 2: Choose Google Fonts
Open up your browser and go to fonts.google.com.

Step 2a: Select a Font Family
There are a lot of font families on Google Fonts. Take a minute to browse through and find one you want to use on your site. In the top right of each font family box there is some text that says “1 style” or “6 styles” or “variable”. Select a font family that has 2 or more styles and stay away from variable for the moment. Once you found the font family you want to use, click on it.

Step 2b: Select Styles
On this screen you need to select the styles you are going to use. Try and select only the ones you plan on using. You don’t need to pick a font family that has 28 styles and then select all 28 because most likely you won’t be using all 28 styles. I typically try to get a Regular, Regular Italic, Bold, and Bold Italic as a starting point. Usually I will need at least those four but if you think you might need any extra select away.

Step 2c: Get Code
After you have your styles selected you can click on the “View your selected families” icon in the top right. It has three squares and a plus sign and should have a red circle in the top right. A panel should slide on the screen that shows your selected family when you click on the icon.
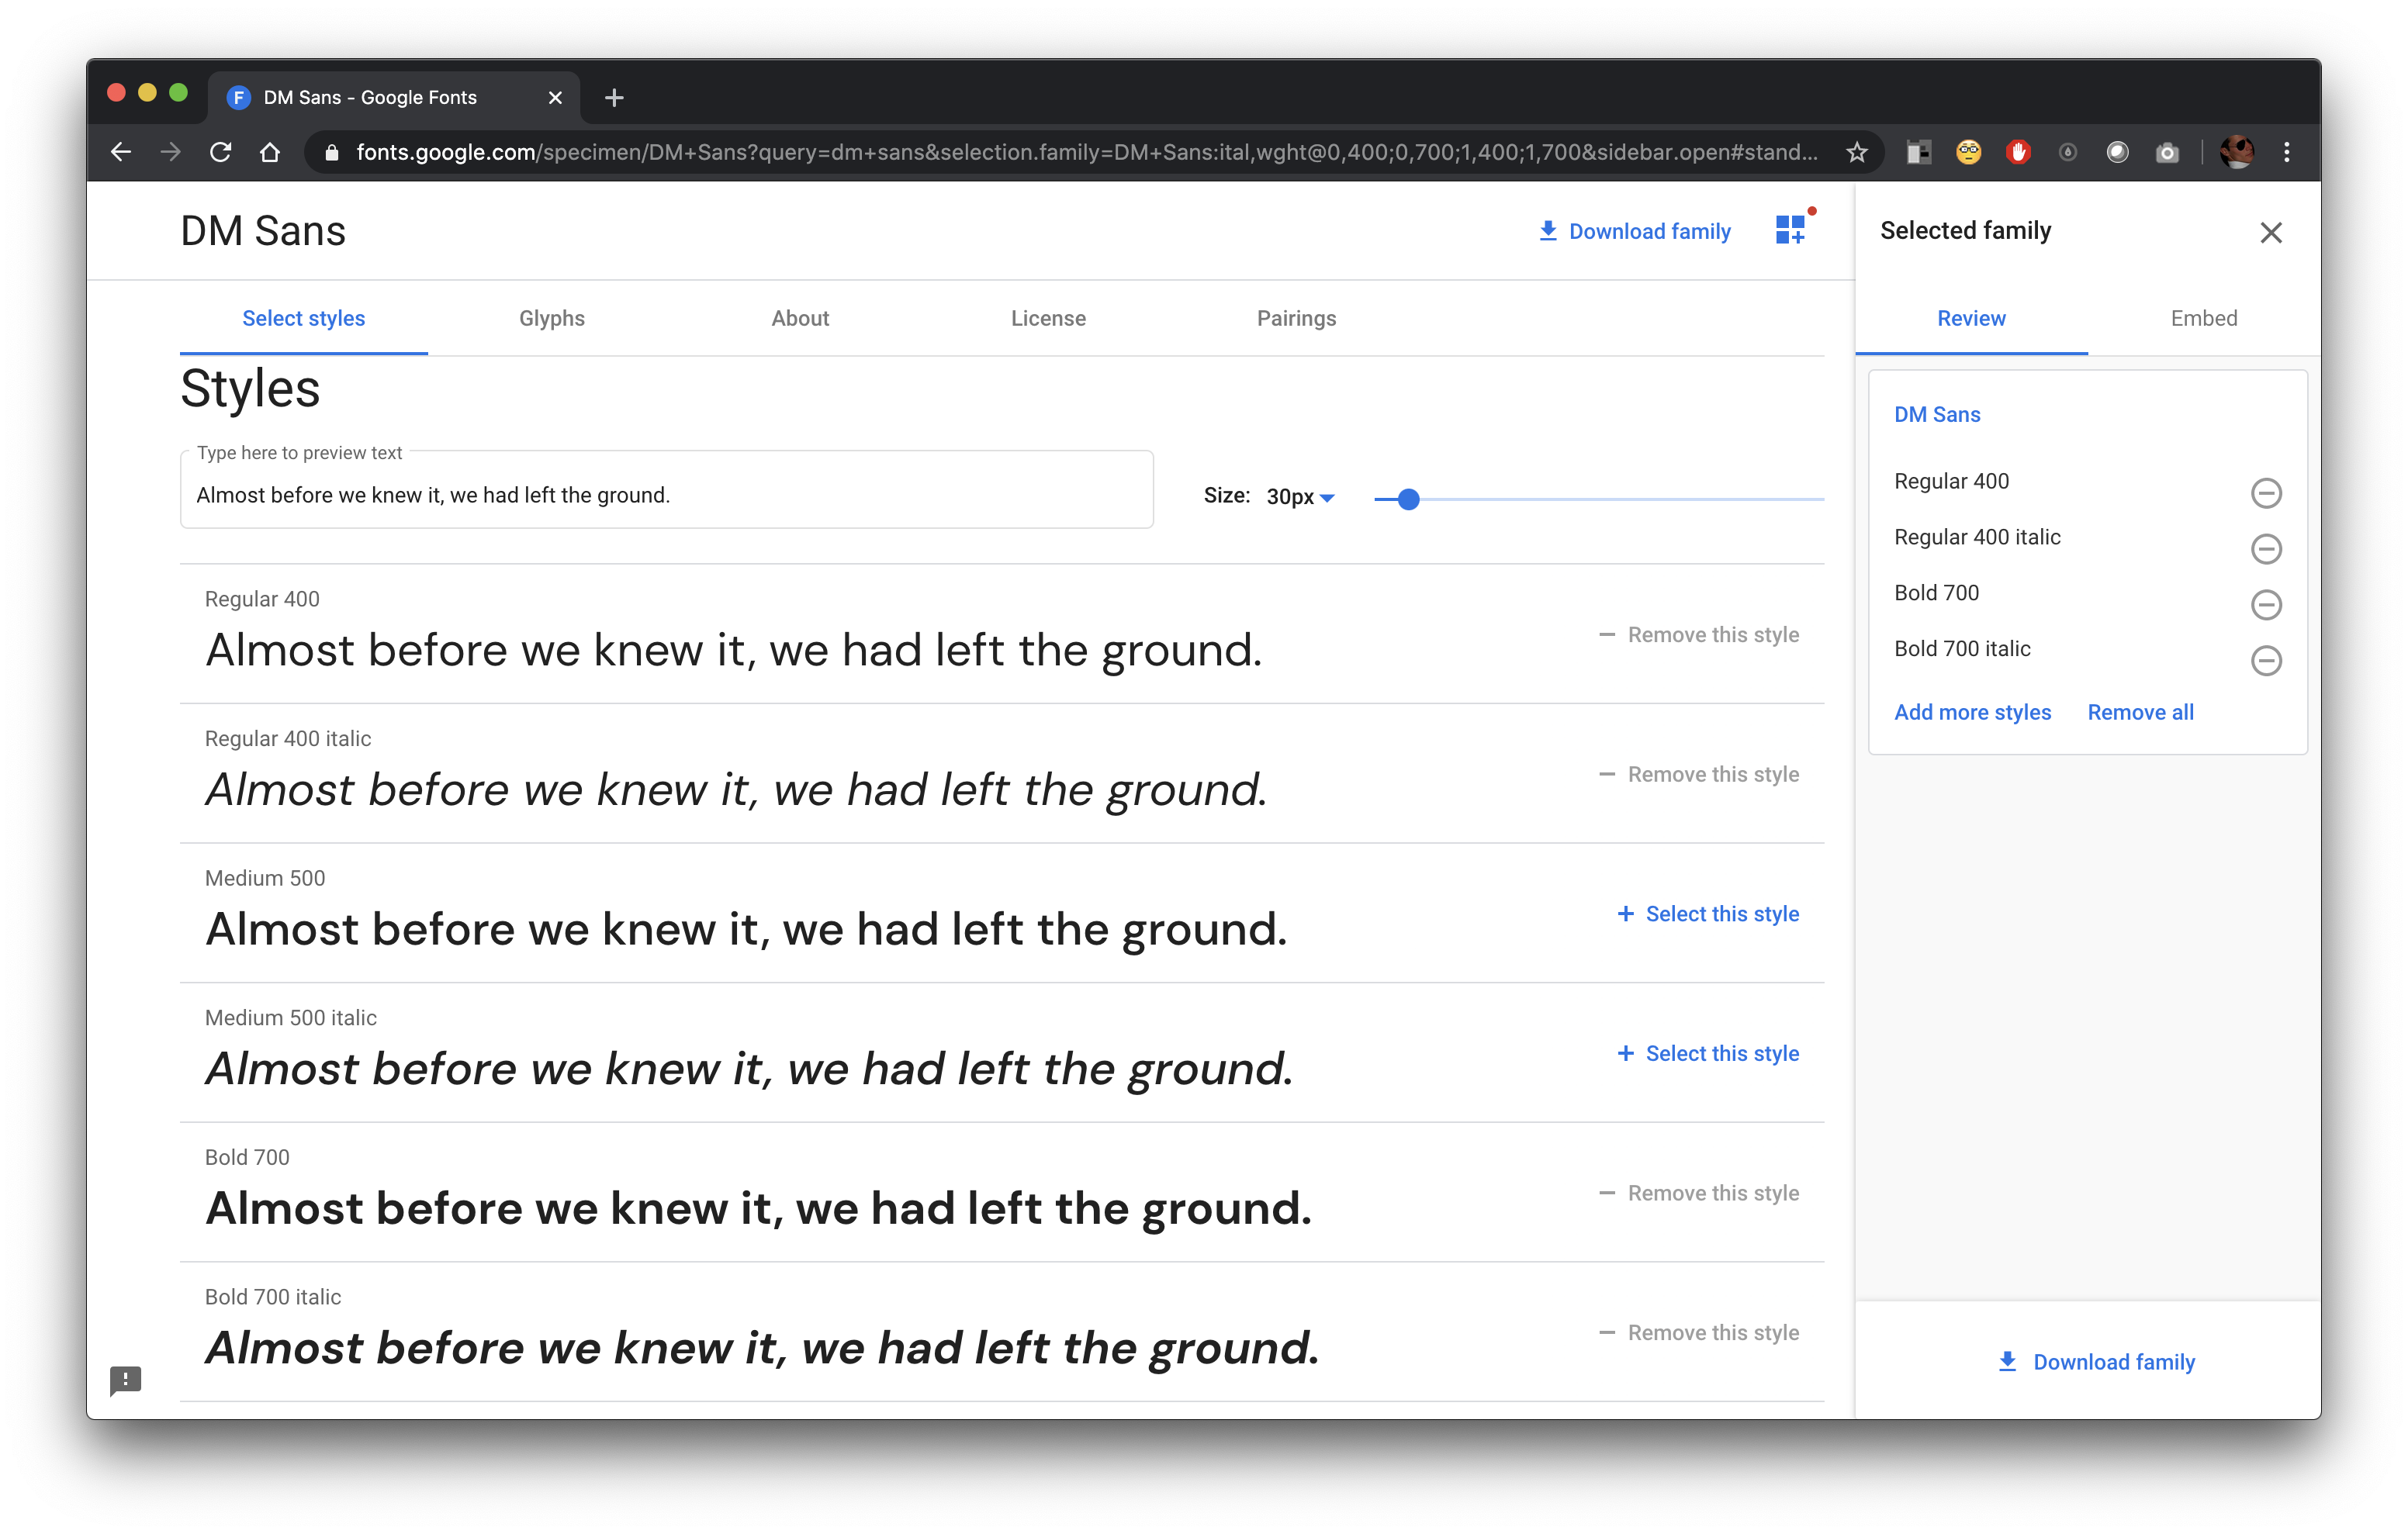
Check to make sure the fonts you think should be there are there and then click on the “Embed” tab at the top of the panel. This will bring up the tab that has the code for you to link to the fonts from your HTML document and add the font family to your CSS.
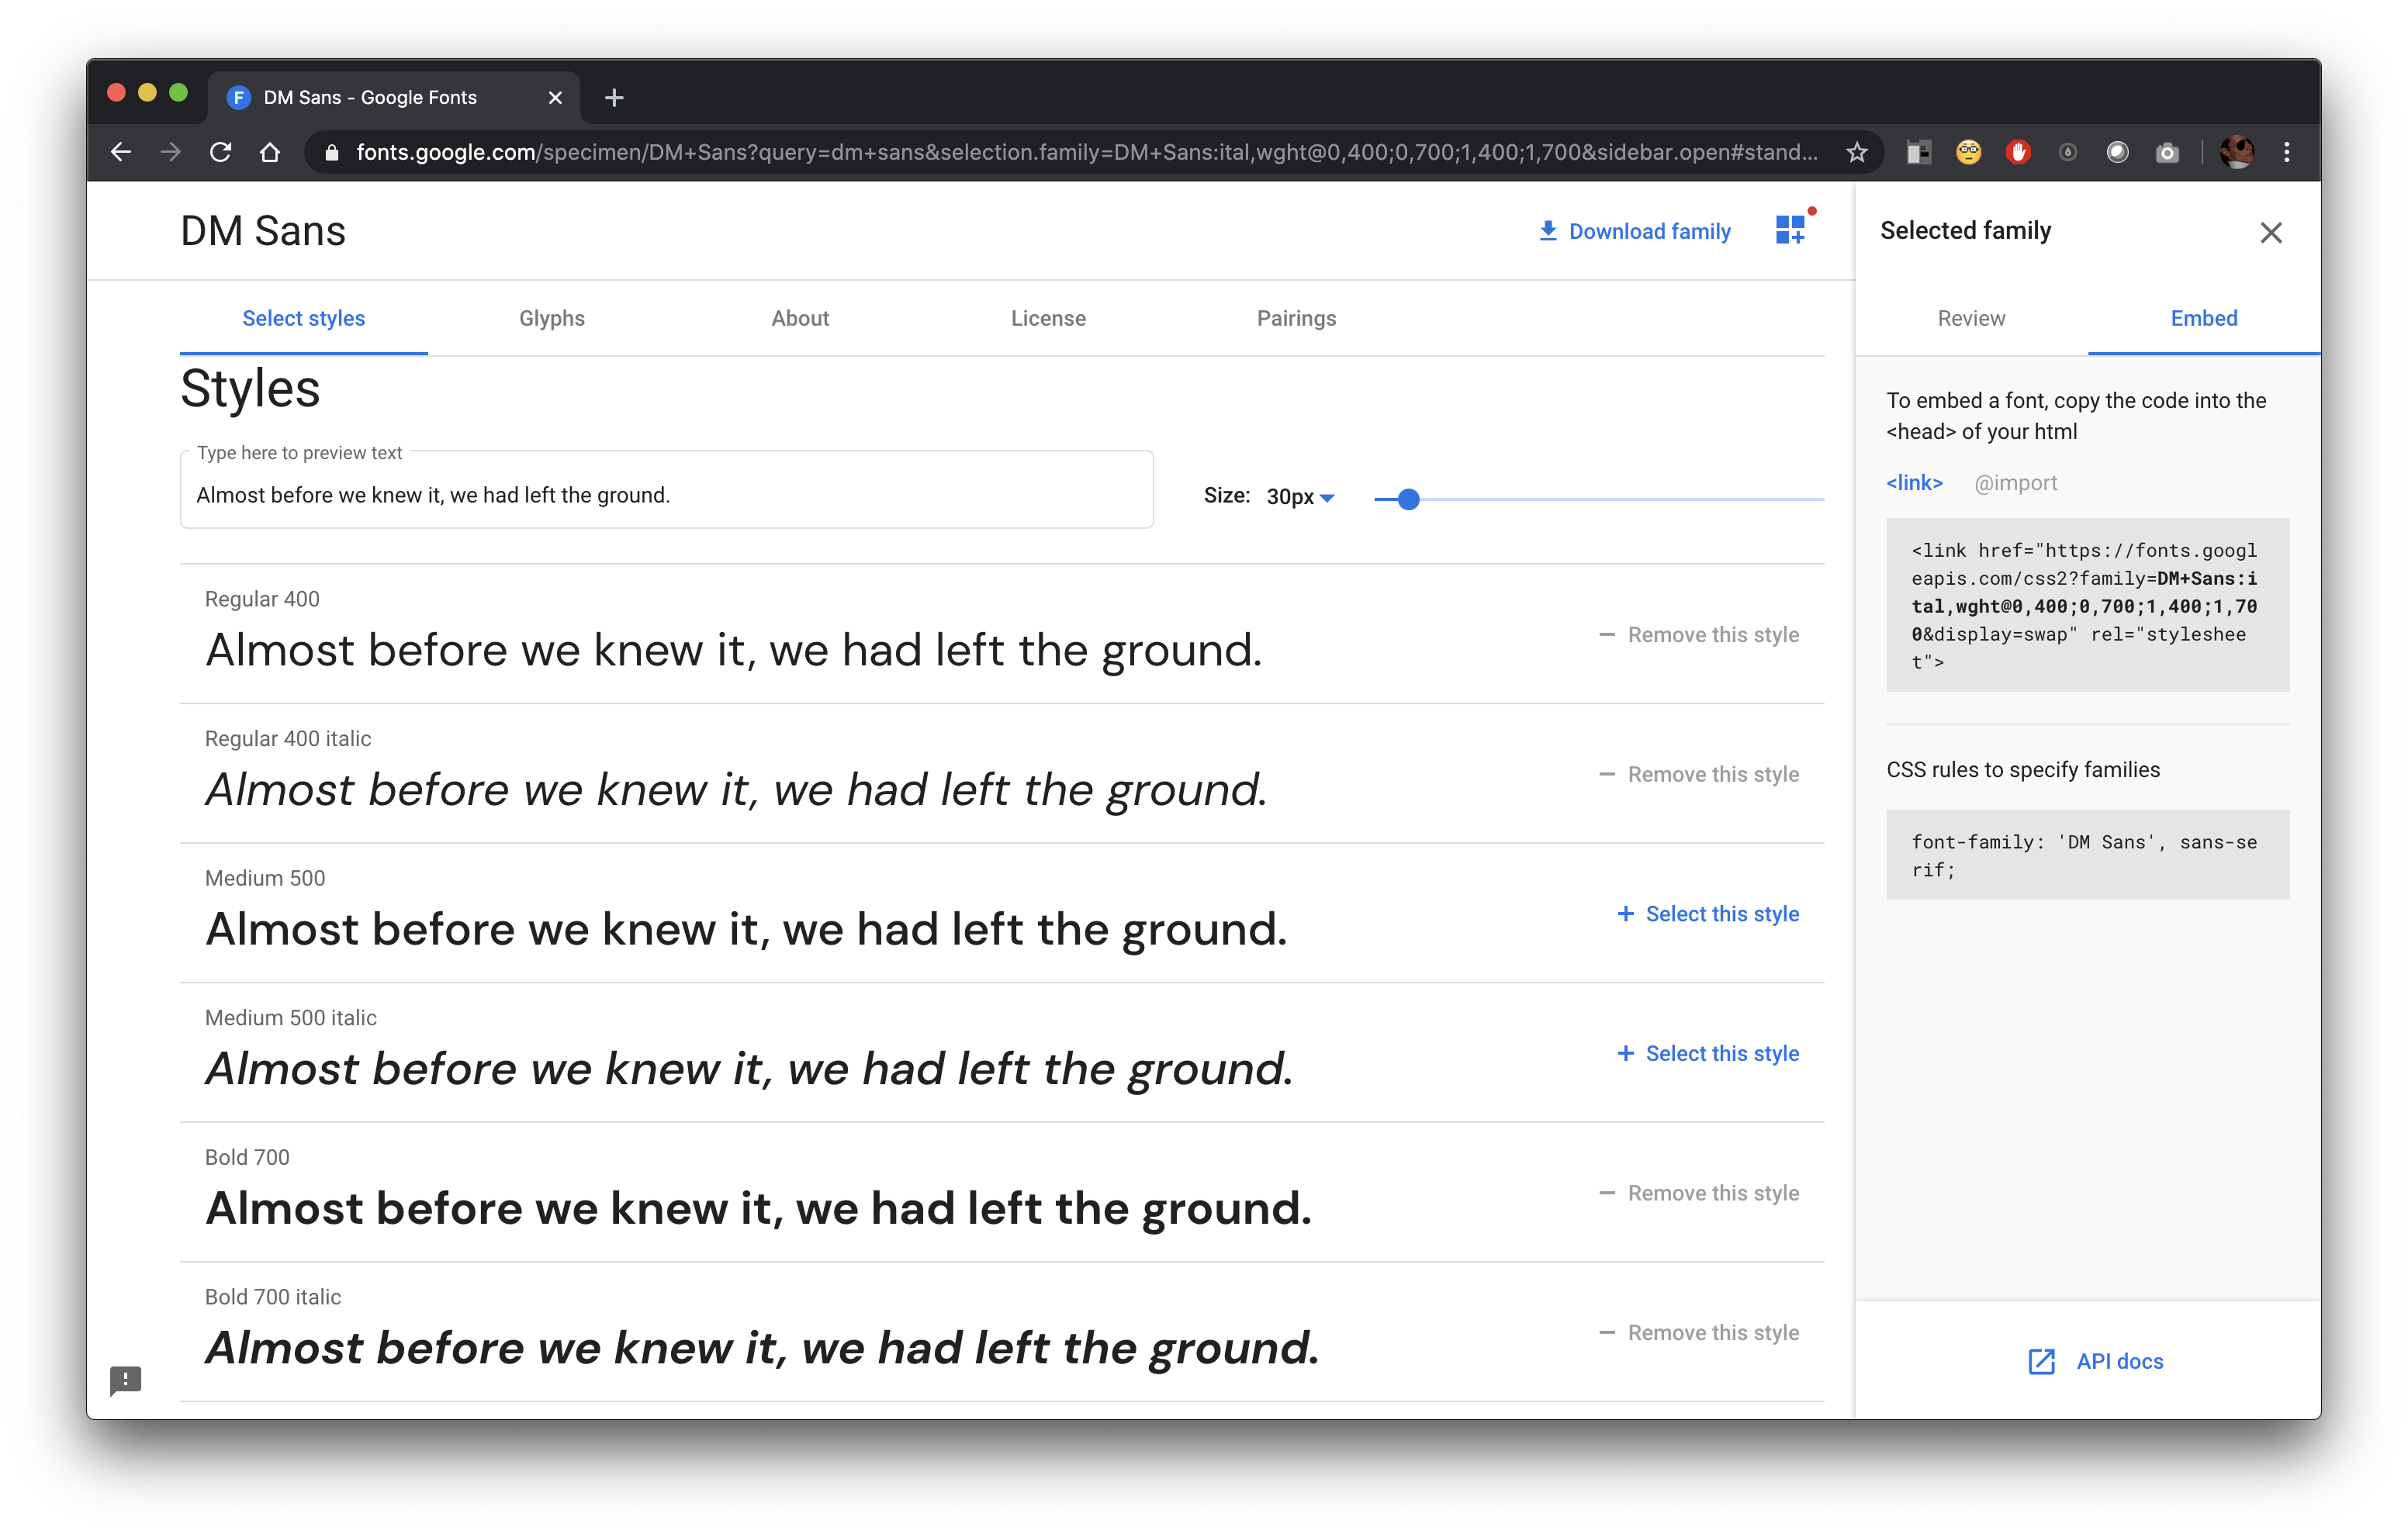
Step 2d: Copy Link and Paste in HTML Document
Copy the first bit of code under the <link>. Once it is copied go back to Atom and paste it in your index.html file. Where should you paste it you might ask? It should go in the head of course! Paste it in there above the link element for your CSS file. Remember, the head contains information about the document itself and the body contains the content of the document.
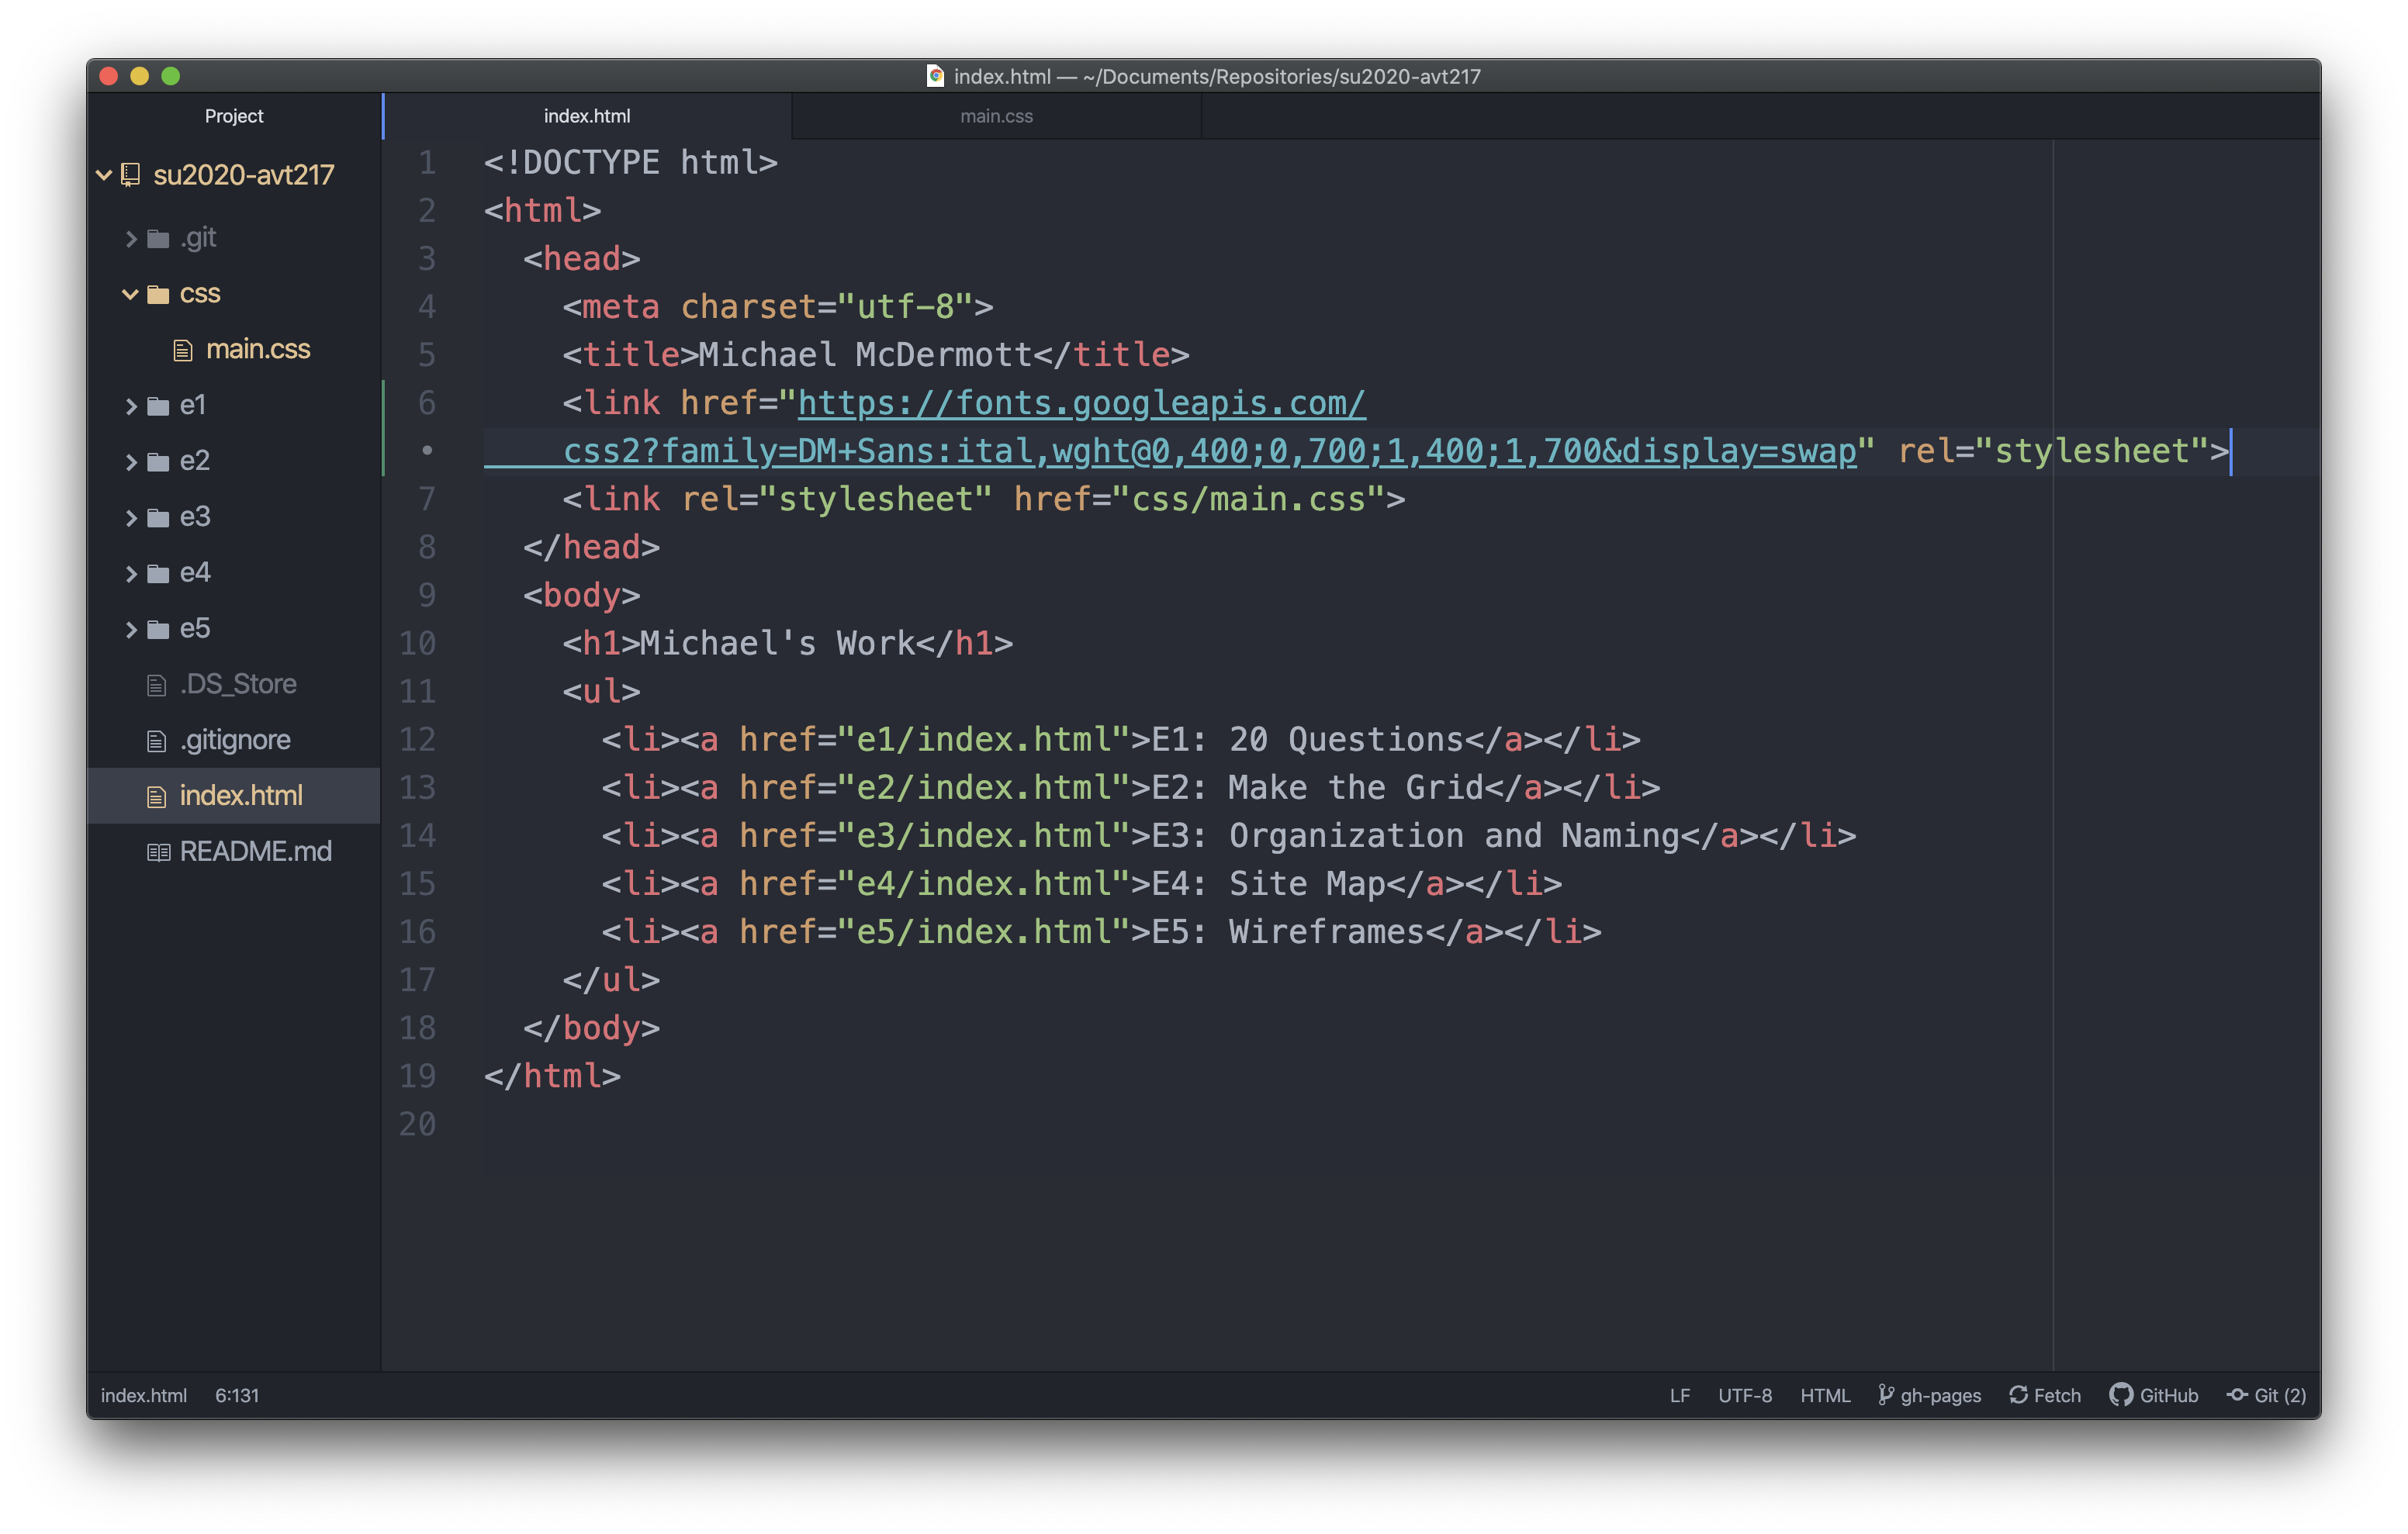
Step 2e: Copy CSS and Paste in CSS Document
Copy the second bit of code from the Google Fonts embed panel under the “CSS rules to specify families”. Once it is copied go back to Atom and paste it in your CSS file. Where should you paste it you might ask? Well this time it could go a lot of places because it depends on what in your HTML file you want to use new fonts. In this case, everything is going to use these fonts so I’m going to add them to a style rule for the body. But if you just wanted your h1 element to be the new font you could make a style rule for the h1 element. Or if you wanted the li elements to be the new font you could make a style rule for the li element.
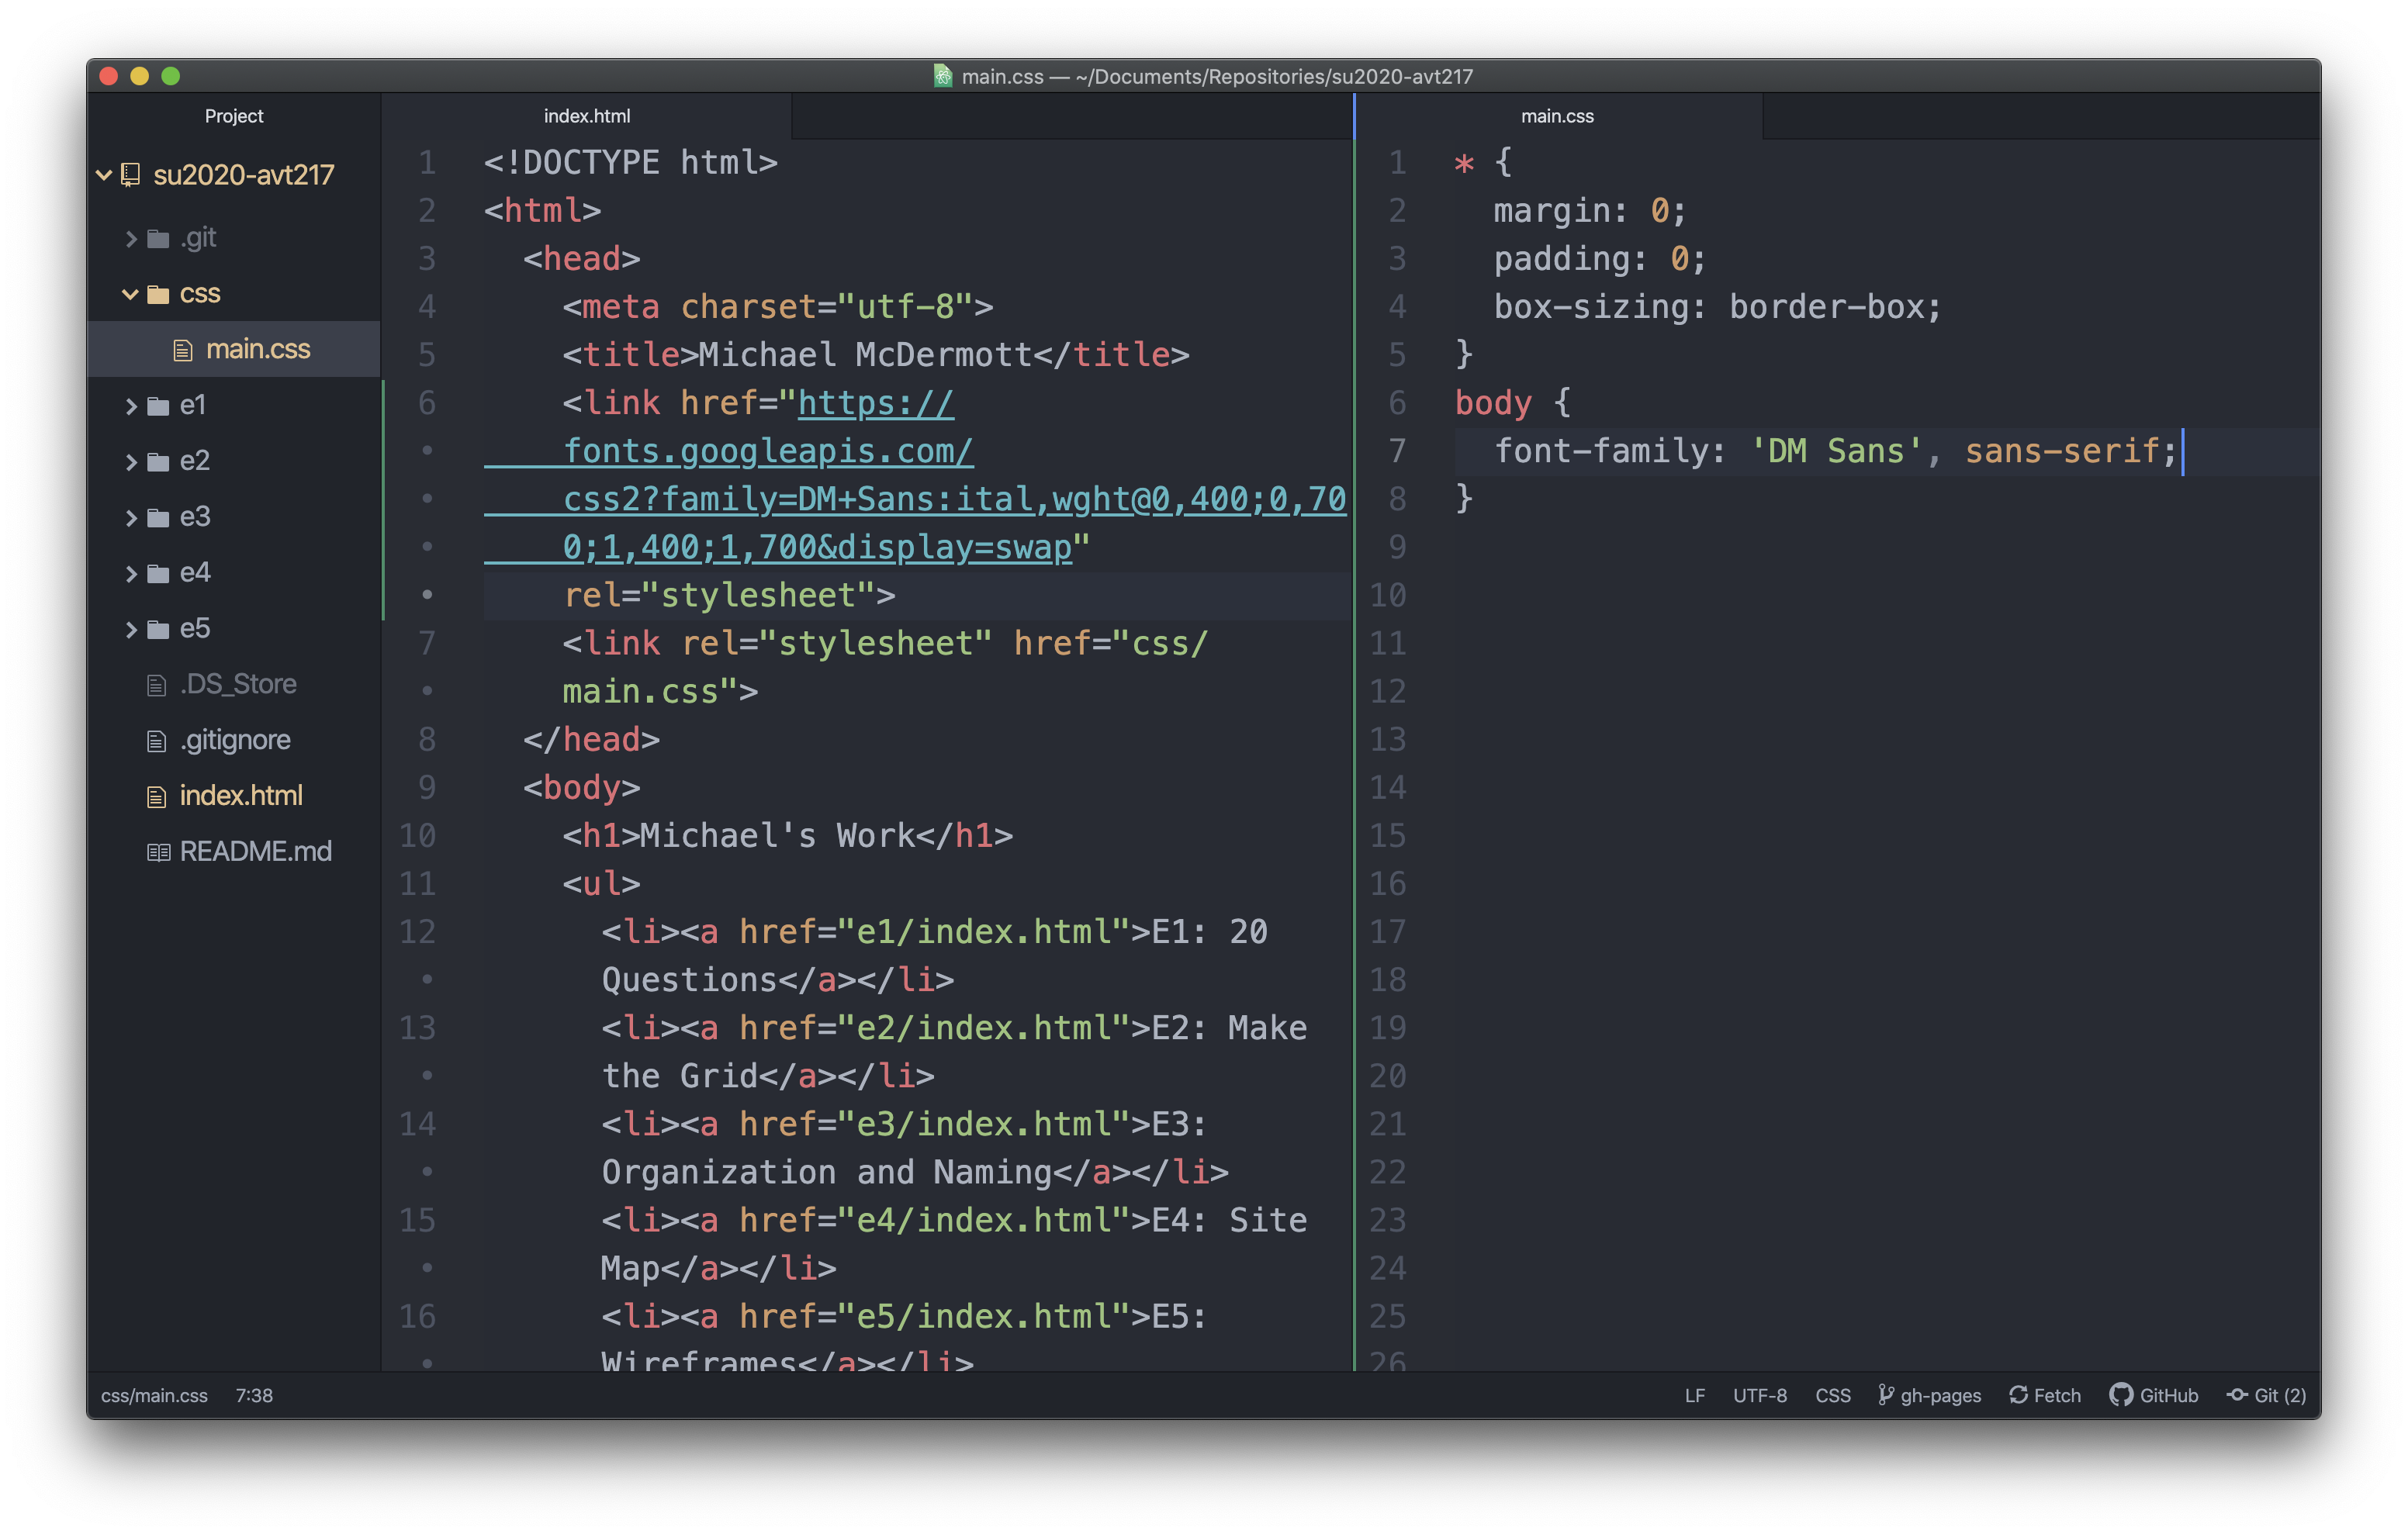
Step 3: Save and Preview
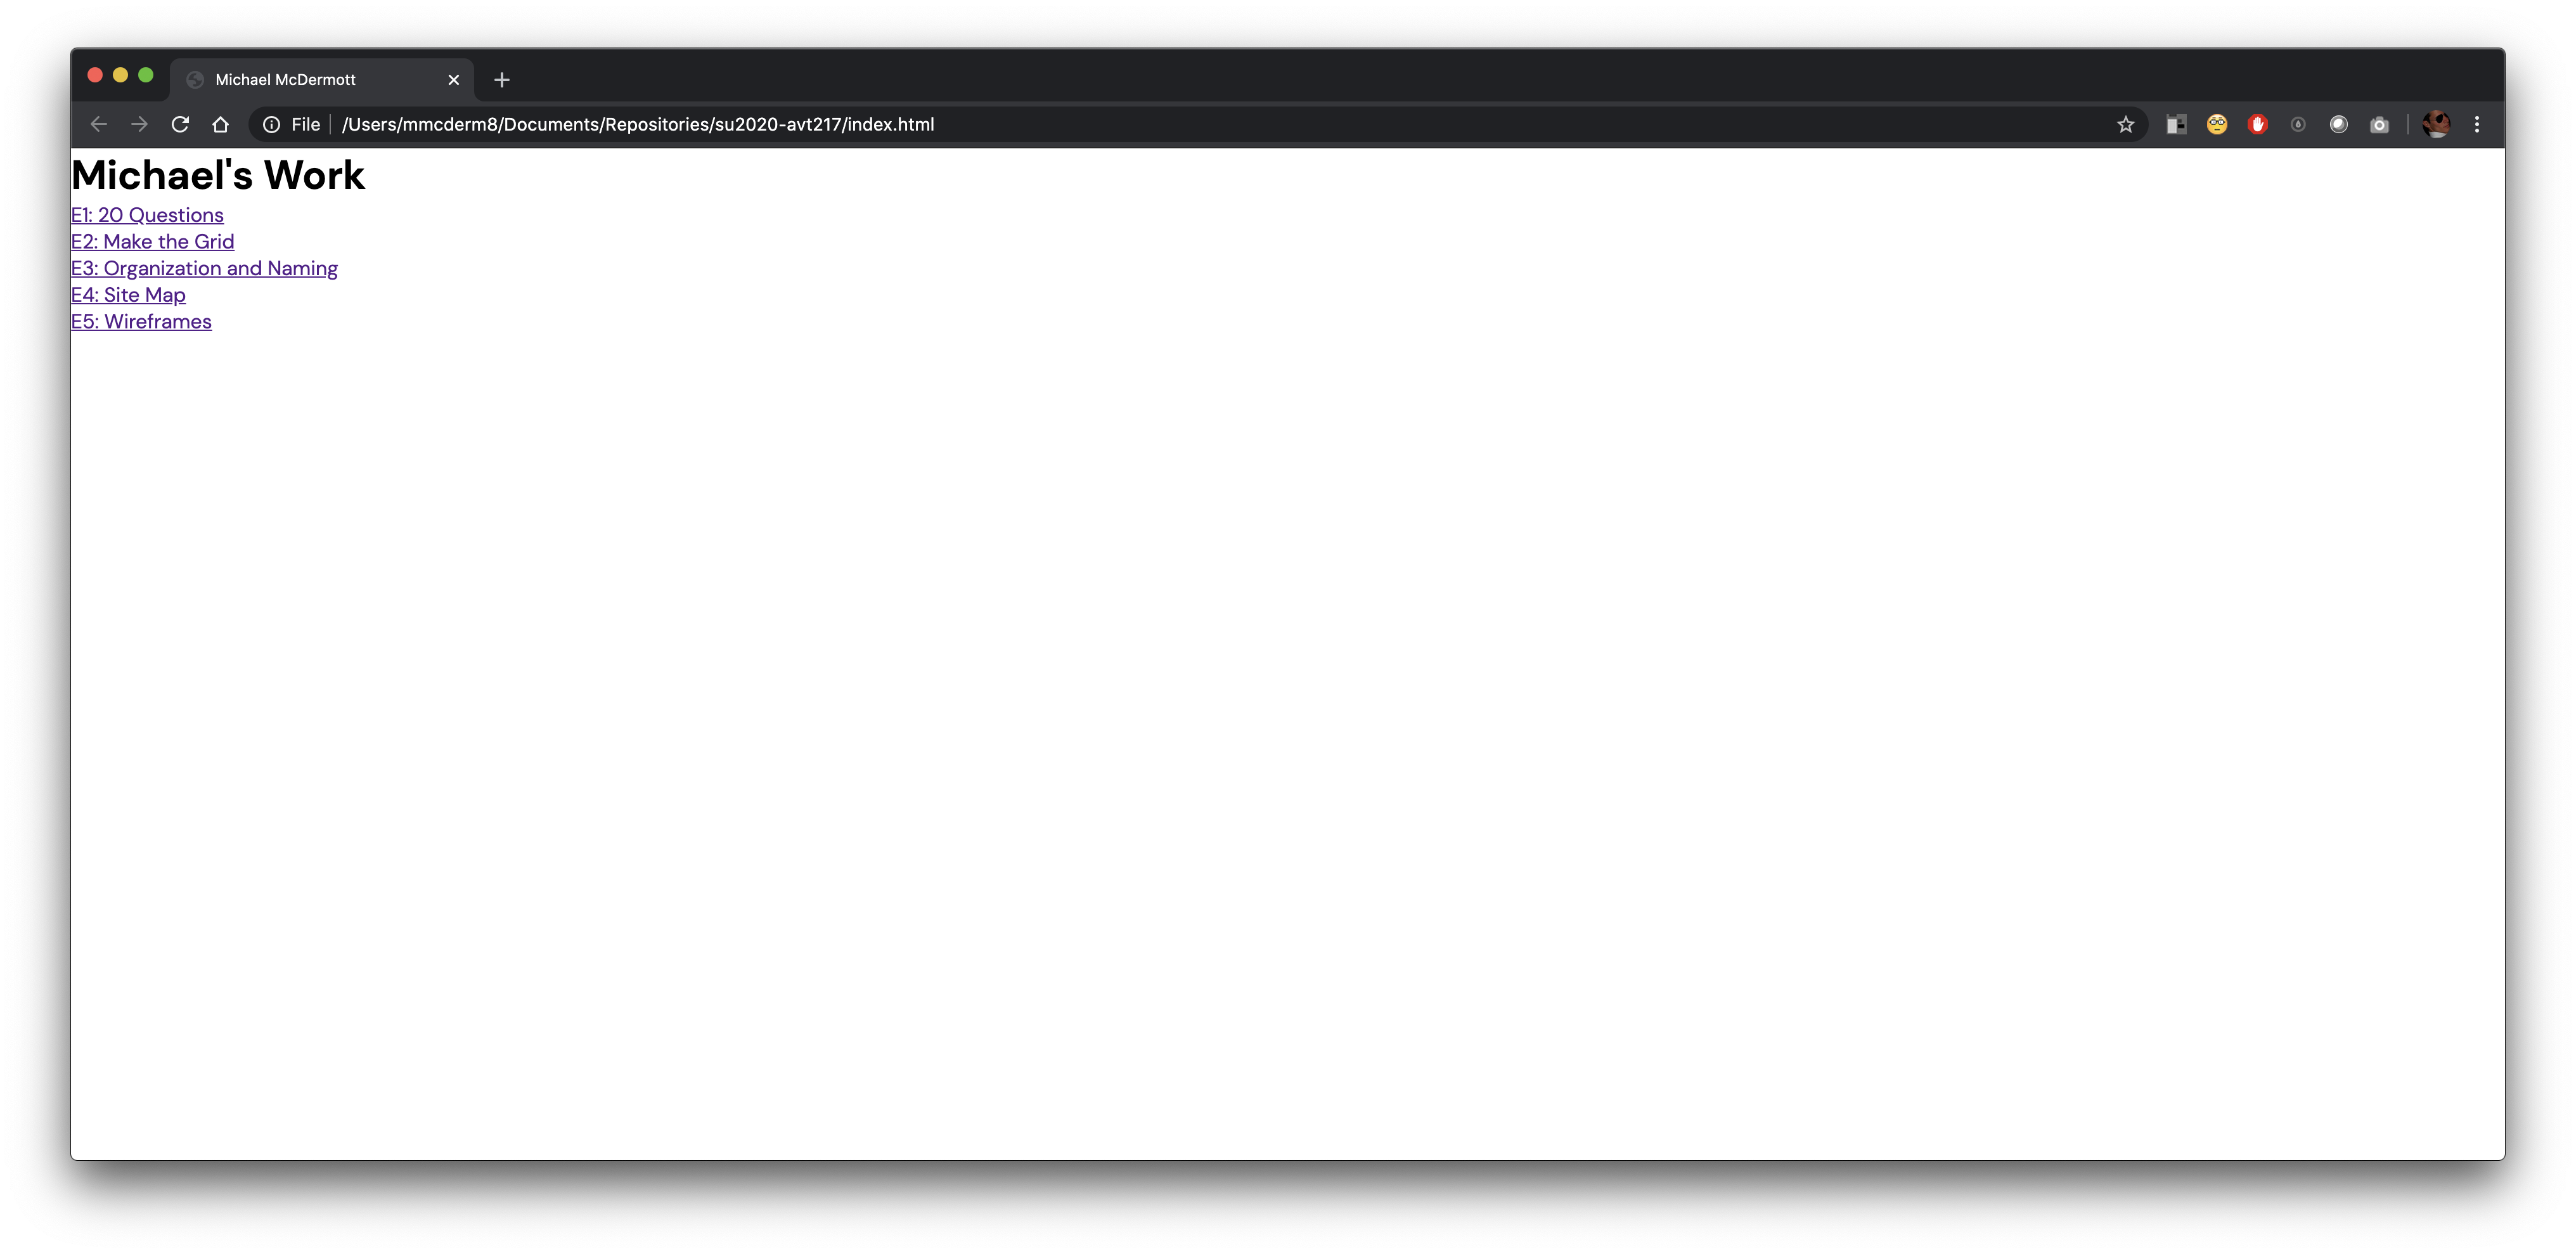
The last step is to check and see if everything worked. Make sure both your HTML and CSS files are saved and then preview your HTML file. Hopefully the font on the page should change to the new font you selected. If it doesn’t, go back and make sure you pasted the whole link element in the head of your document and that you pasted the font-family styles into your CSS file correctly.
Homepage before:

Homepage after:
Step 4: Choose Adobe Fonts
If you have a subscription to Creative Cloud, go through step four. If you don’t, the fonts available to you without a CC subscription are many of the same ones on Google so you aren’t going to find much difference here.
If you have a CC subscription, go to fonts.adobe.com and make sure your are signed in using your Adobe ID.

Step 4a: Select a Font Family
There are also a lot of font families on Adobe Fonts. Take a minute to browse through and find one you want to use on your site. Like you did with the fonts on Google, look for a font that has more than 2 fonts in it. The number of fonts is next to the name of the font. For the Adobe font, choose the opposite of what you picked from Google. So if you picked a serif on Google, pick a sans-serif on Adobe. Choose something that will be easy to tell apart. Once you found the font family you want to use, click on the “View Family” button.

Step 4b: Add to Web Project
Click the “Add to Web Project” on the right.
In the pop up that appears, click the down arrow and create a new project. The name can be whatever you want, I’m calling mine “avt217”.
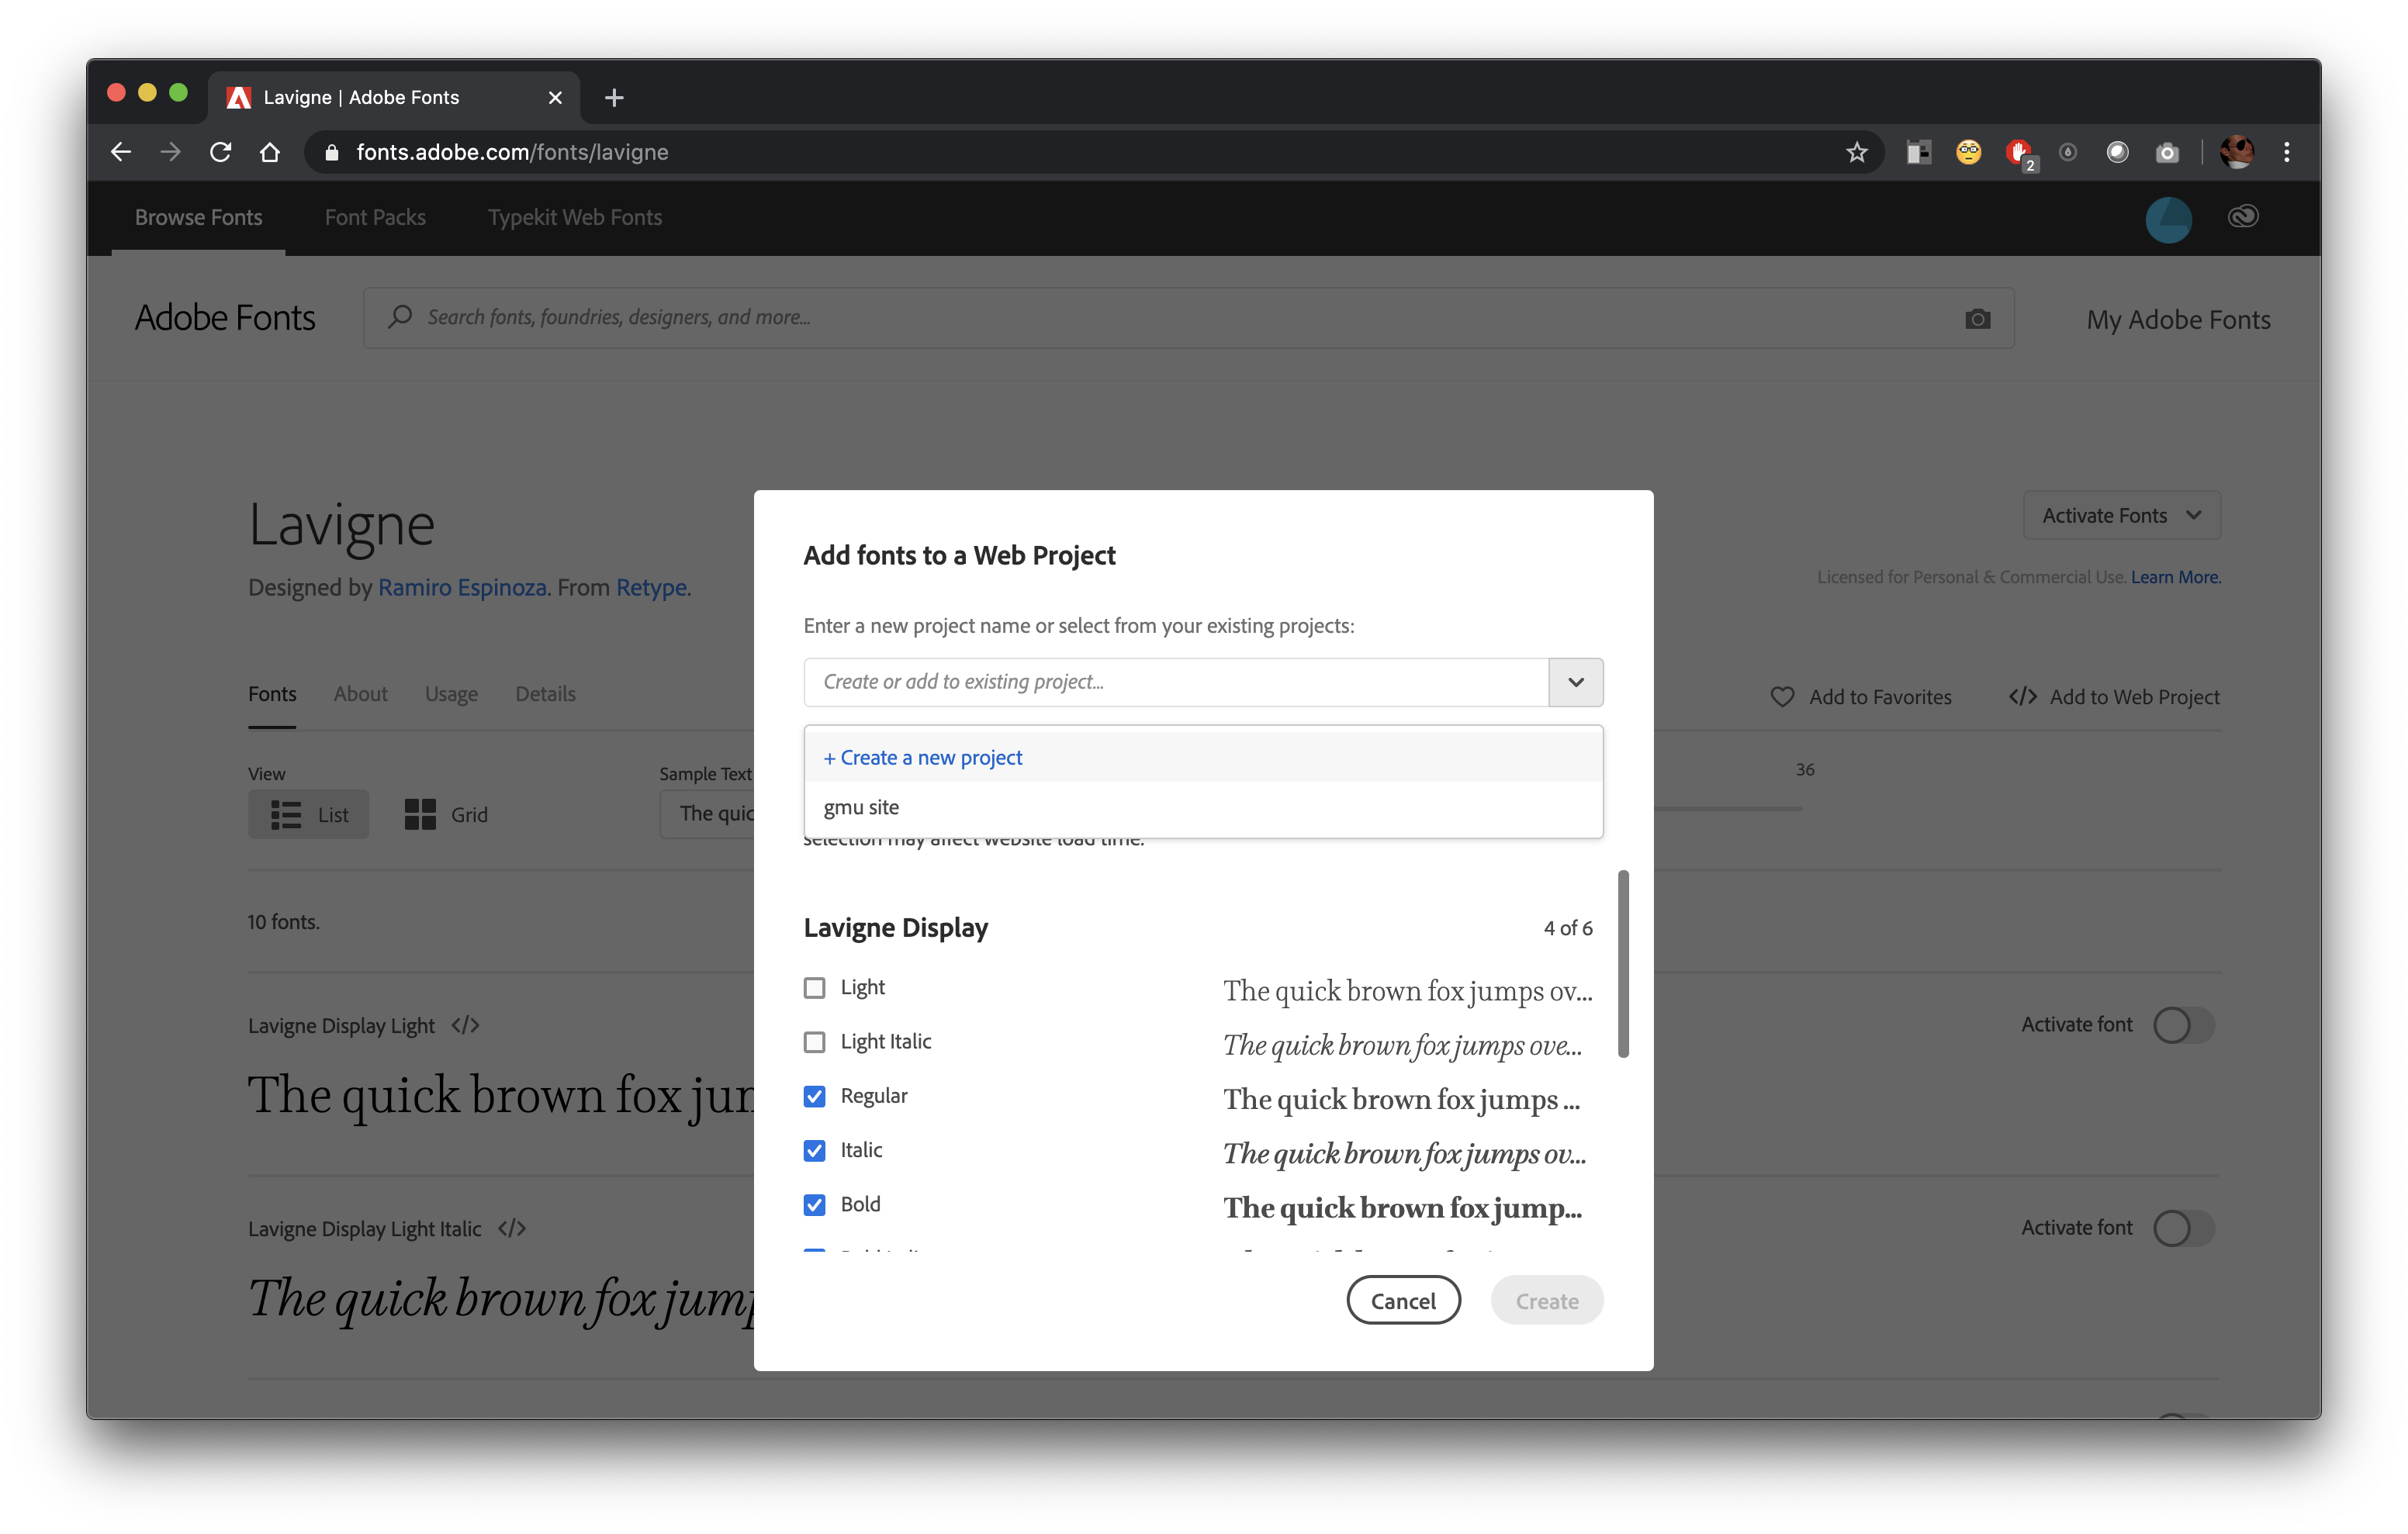
Once you have the project created you can select the styles you want to use. I’m going to select the same thing I did before, Regular, Regular Italic, Bold, and Bold Italic.
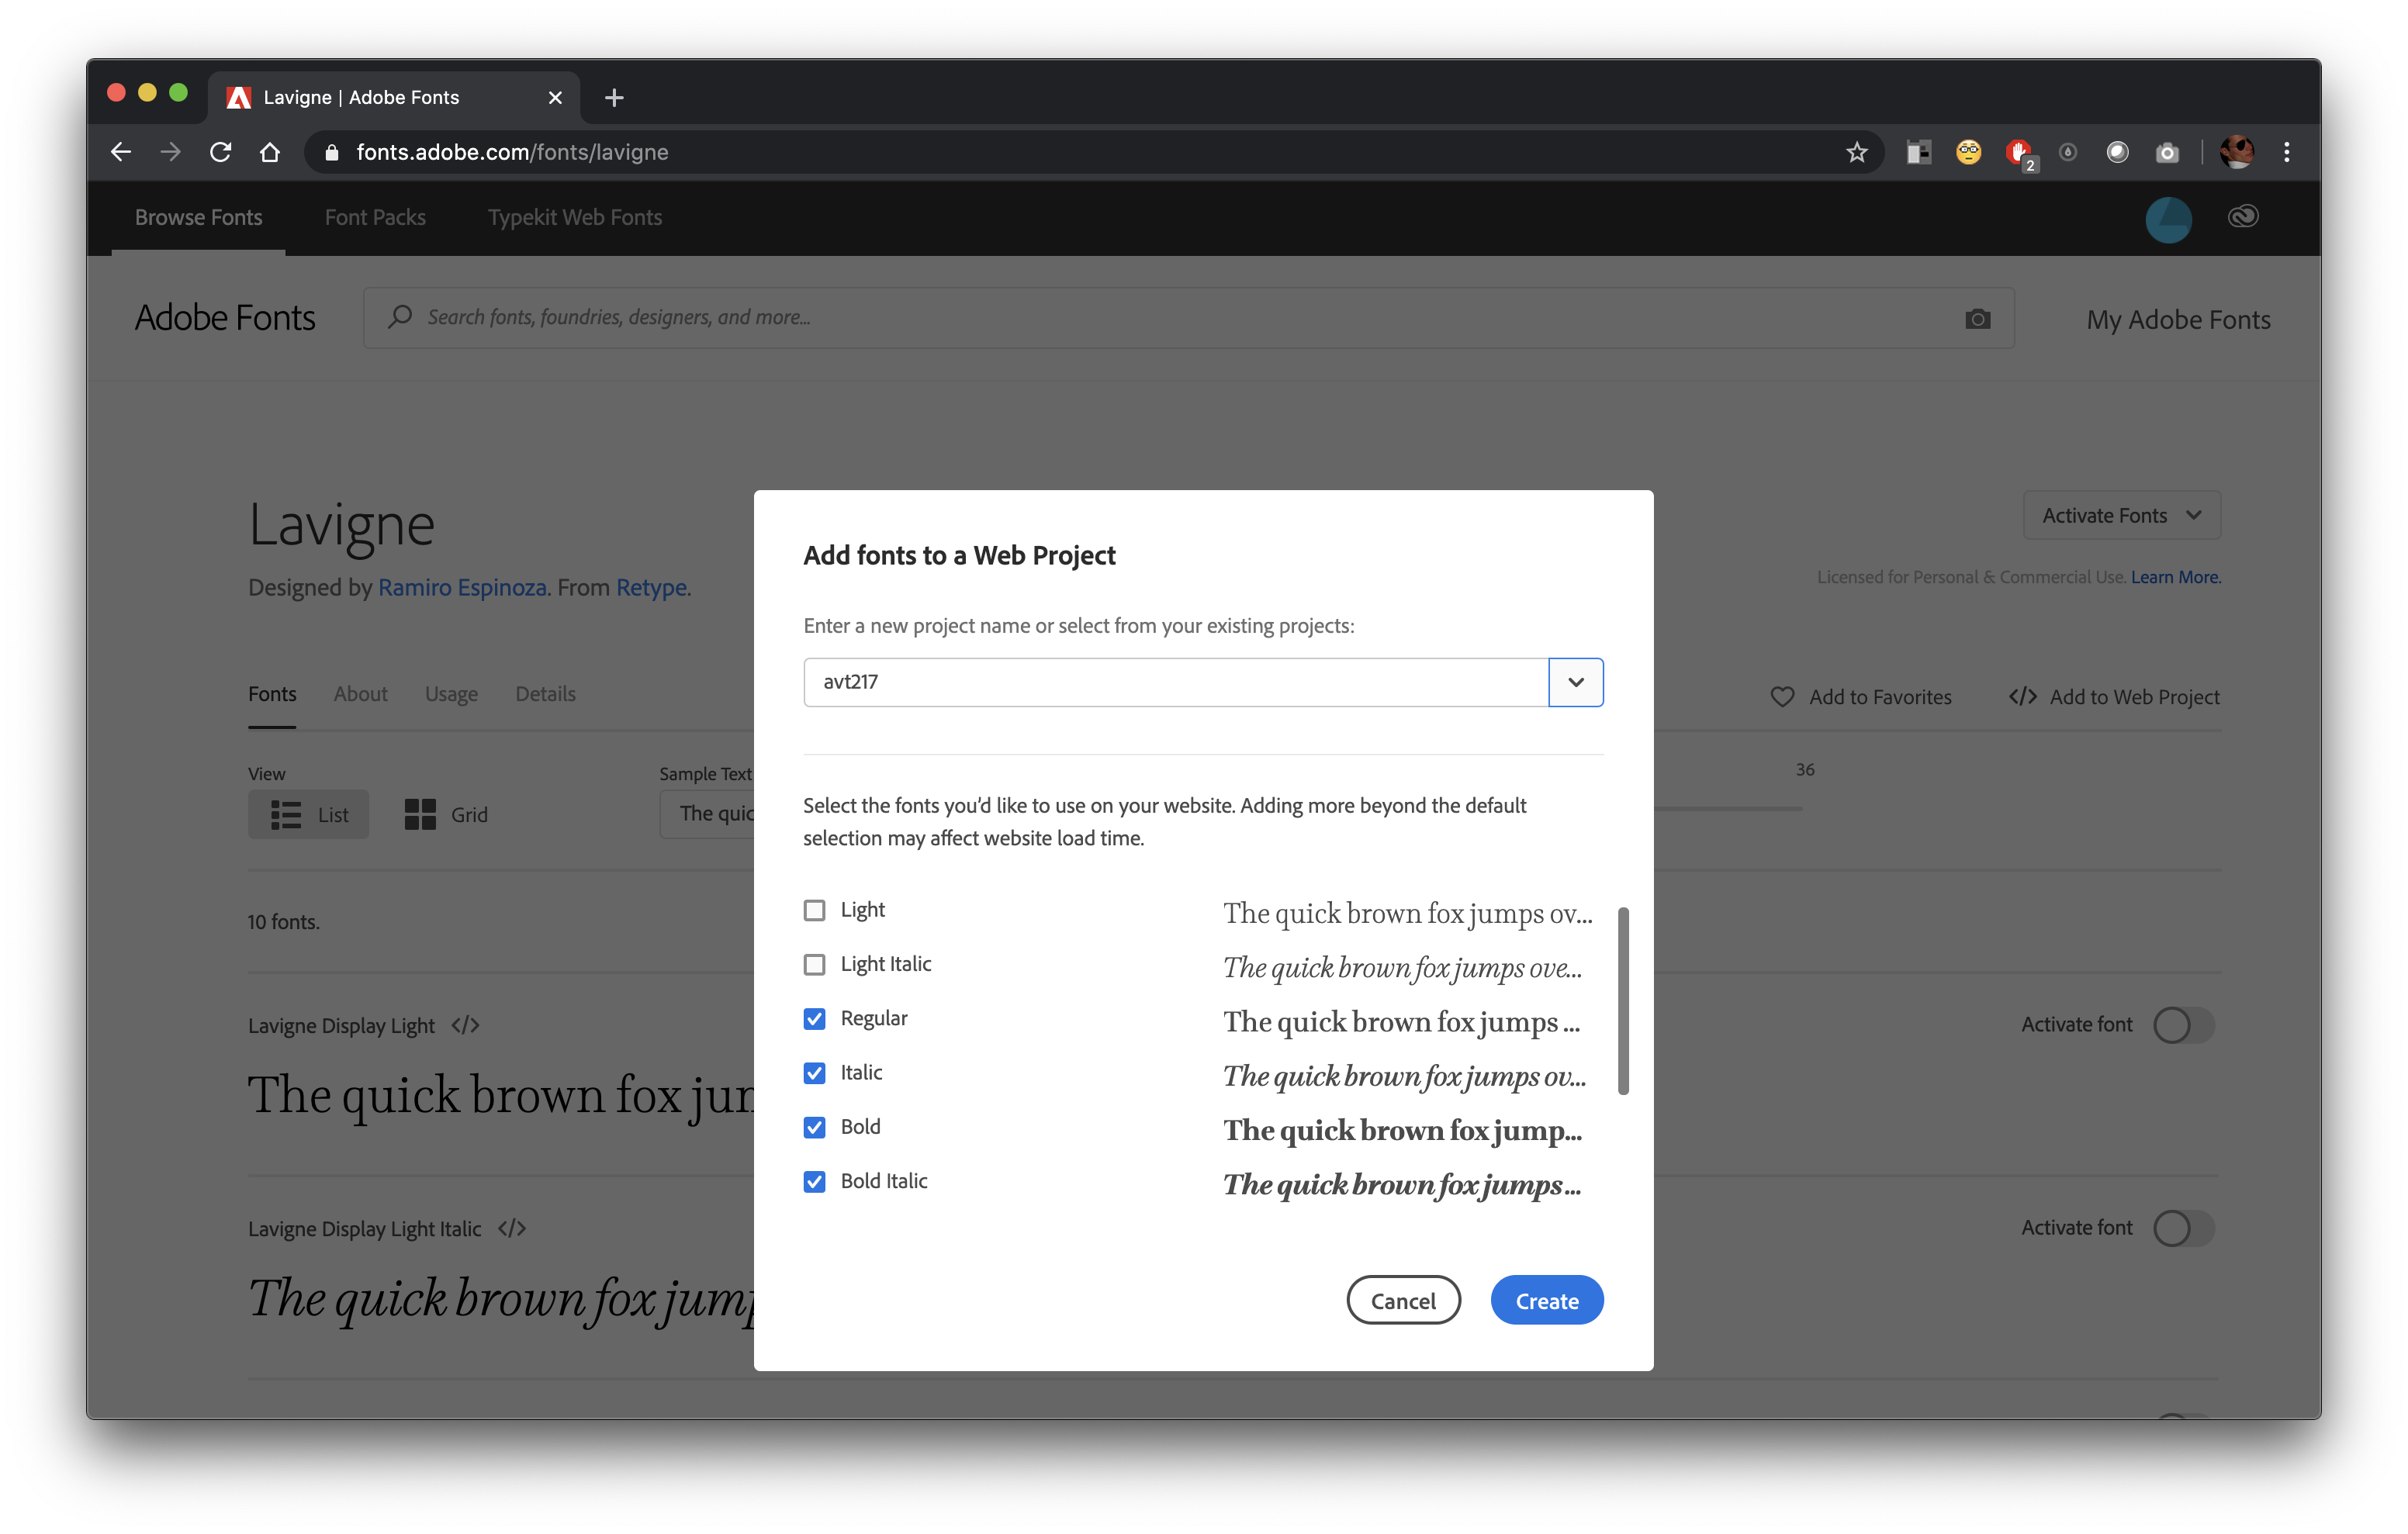
Once you have the styles you want checked, click the “Create” button.
Step 4c: Get Code
After clicking the “Create” button the pop up will change to the code screen. This screen is very similar to the Google screen but has a little bit more detailed CSS.
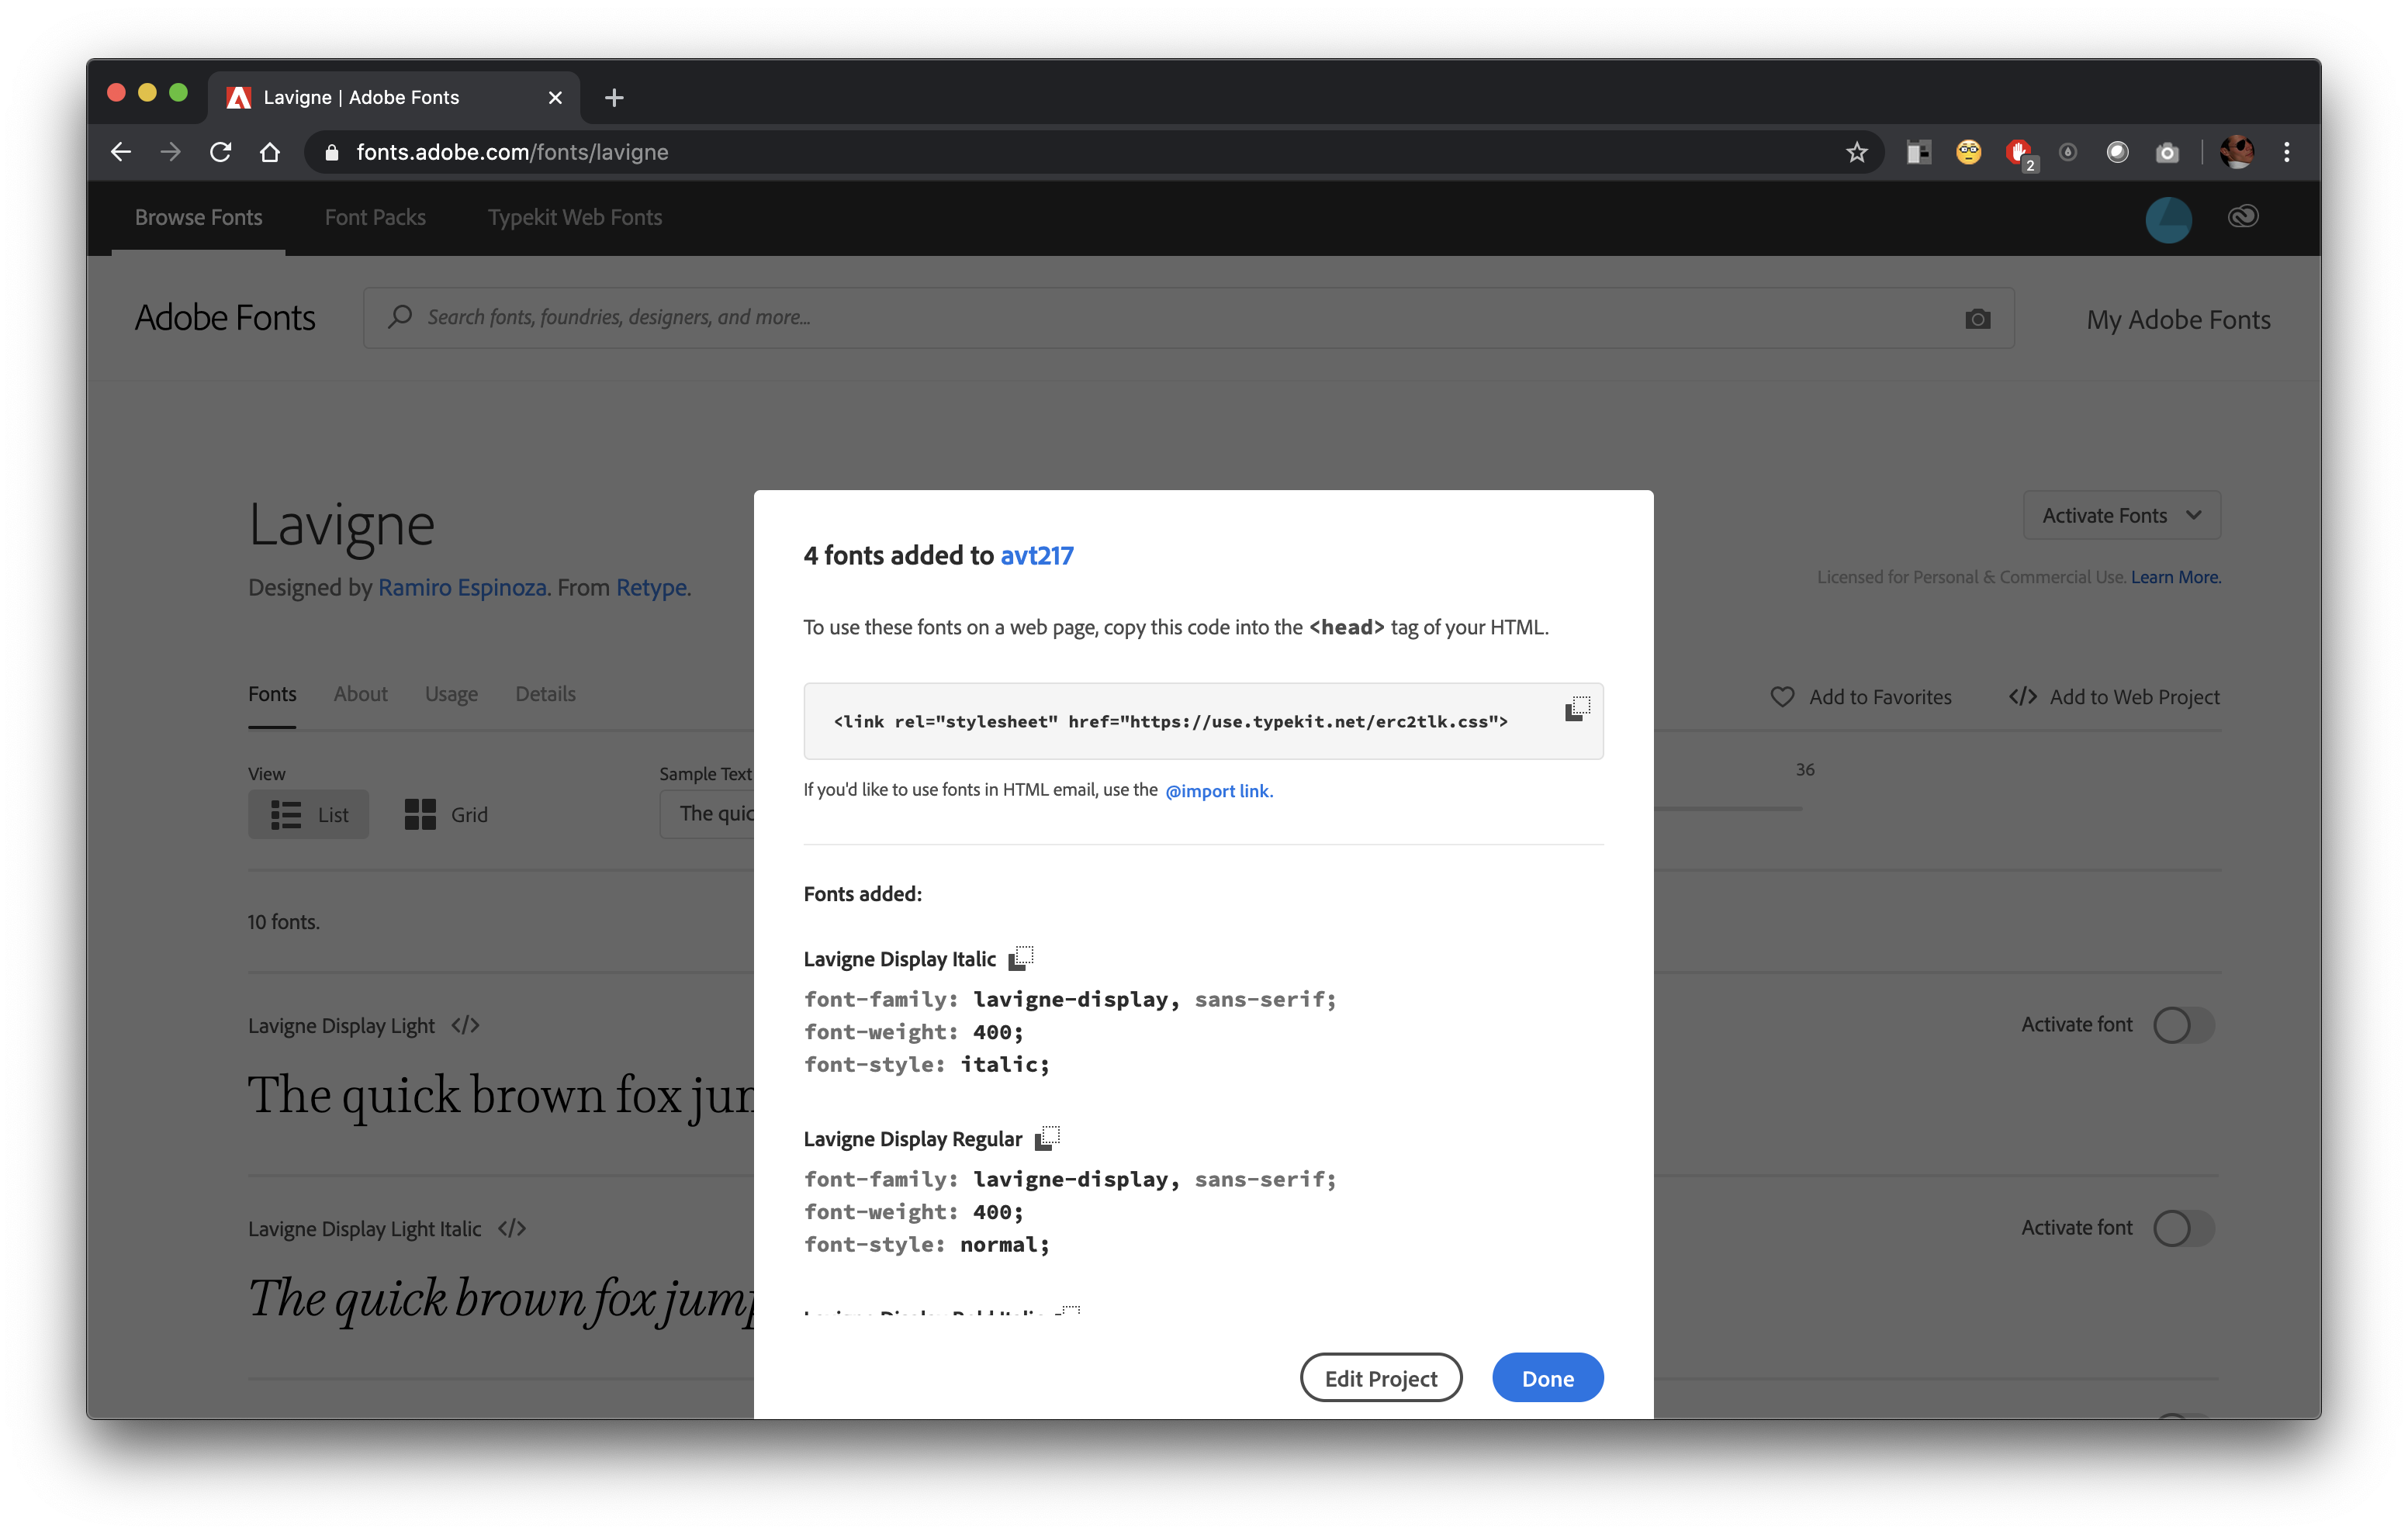
Step 4d: Copy Link and Paste in HTML Document
Copy the link element code and paste it into the head of your index.html file.
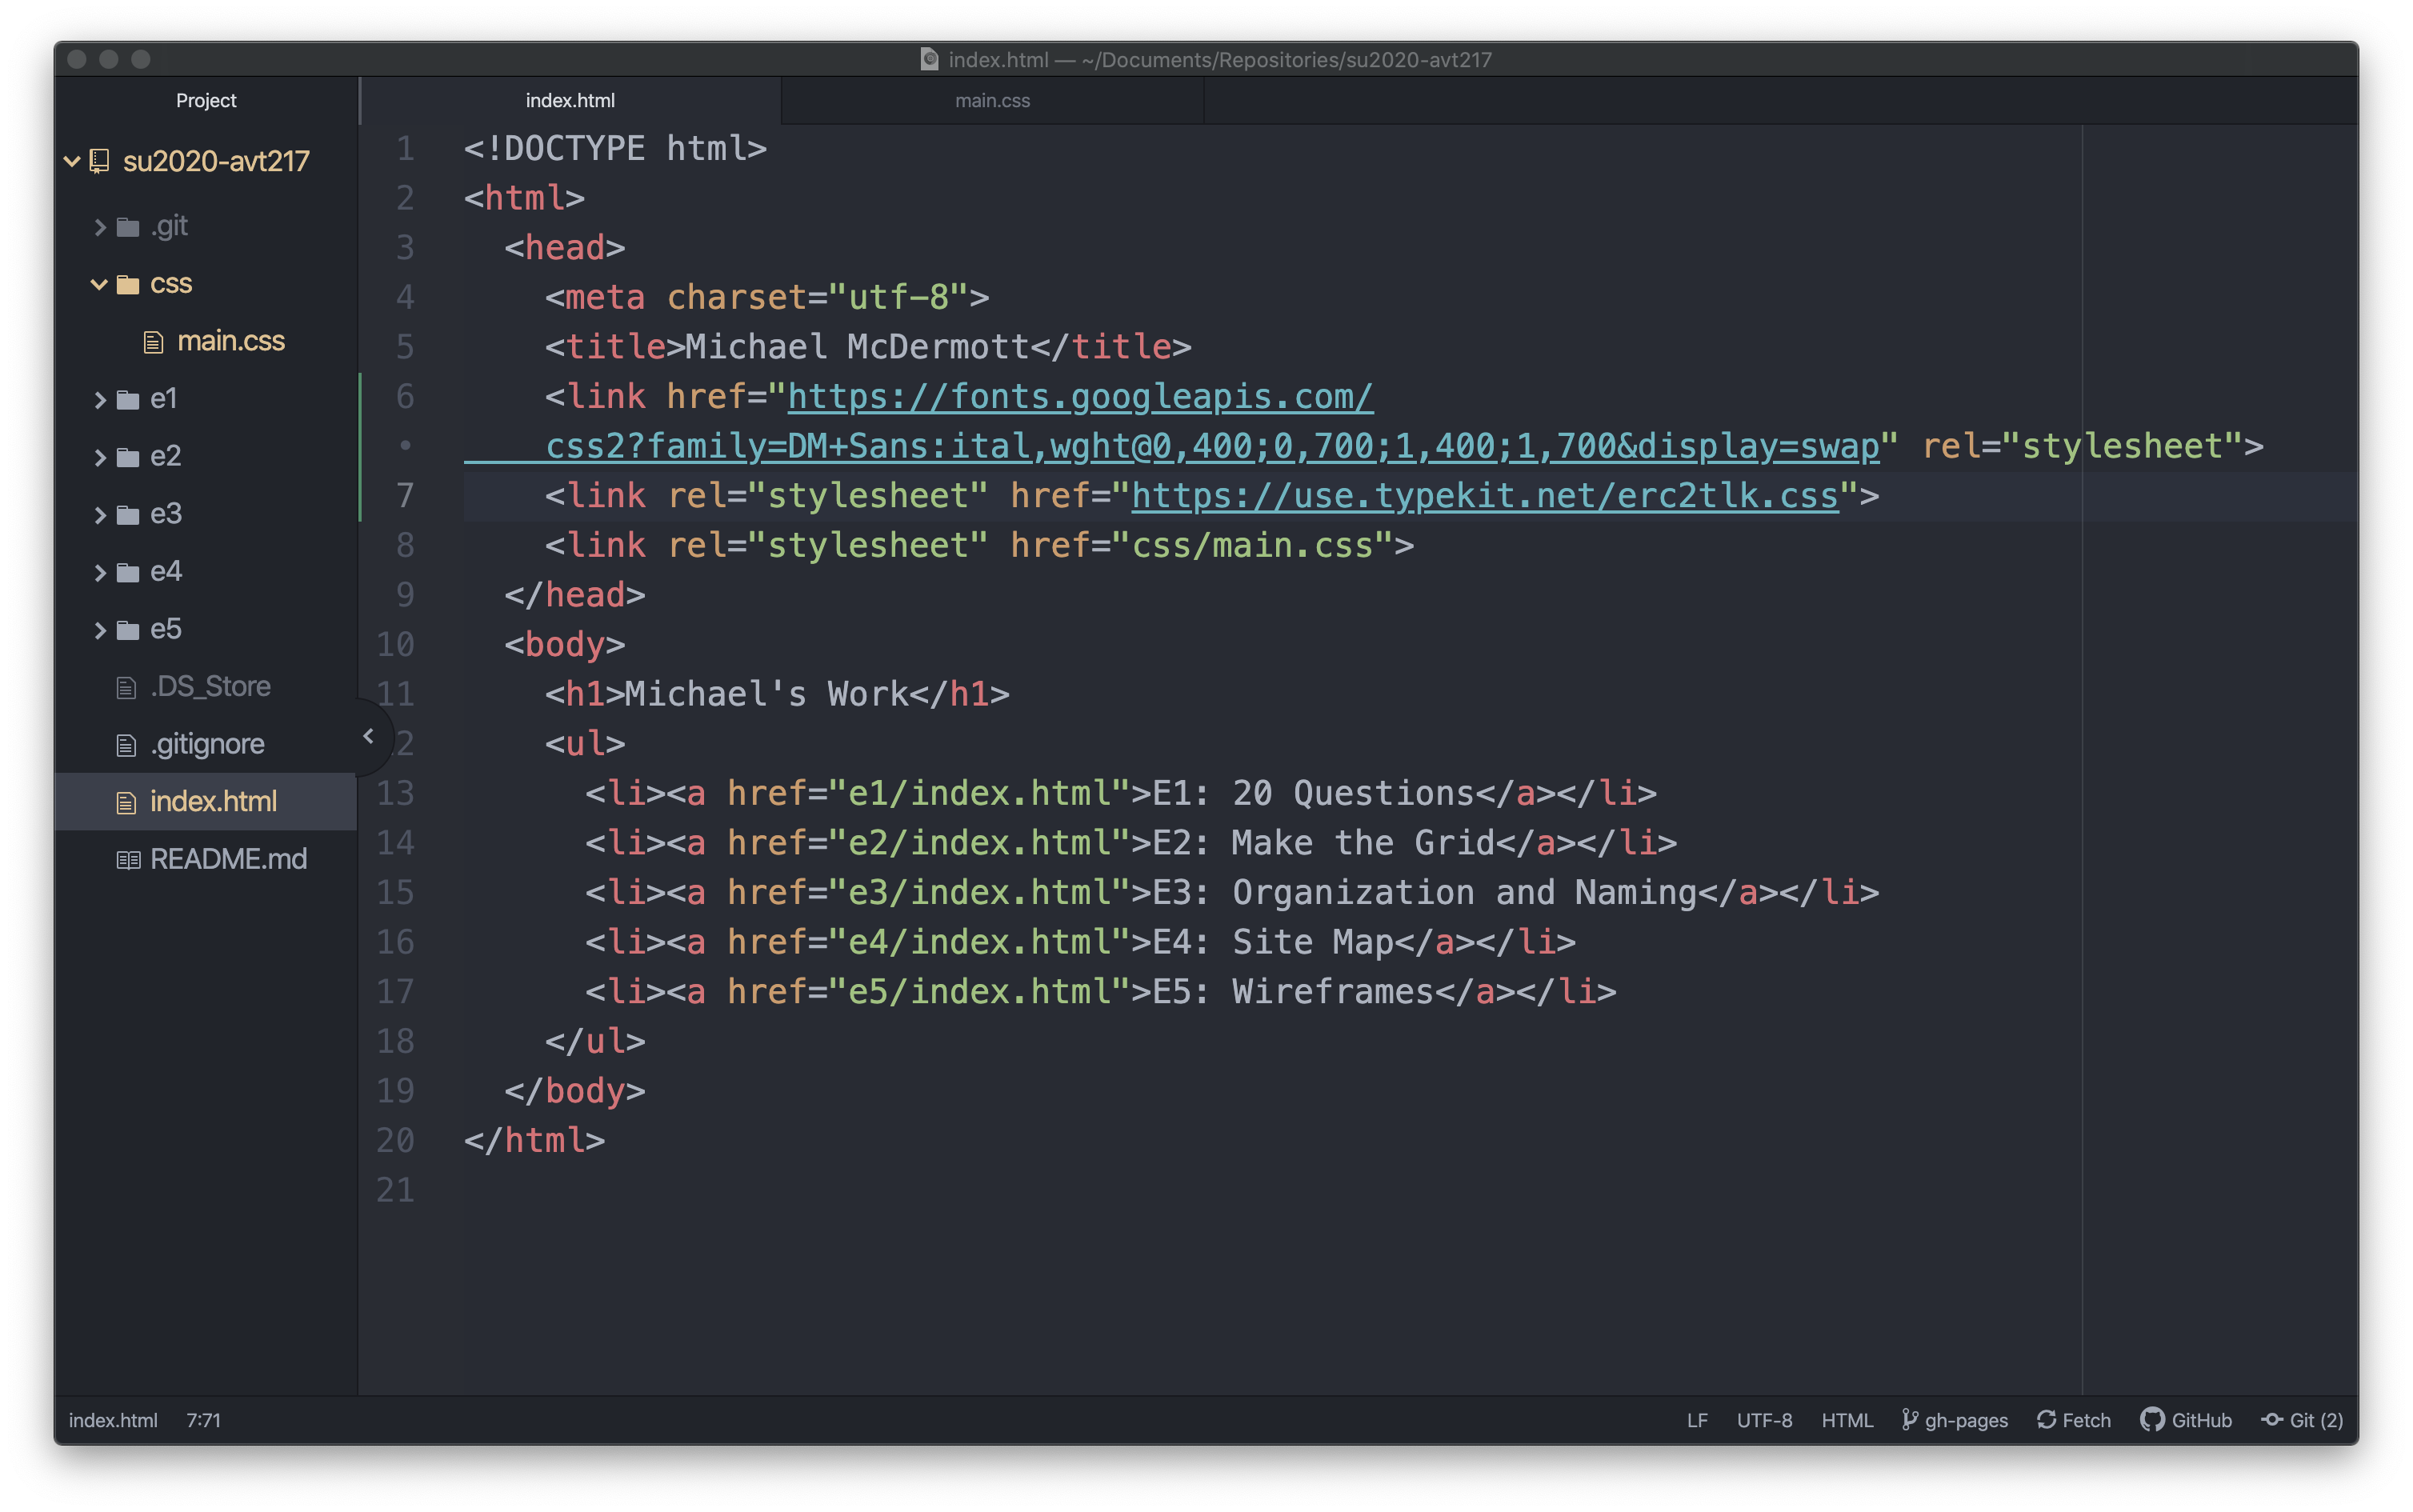
Step 4e: Copy CSS and Paste in CSS Document
The CSS code is a little more detailed here than it was on Google. The difference being Adobe is giving you more than you might need and Google is assuming you know how to change the weight or style on your own. The main thing to copy here is the font-family declaration. Once you have that copied, go back to your CSS file and make a new style rule. Depending on where you added the Google font you selected, do the opposite with this one. So if you added the Google font to the heading elements, add this to the li elements. If you added the Google font to the body you can add this one to the heading elements or the li elements and it will override the body declaration.
I’m going to add it to my h1 element. Because using h1 as the selector is more specific than the body selector, this font-family will override the font-family for the body.
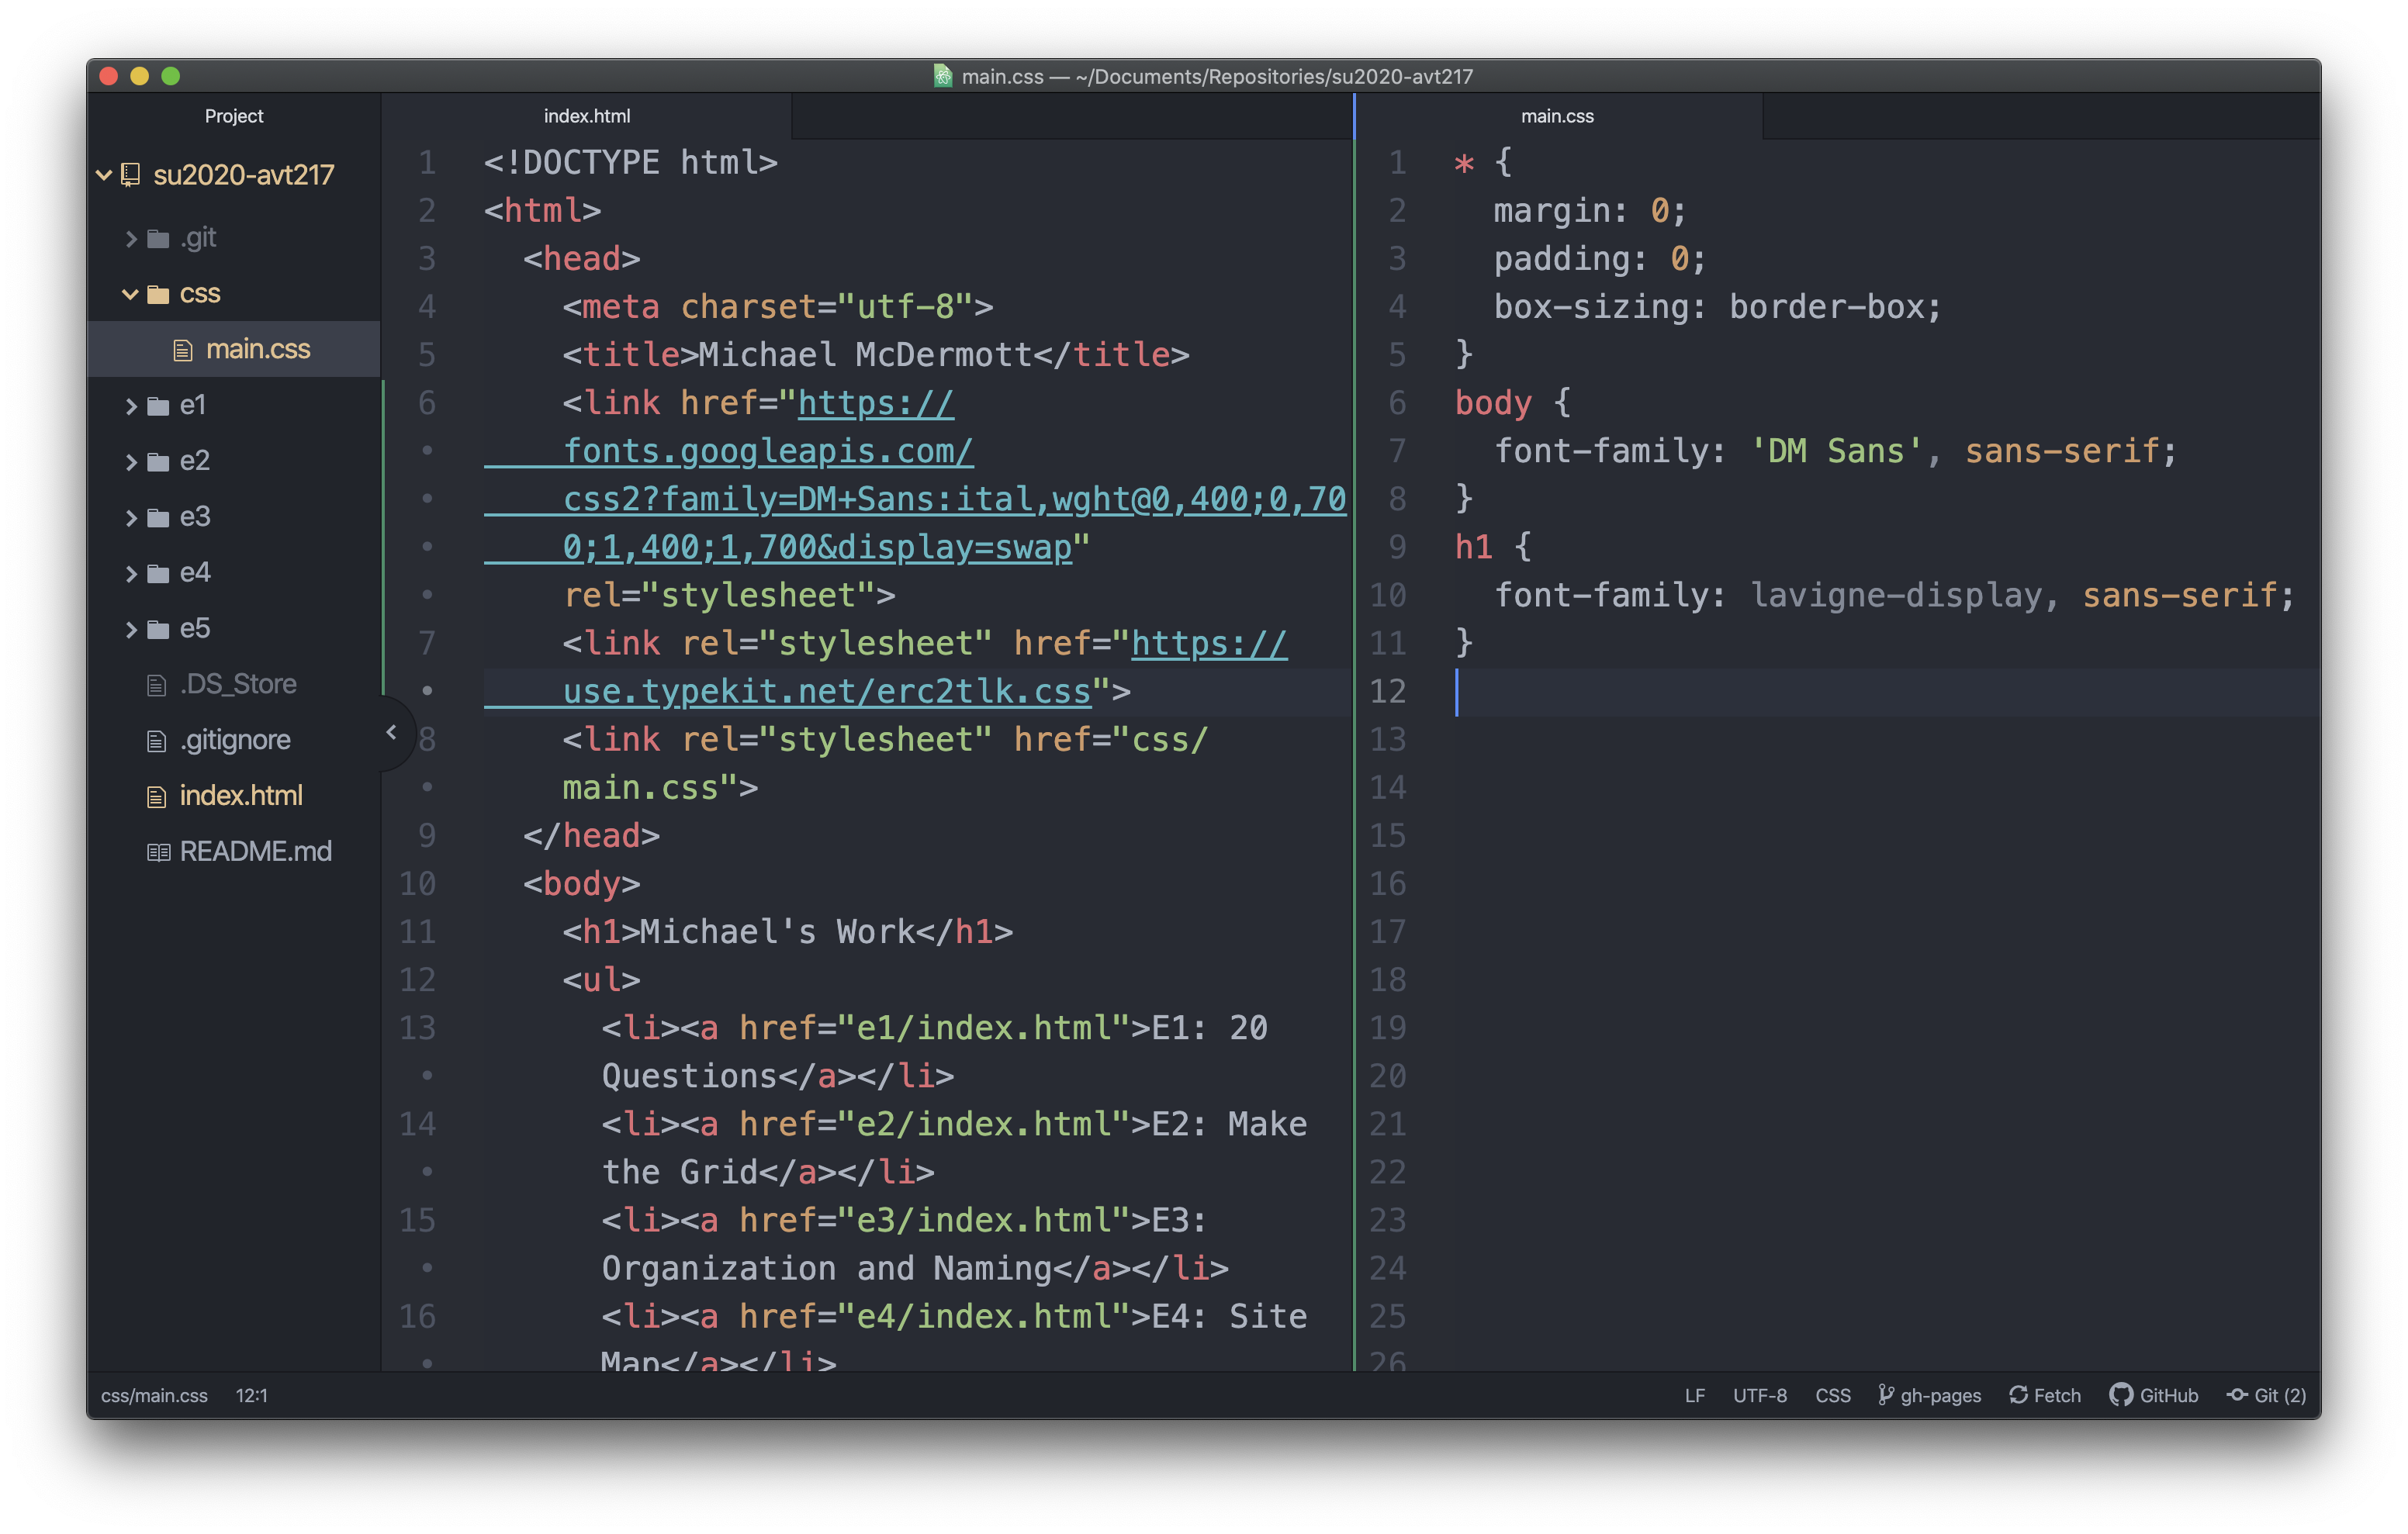
I’m also going to add a few extra styles to this page to make the type a little bigger, style the list and links a little, give it some margins so it isn’t smashed up against the edges of the browser window, and add a little color.
Step 5: Save and Preview Again
Make sure both your HTML and CSS files are saved and then preview your HTML file again. Hopefully the font on the page should change to the new font you selected. If it doesn’t, go back and make sure you pasted the whole link element in the head of your document and that you pasted the font-family styles into your CSS file correctly.

Look at the class repository to see the styles I used to get the page to look like that if you are interested.
Note: The two link elements that you pasted in the head of your HTML file need to exist in the head of every HTML file where you want to use those fonts.