3. Your Homepage
This tutorial will get the homepage of your repository setup to be an archive of the work you are creating for this class.
Step 1: Set up the HTML file
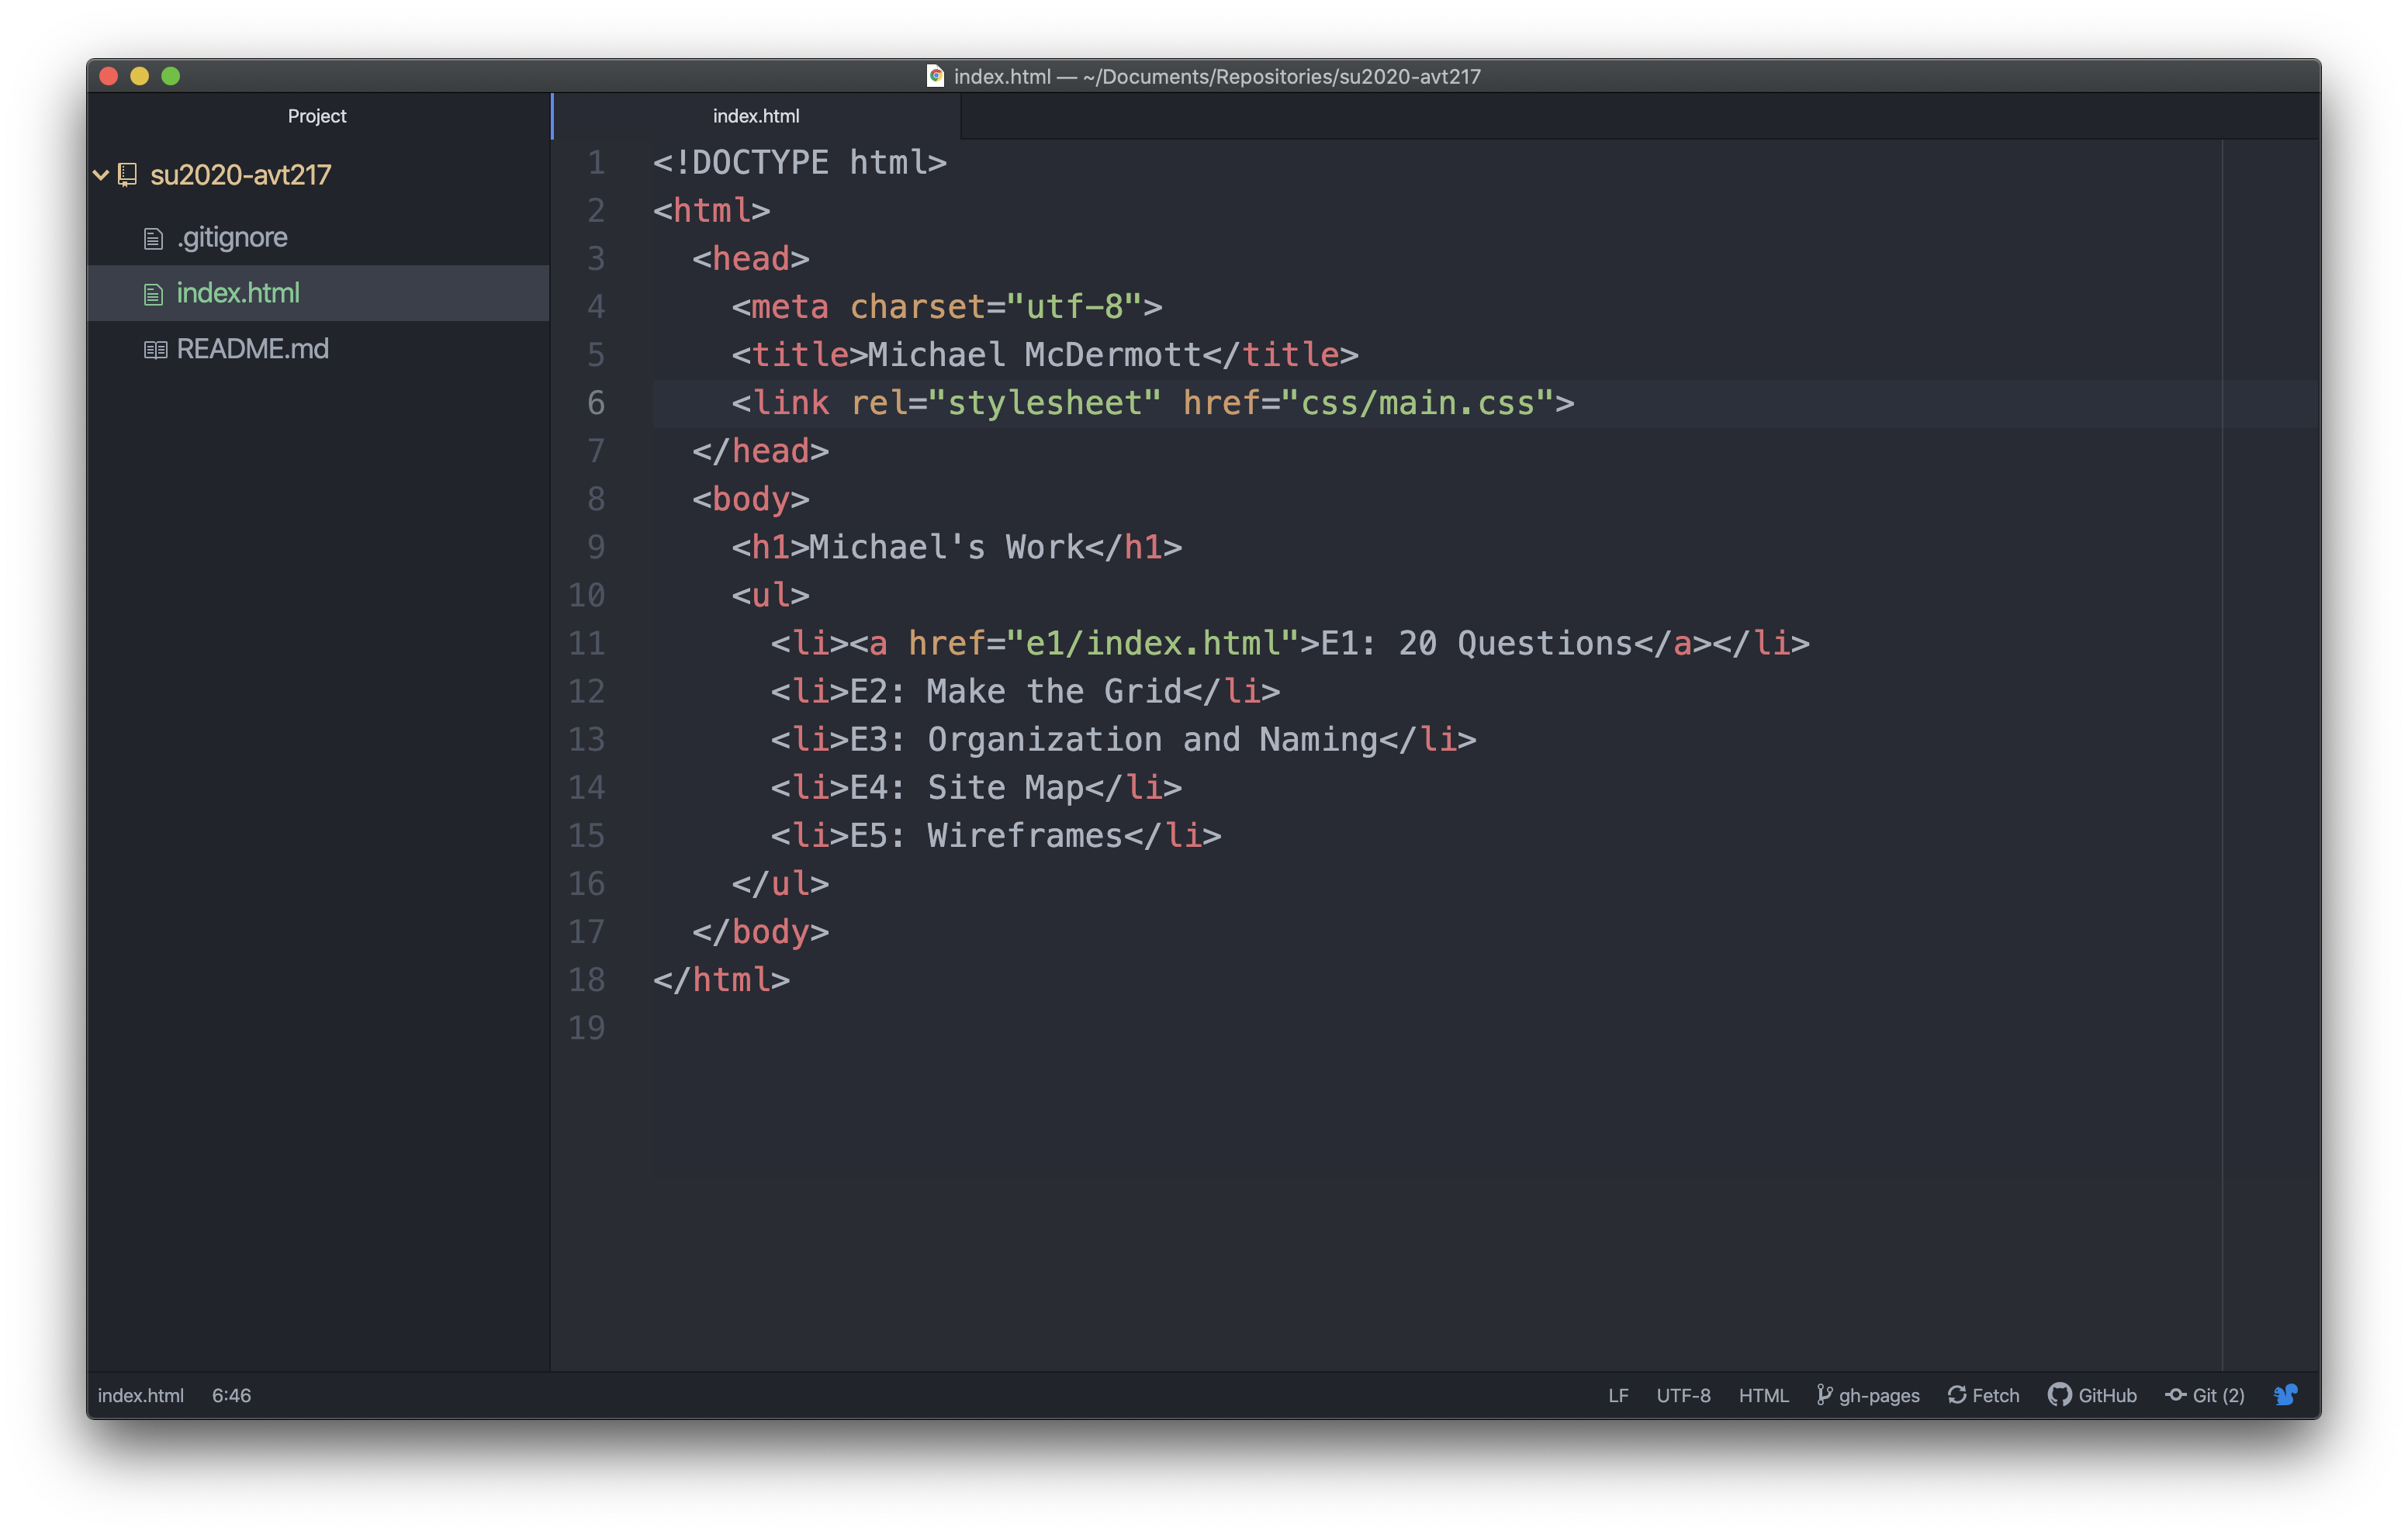
The first step is opening up your text editor, creating a new file, and saving it in the root directory of your repository as index.html. Once you have done that add in the basic HTML set up (steps 1 through 6 of tutorial 1). Make sure you make the text in the title element is something useful. At the end your file should look something like the image below.

Step 2: Adding Content
Now that the file is set up you can add some content. This page is going to be a list of links to the work for the class. It should have some large text at the top to give the page a title and then a bunch of links underneath that. All of this content is going to go in the body element.
Step 2a: Add your main heading
Start with a title for your page using the h1 element. Something like <h1>Michael's Work</h1> or some other way to identify this page as yours.

Step 2b: Add an Unordered List
There are a lot of different ways to add links to a document. Since this going to be a list of links and we want to markup the document semantically, a list element makes sense. A list with numbers next to it isn’t important here so use an unordered list element, <ul>...</ul>. Add the opening tag for the unordered list on the line beneath the h1 element and the closing tag for the unordered list two lines beneath that. This leaves space to add a list item inside the unordered list. All of the elements inside the body element are at the same indent level so far.

Step 2c: Add a List Item
The text inside a list is all contained in the list item element, <li>...</li>. On the line between the opening and closing tags for the unordered list, add a list item with some text that identifies this list item as Exercise 1, something like, “E1: 20 Questions”. Note that this li element is indented another level because it is a child of the ul element. Also a good time to save, cmd+s, if you haven’t yet.
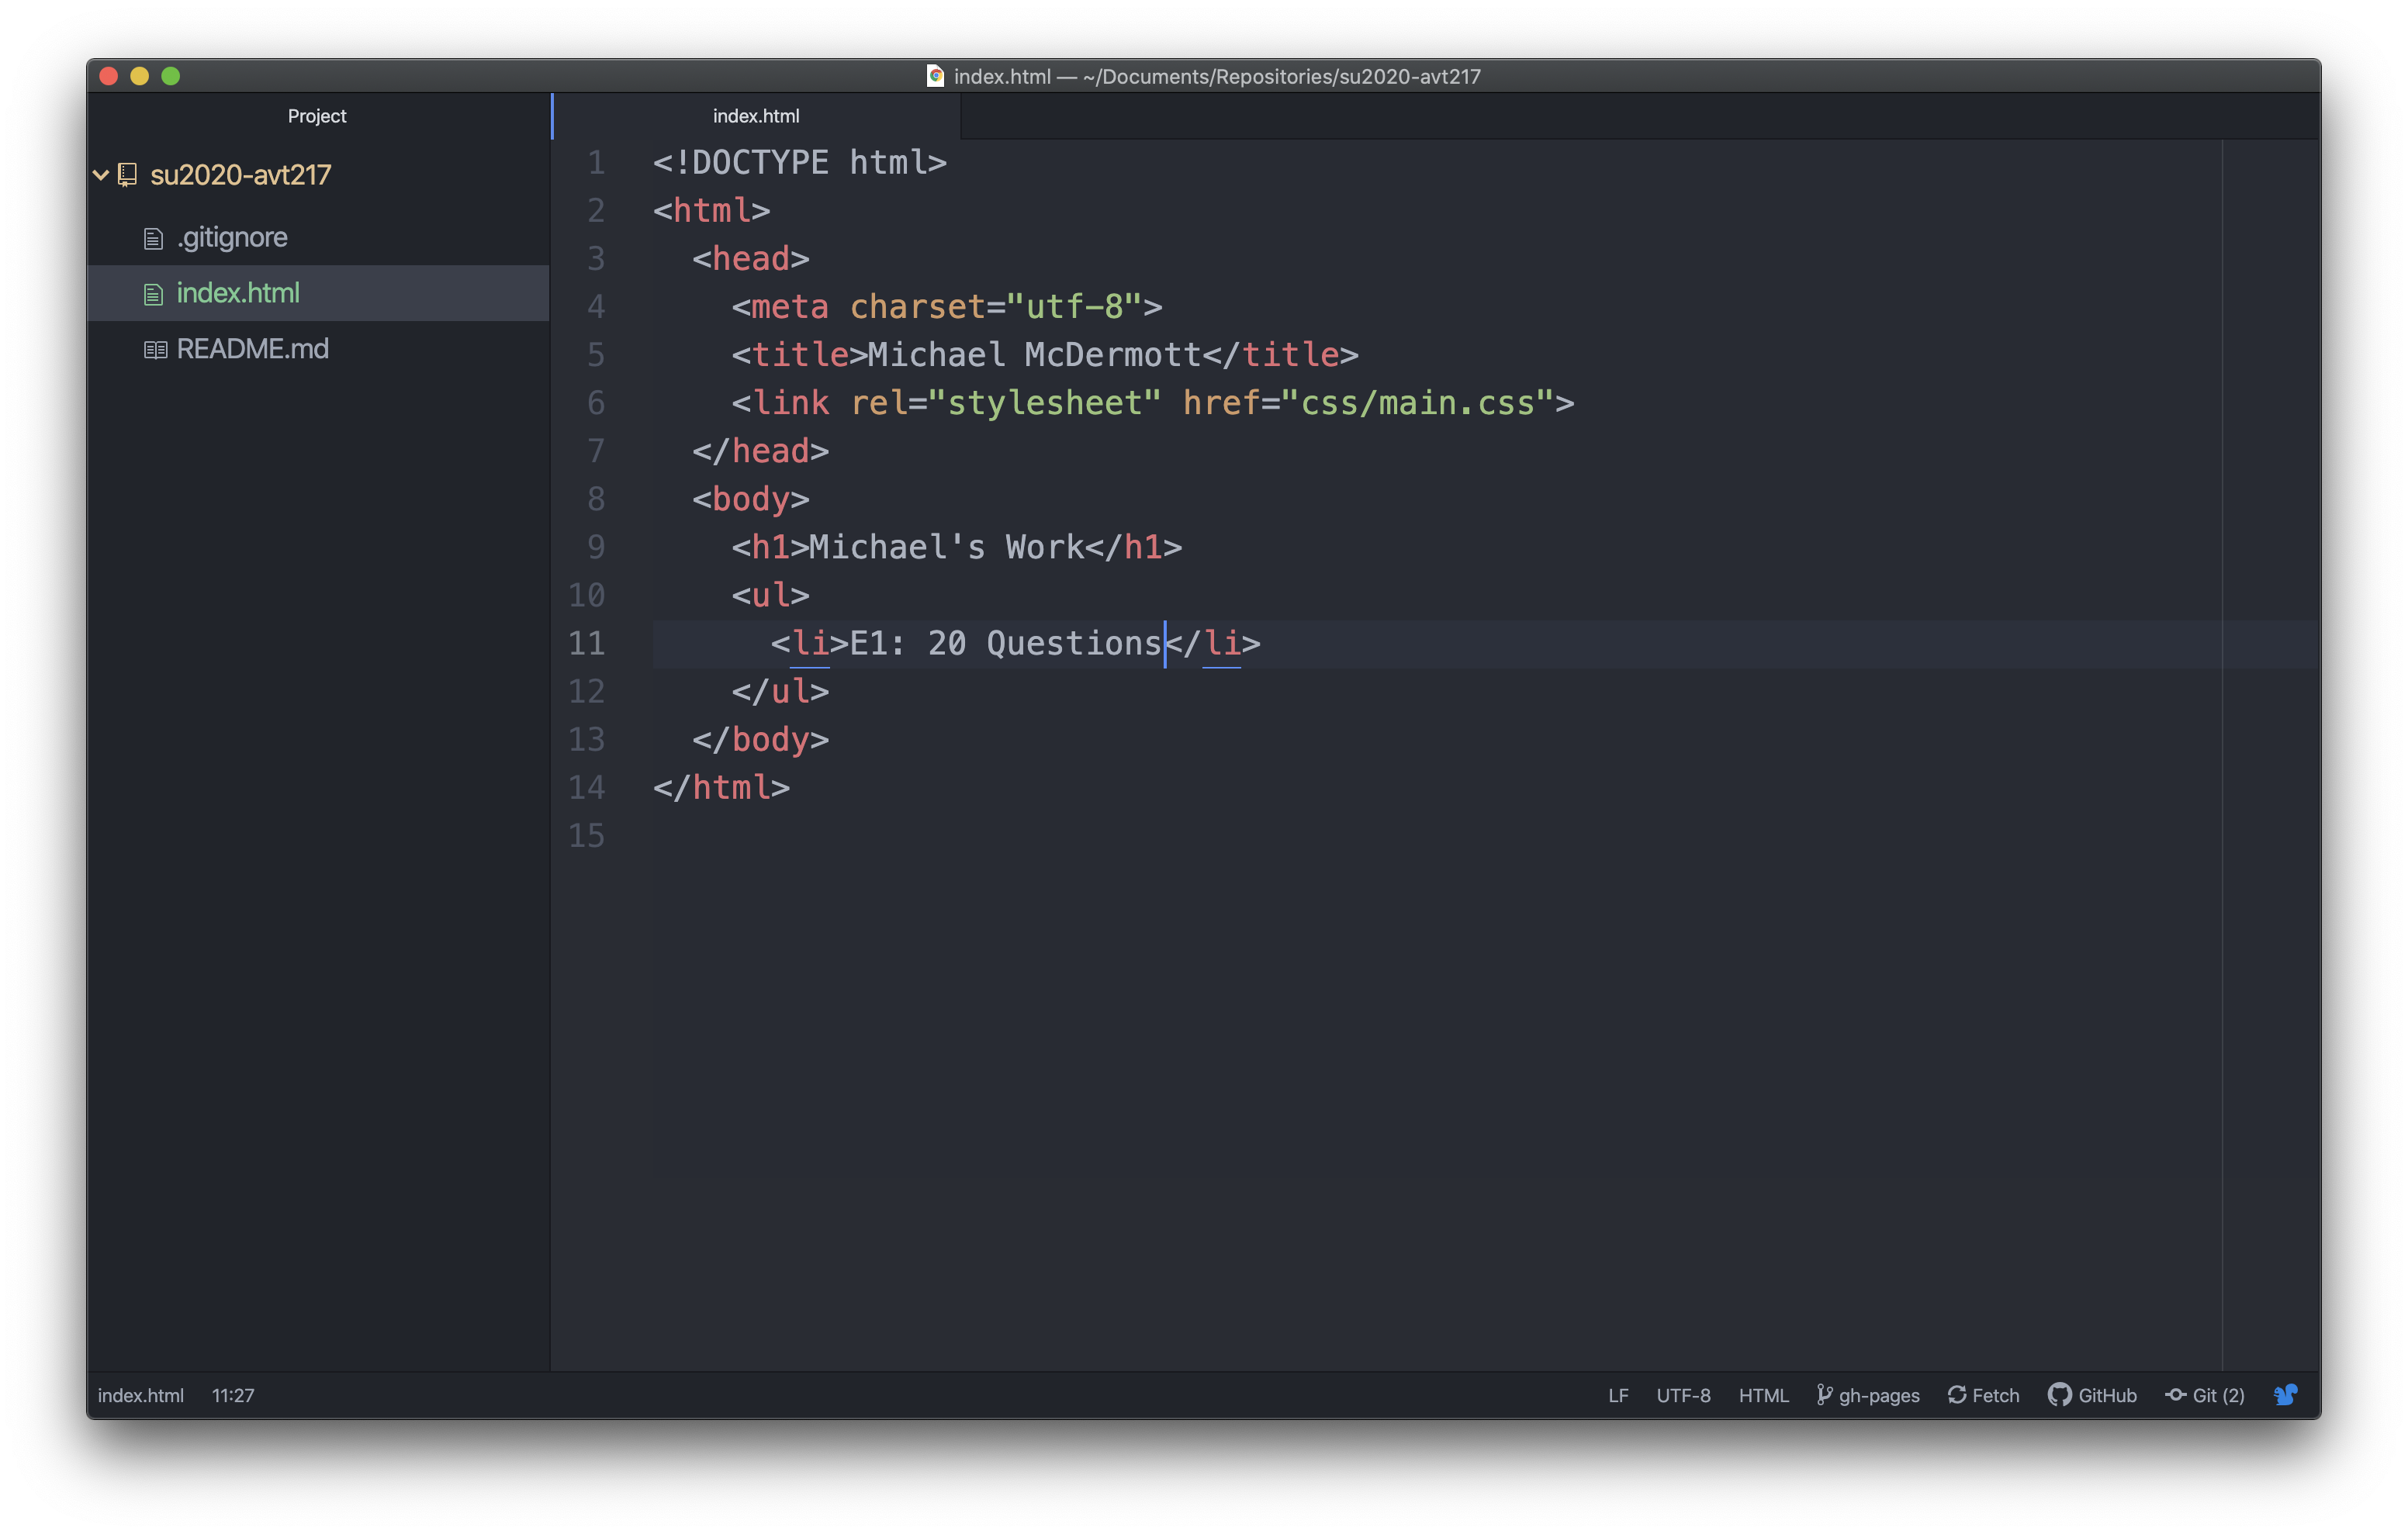
Step 2d: Add More List Items
Add a new line beneath the li for E1 and make an li for E2. Repeat this process until you have list items for E1 through E5. All of these should be at the same level indent as the first li because they are all children of the ul element. Don’t forget to save.
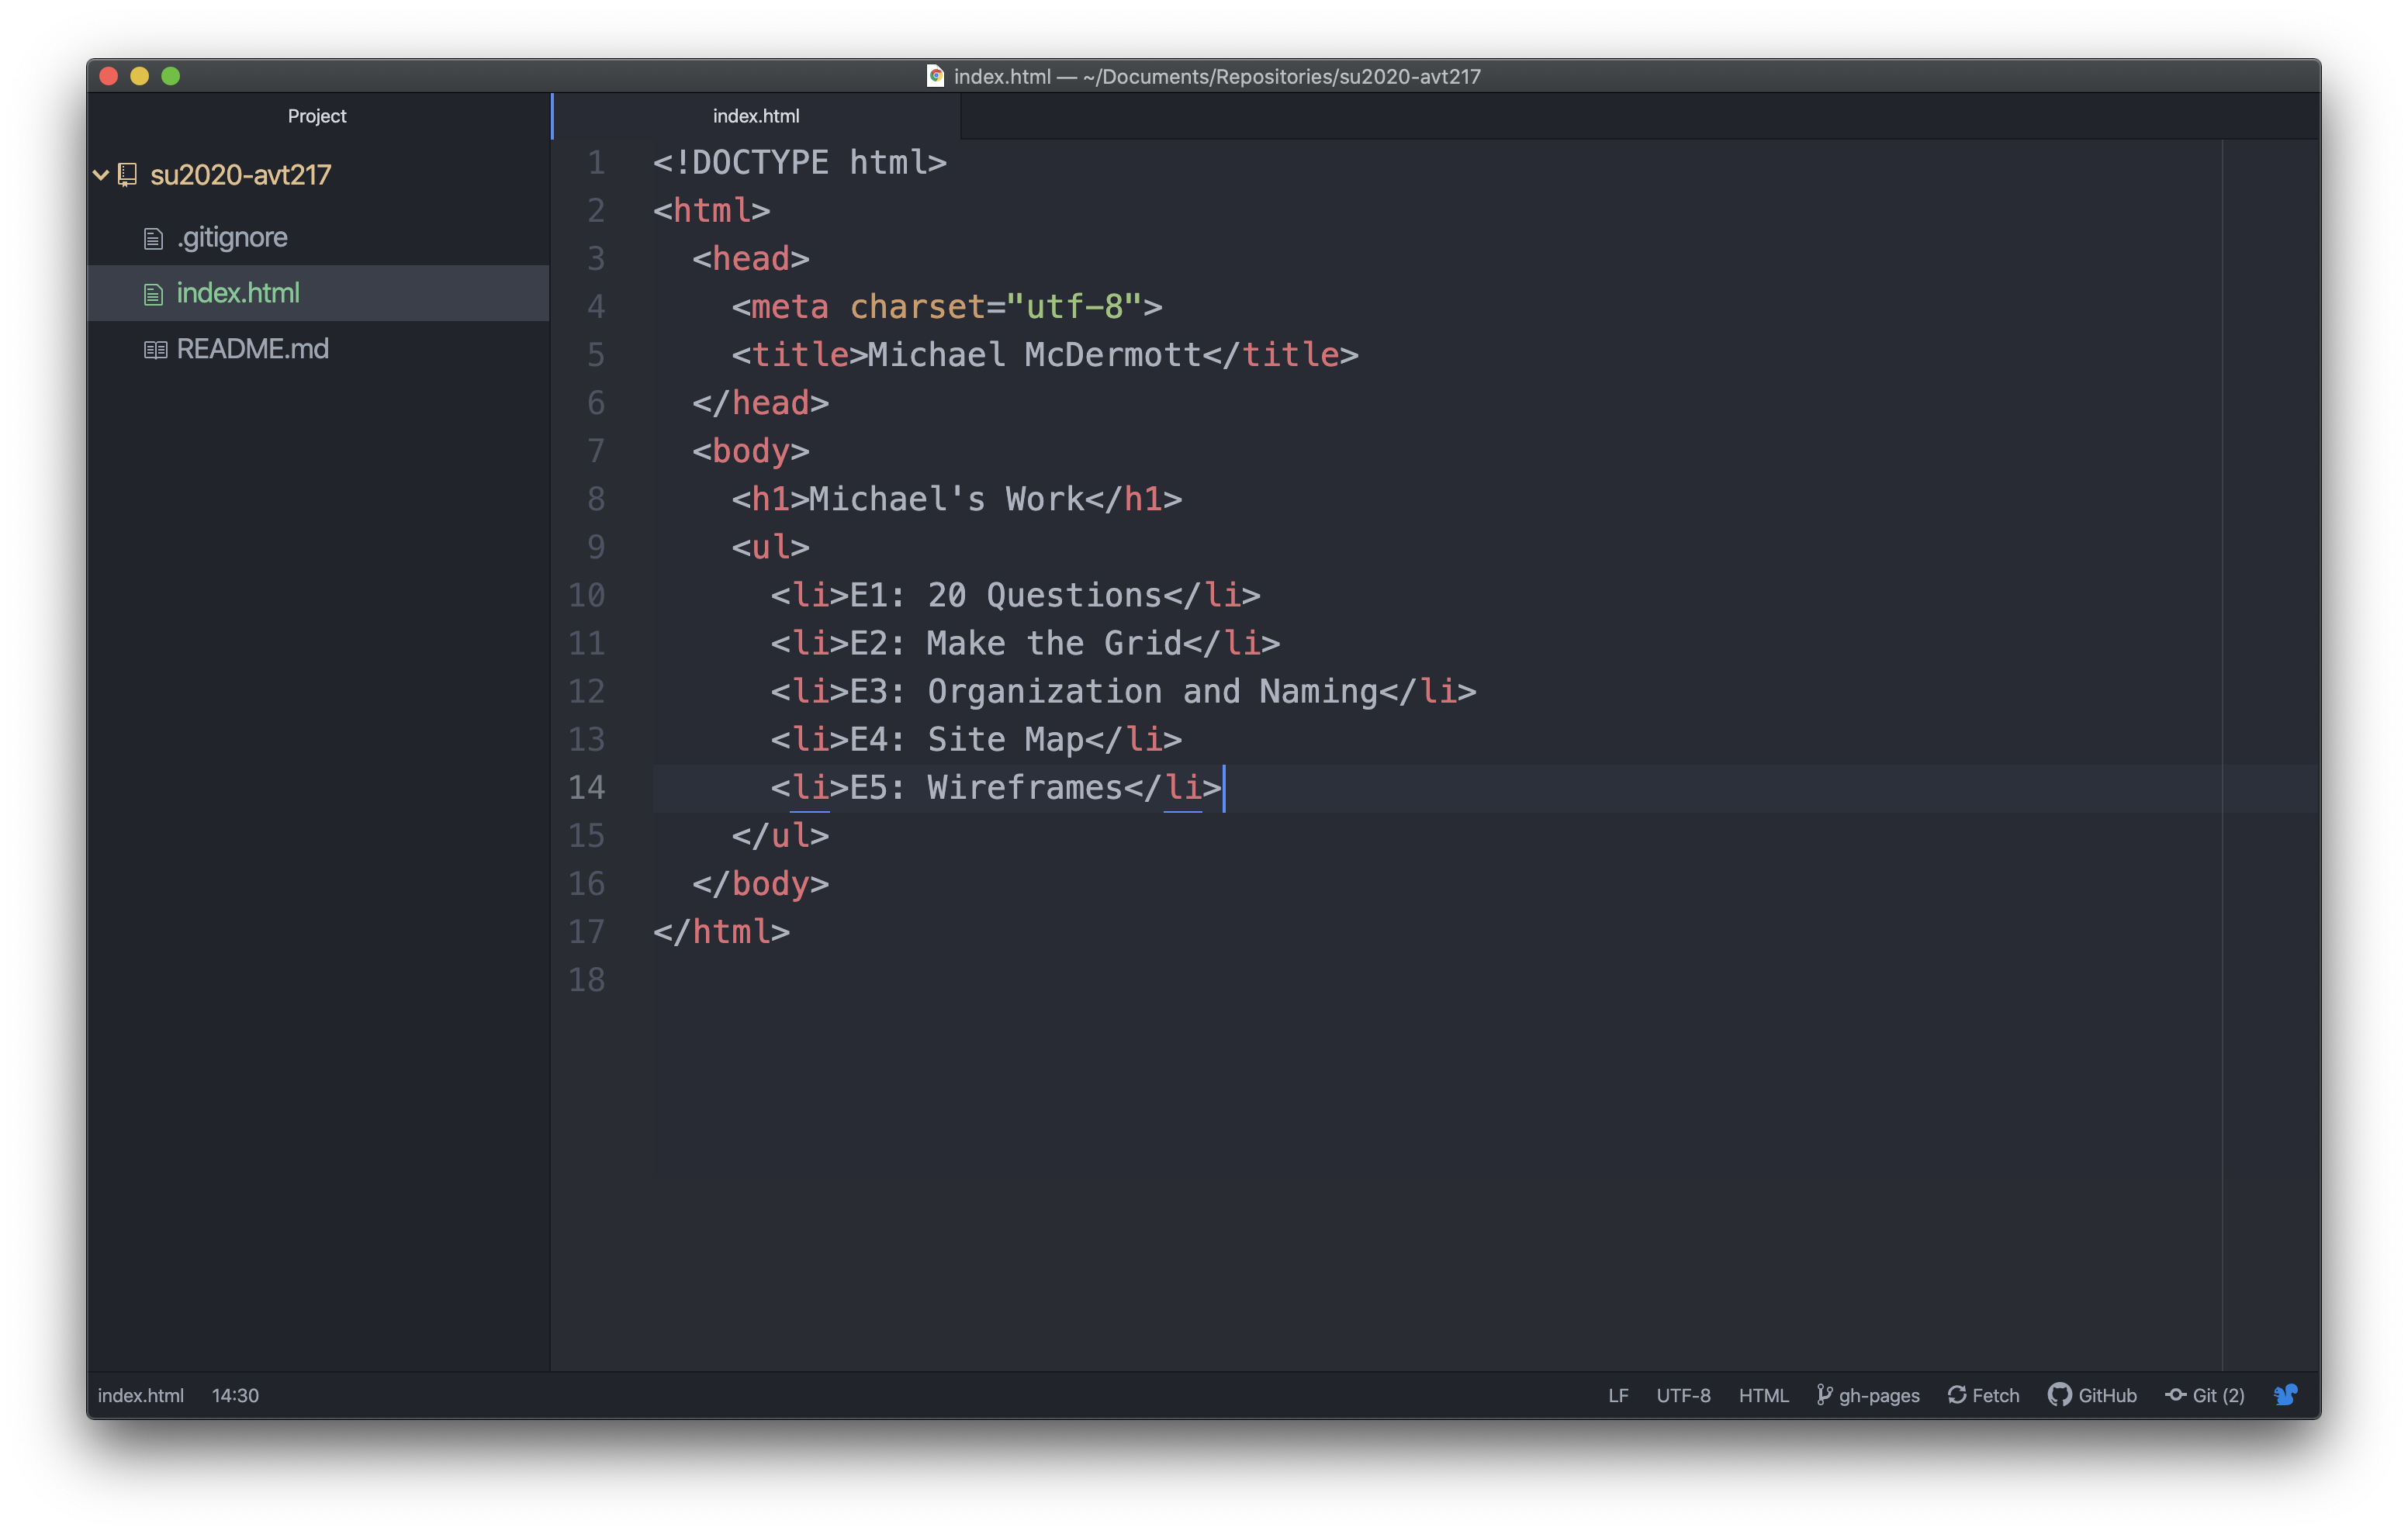
Step 3: Add Links
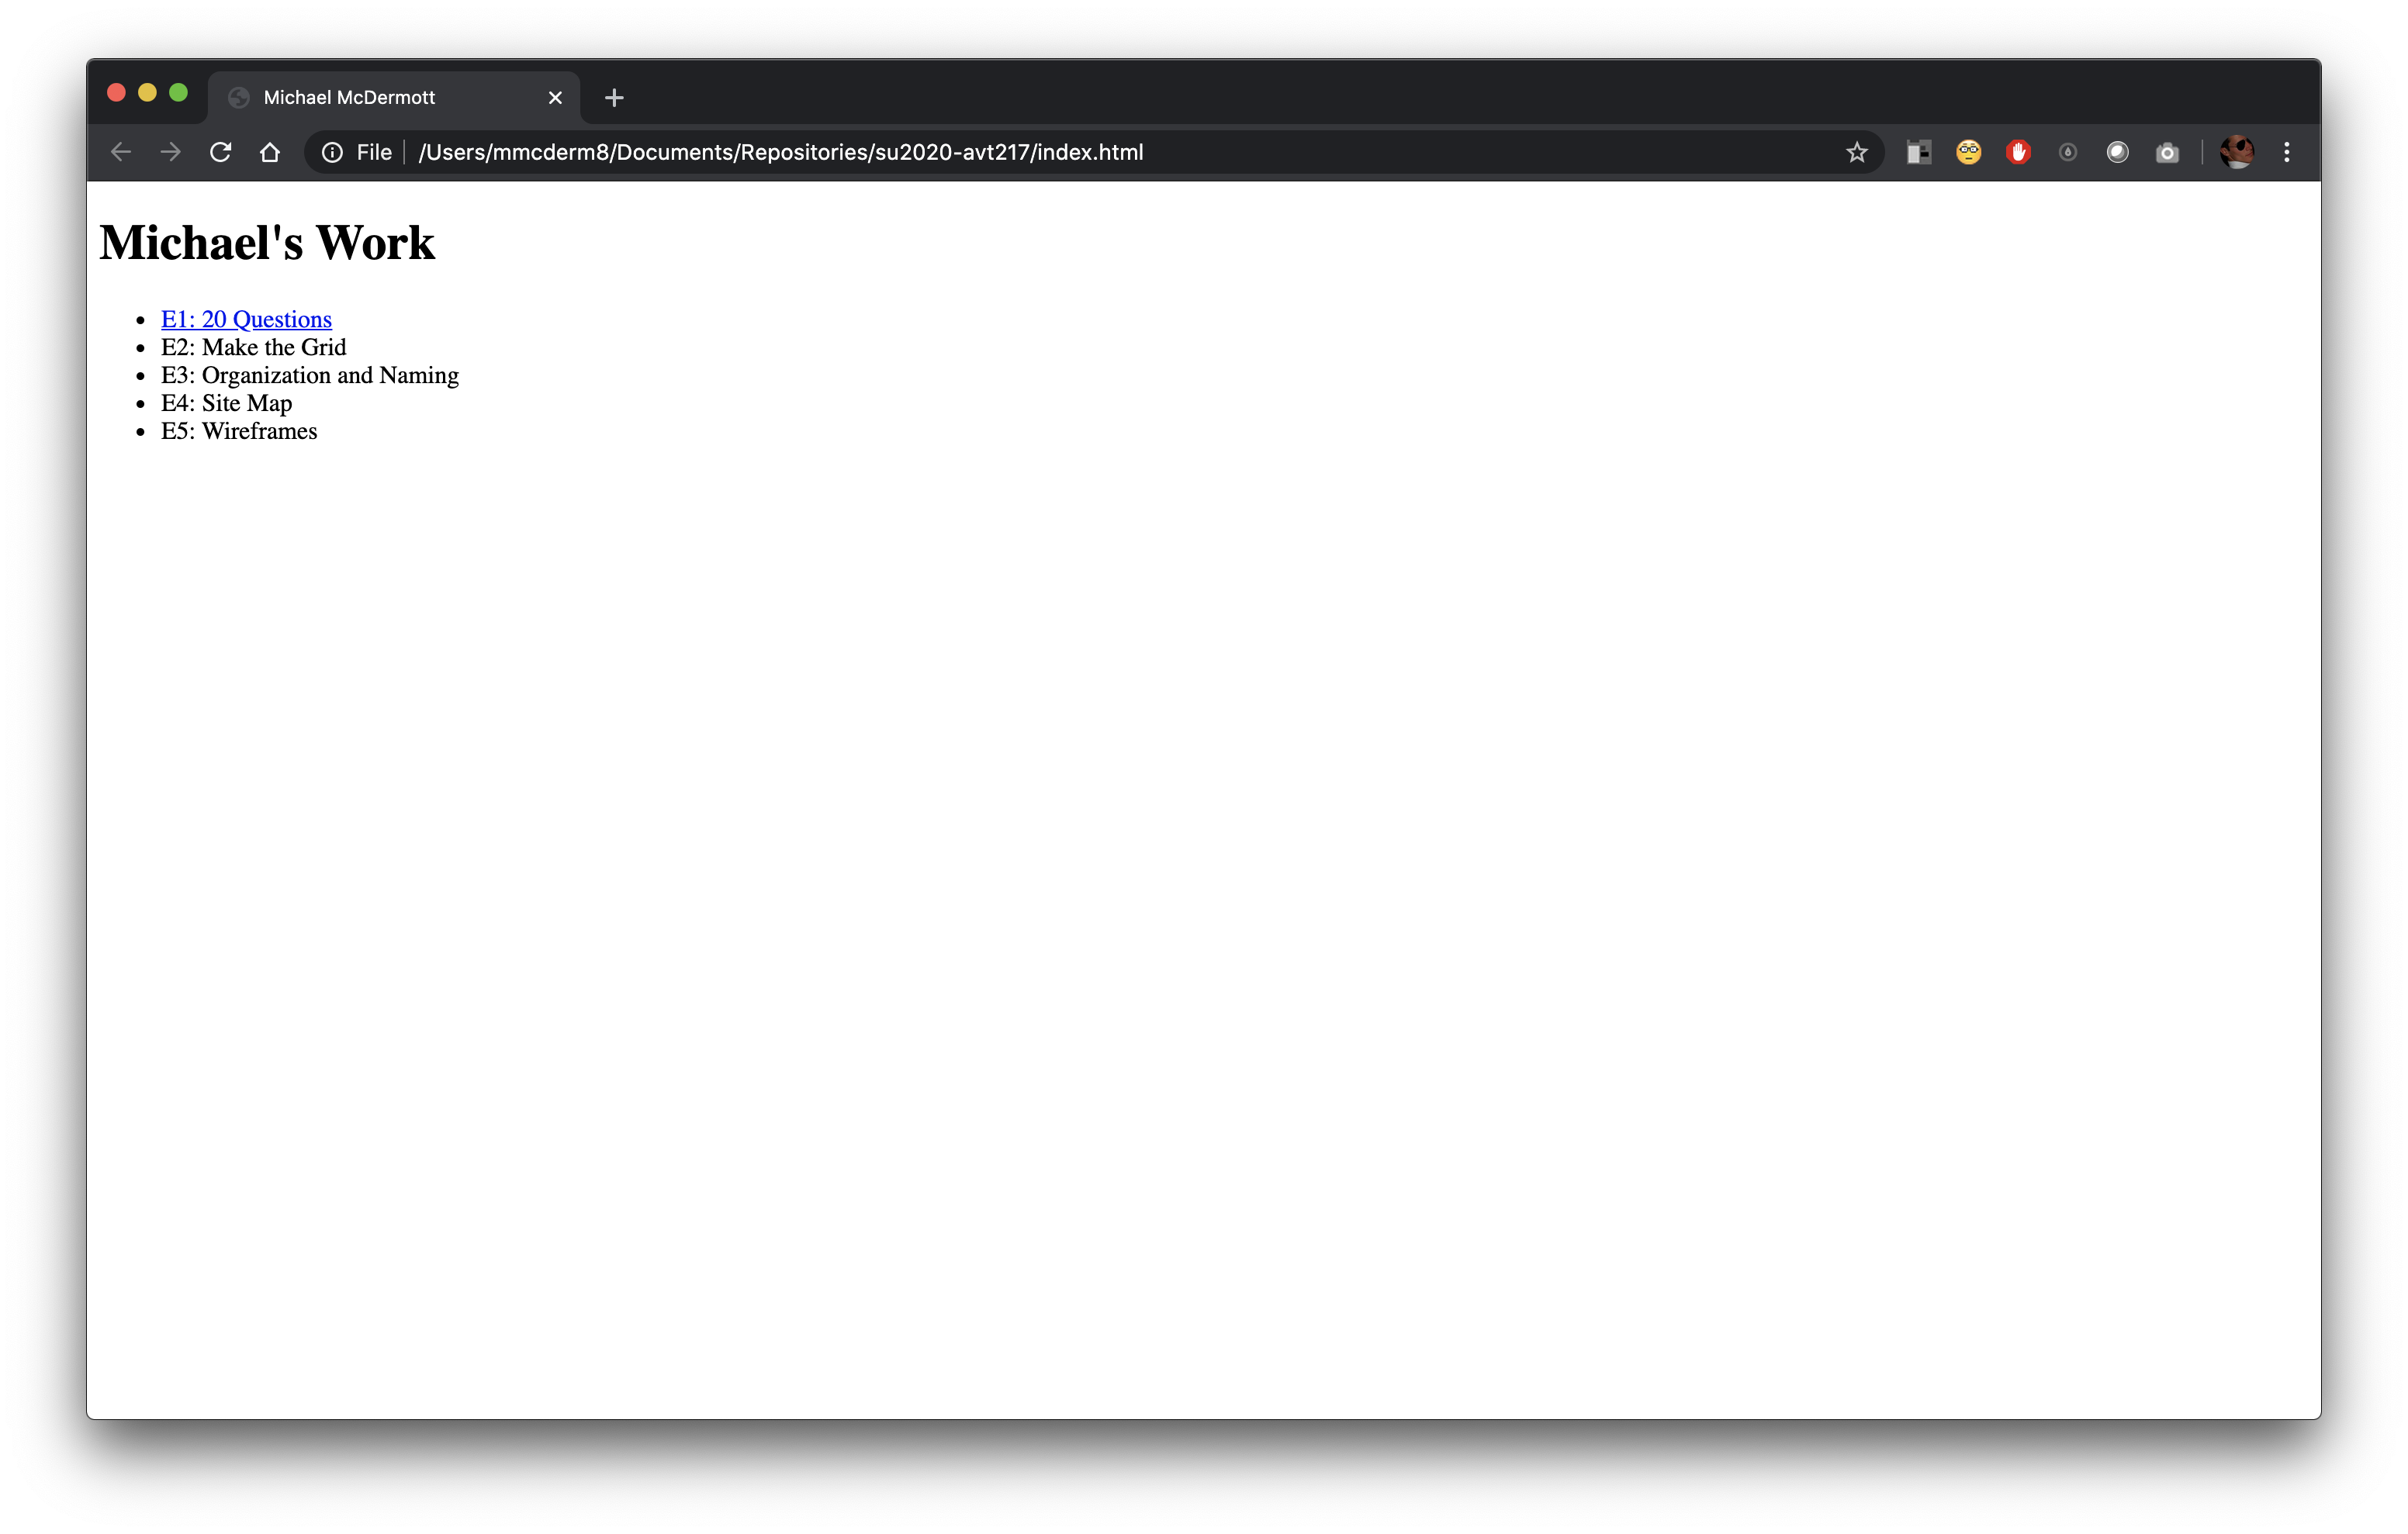
If you haven’t previewed the page yet you might want to. You should have something that looks like:

This works to show what the work is but the we can’t click on anything to take us to the work. To make that happen we need to add some anchor elements, <a>...</a>.
Step 3a: Wrap List Item Text in an Anchor Element
Put your cursor between the opening tag and the content for the first list item you have. That means the cursor should be after <li> and before “E1…”. Add the opening tag for the anchor element here. At the end of the text but before the closing tag for the list item add the closing tag for the anchor element.
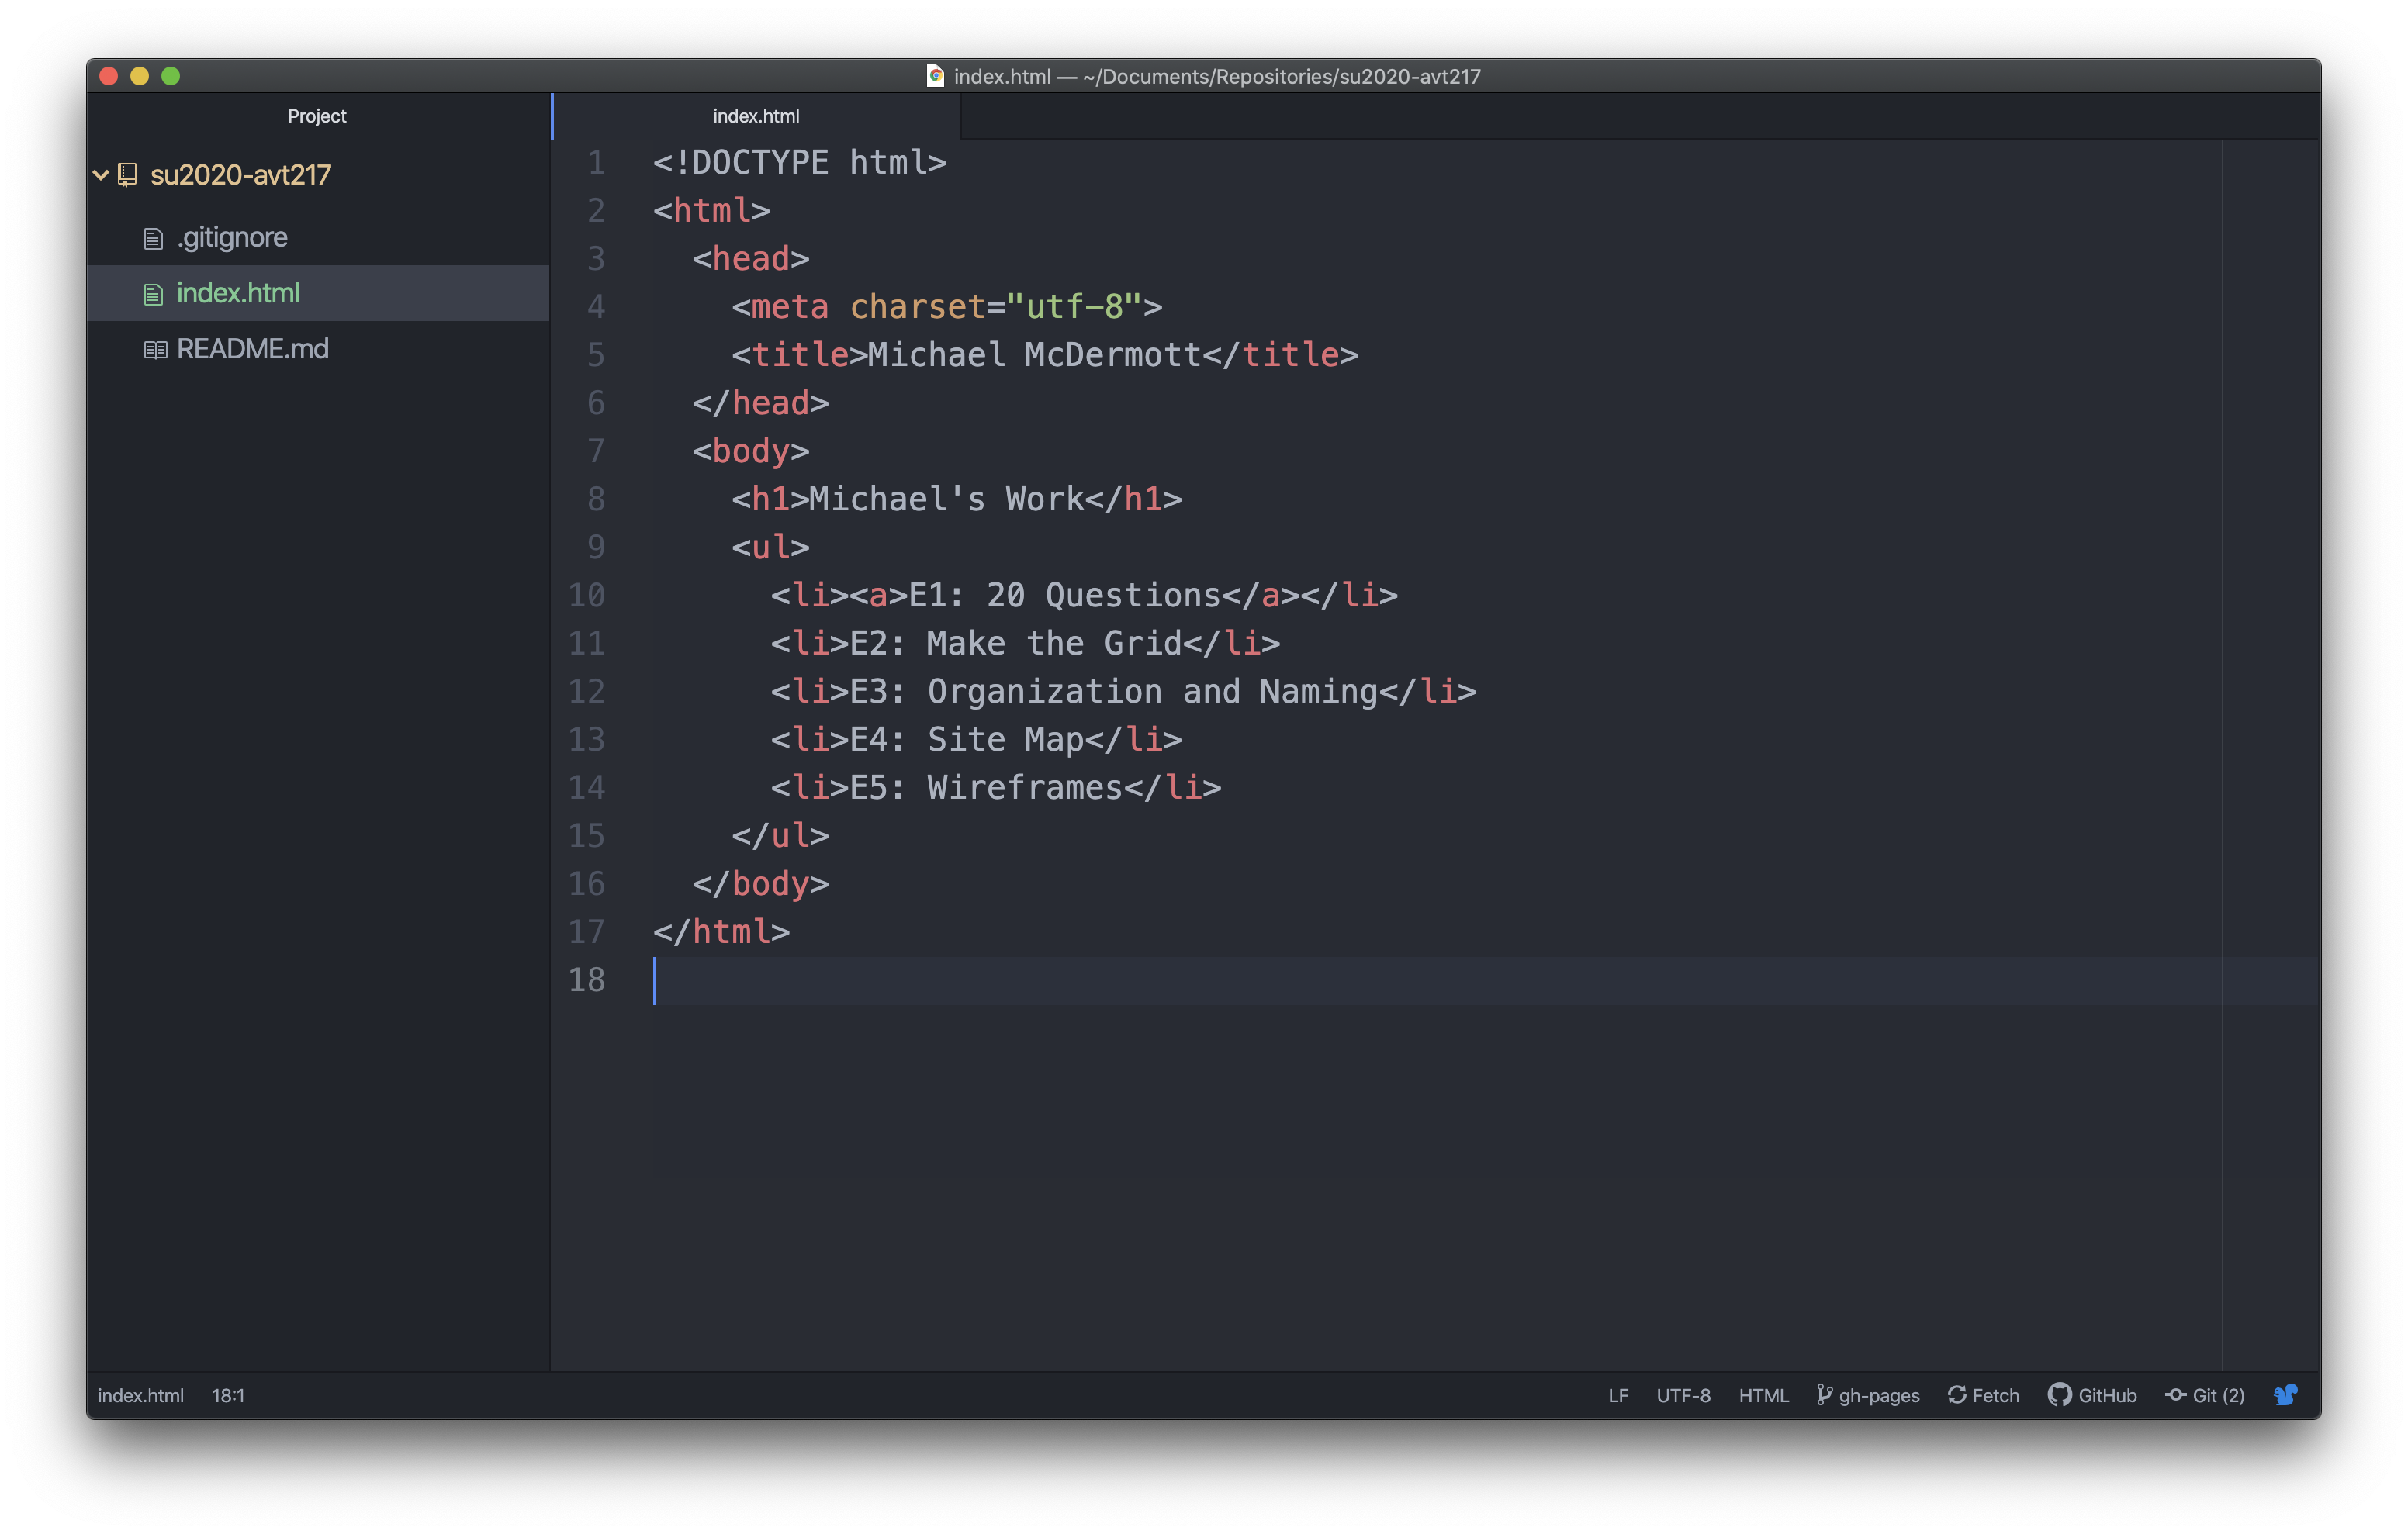
Step 3b: Add an Attribute
Now there is one more part of an anchor element that needs to be added in order for the link to actually work. If you said the href attribute you are correct. In the opening tag for the anchor element but your cursor after the a and before the >. Add a space and then type href="#". The code should look like the first screenshot and if you preview the page the first list item should change to blue with an underline. If you click that link nothing will happen because it doesn’t have a path yet but it should look like the default link now.
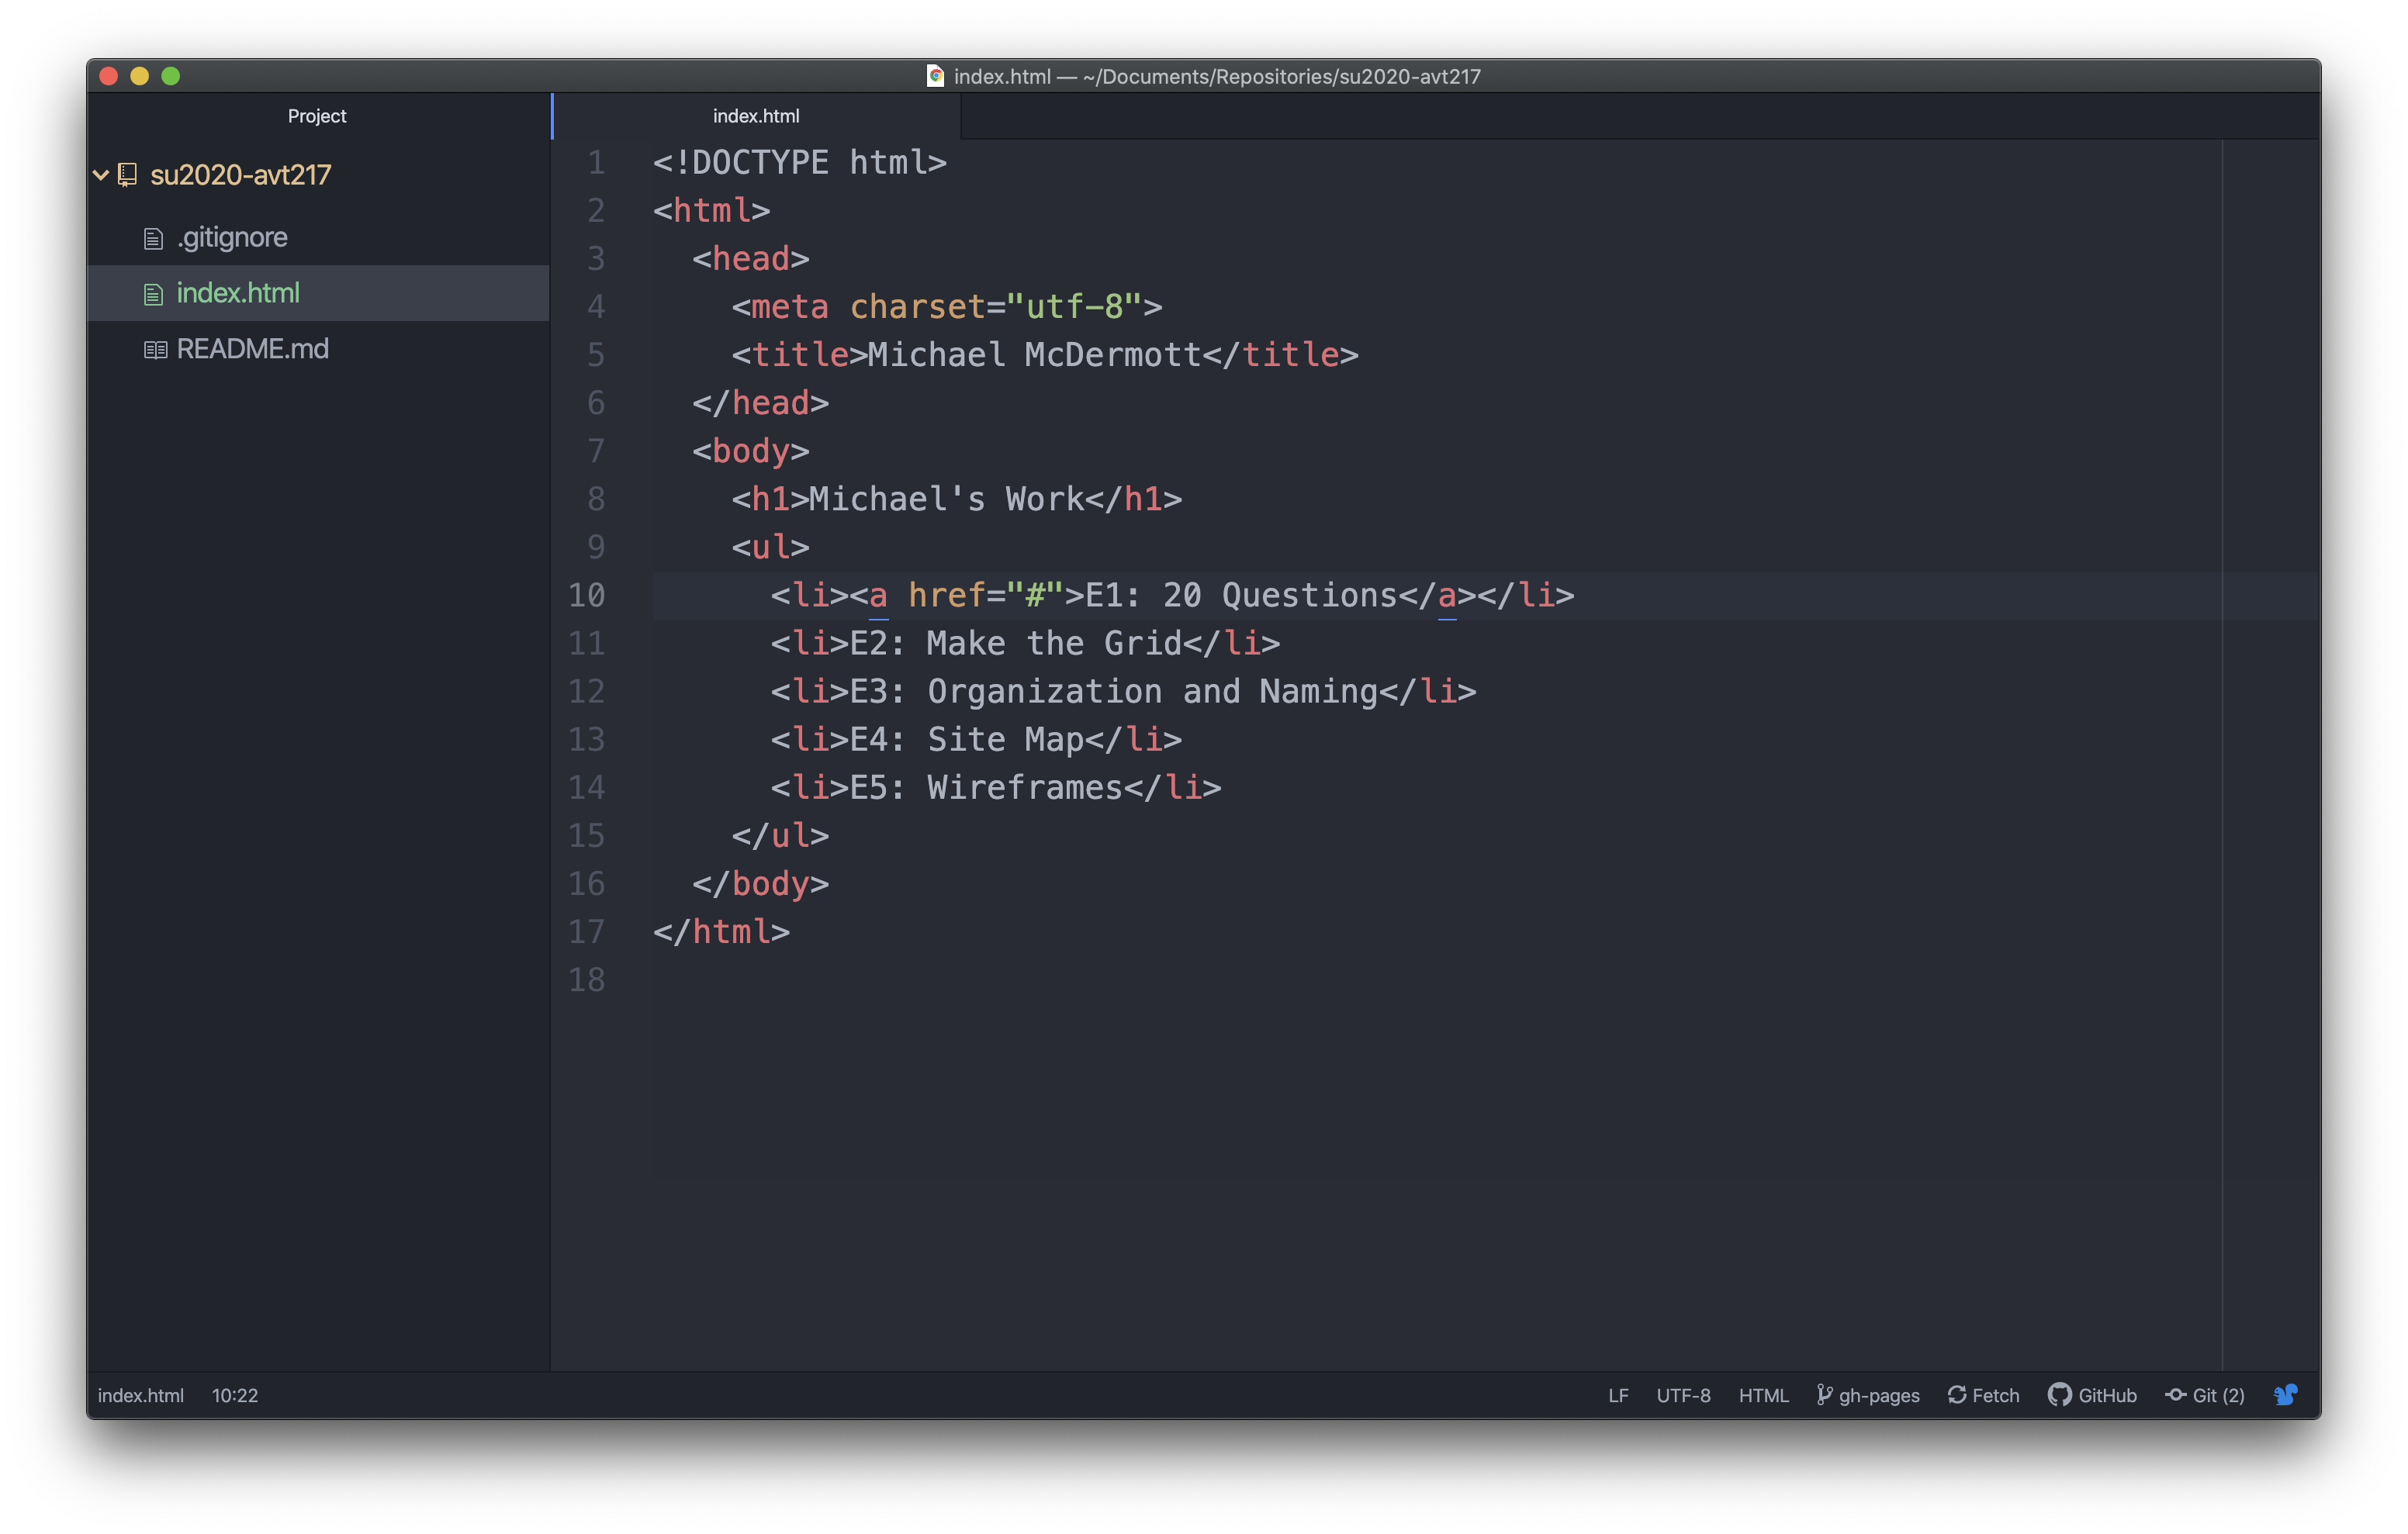
Step 4: Add E1 to Repository
In order for the link to work, Exercise 1 needs to be added to your repository. The first thing you want to do is add a folder in your repository (root directory) where the E1 file will live. There are many ways to add a folder so do it however you are comfortable. Name the folder whatever you want remembering all the rules about naming folders and files, an easy name might be e1.

Once you have the e1 folder you can add your HTML file for Exercise 1 into it. Once you add the E1 file to the e1 folder change the name of it to index.html.
Step 5: Add the Link Path
Now that the Exercise 1 file is in the repository you can add the path to the E1 link on your homepage. You should be back in Atom looking at your index.html file that is in your root directory. That should be the file that has the list of exercises we added earlier.
Find the anchor element wrapped around “E1: 20 Questions”. Delete the “#” we added when we first wrote the href attribute and change it to the correct path to get to your Exercise 1 file. Take a second to try and write it yourself and once you have something highlight the box to see what the path should be e1/index.html.
A note: This path is dependent on the file and folder names this tutorial uses and the location of those files and folders. If you named something differently or put something in a different location, your path will be different than the one above.
Once you have the path filled in preview the page in your browser and test out the link. Did it take you to your E1 file? If it did, great! If it didn’t, check to make sure your spelling is correct, capitalization, etc. and see if you can fix the error.

This is the same process to add links to the other list items in your unordered list. Once you have completed them, add a folder to the repository and then add any files you need displayed in there.
Step 6: Add CSS
The page works but it doesn’t look very good. How can you make it look better? CSS! In your repository add a css folder. Once you have the folder make a new file in Atom and save it in your newly created css folder as main.css. This file will now allow you to control the look of your repository’s homepage. If you need a reminder on how CSS works make sure you have another look at the 2.3: External Style Sheets PDF on Blackboard.
Step 6a: Add Styles
On line one of the newly created CSS file add a selector for something you want to style. In this case, style the body element and type body { on line 1 and then close the style on line 3 with a closing curly bracket, }.
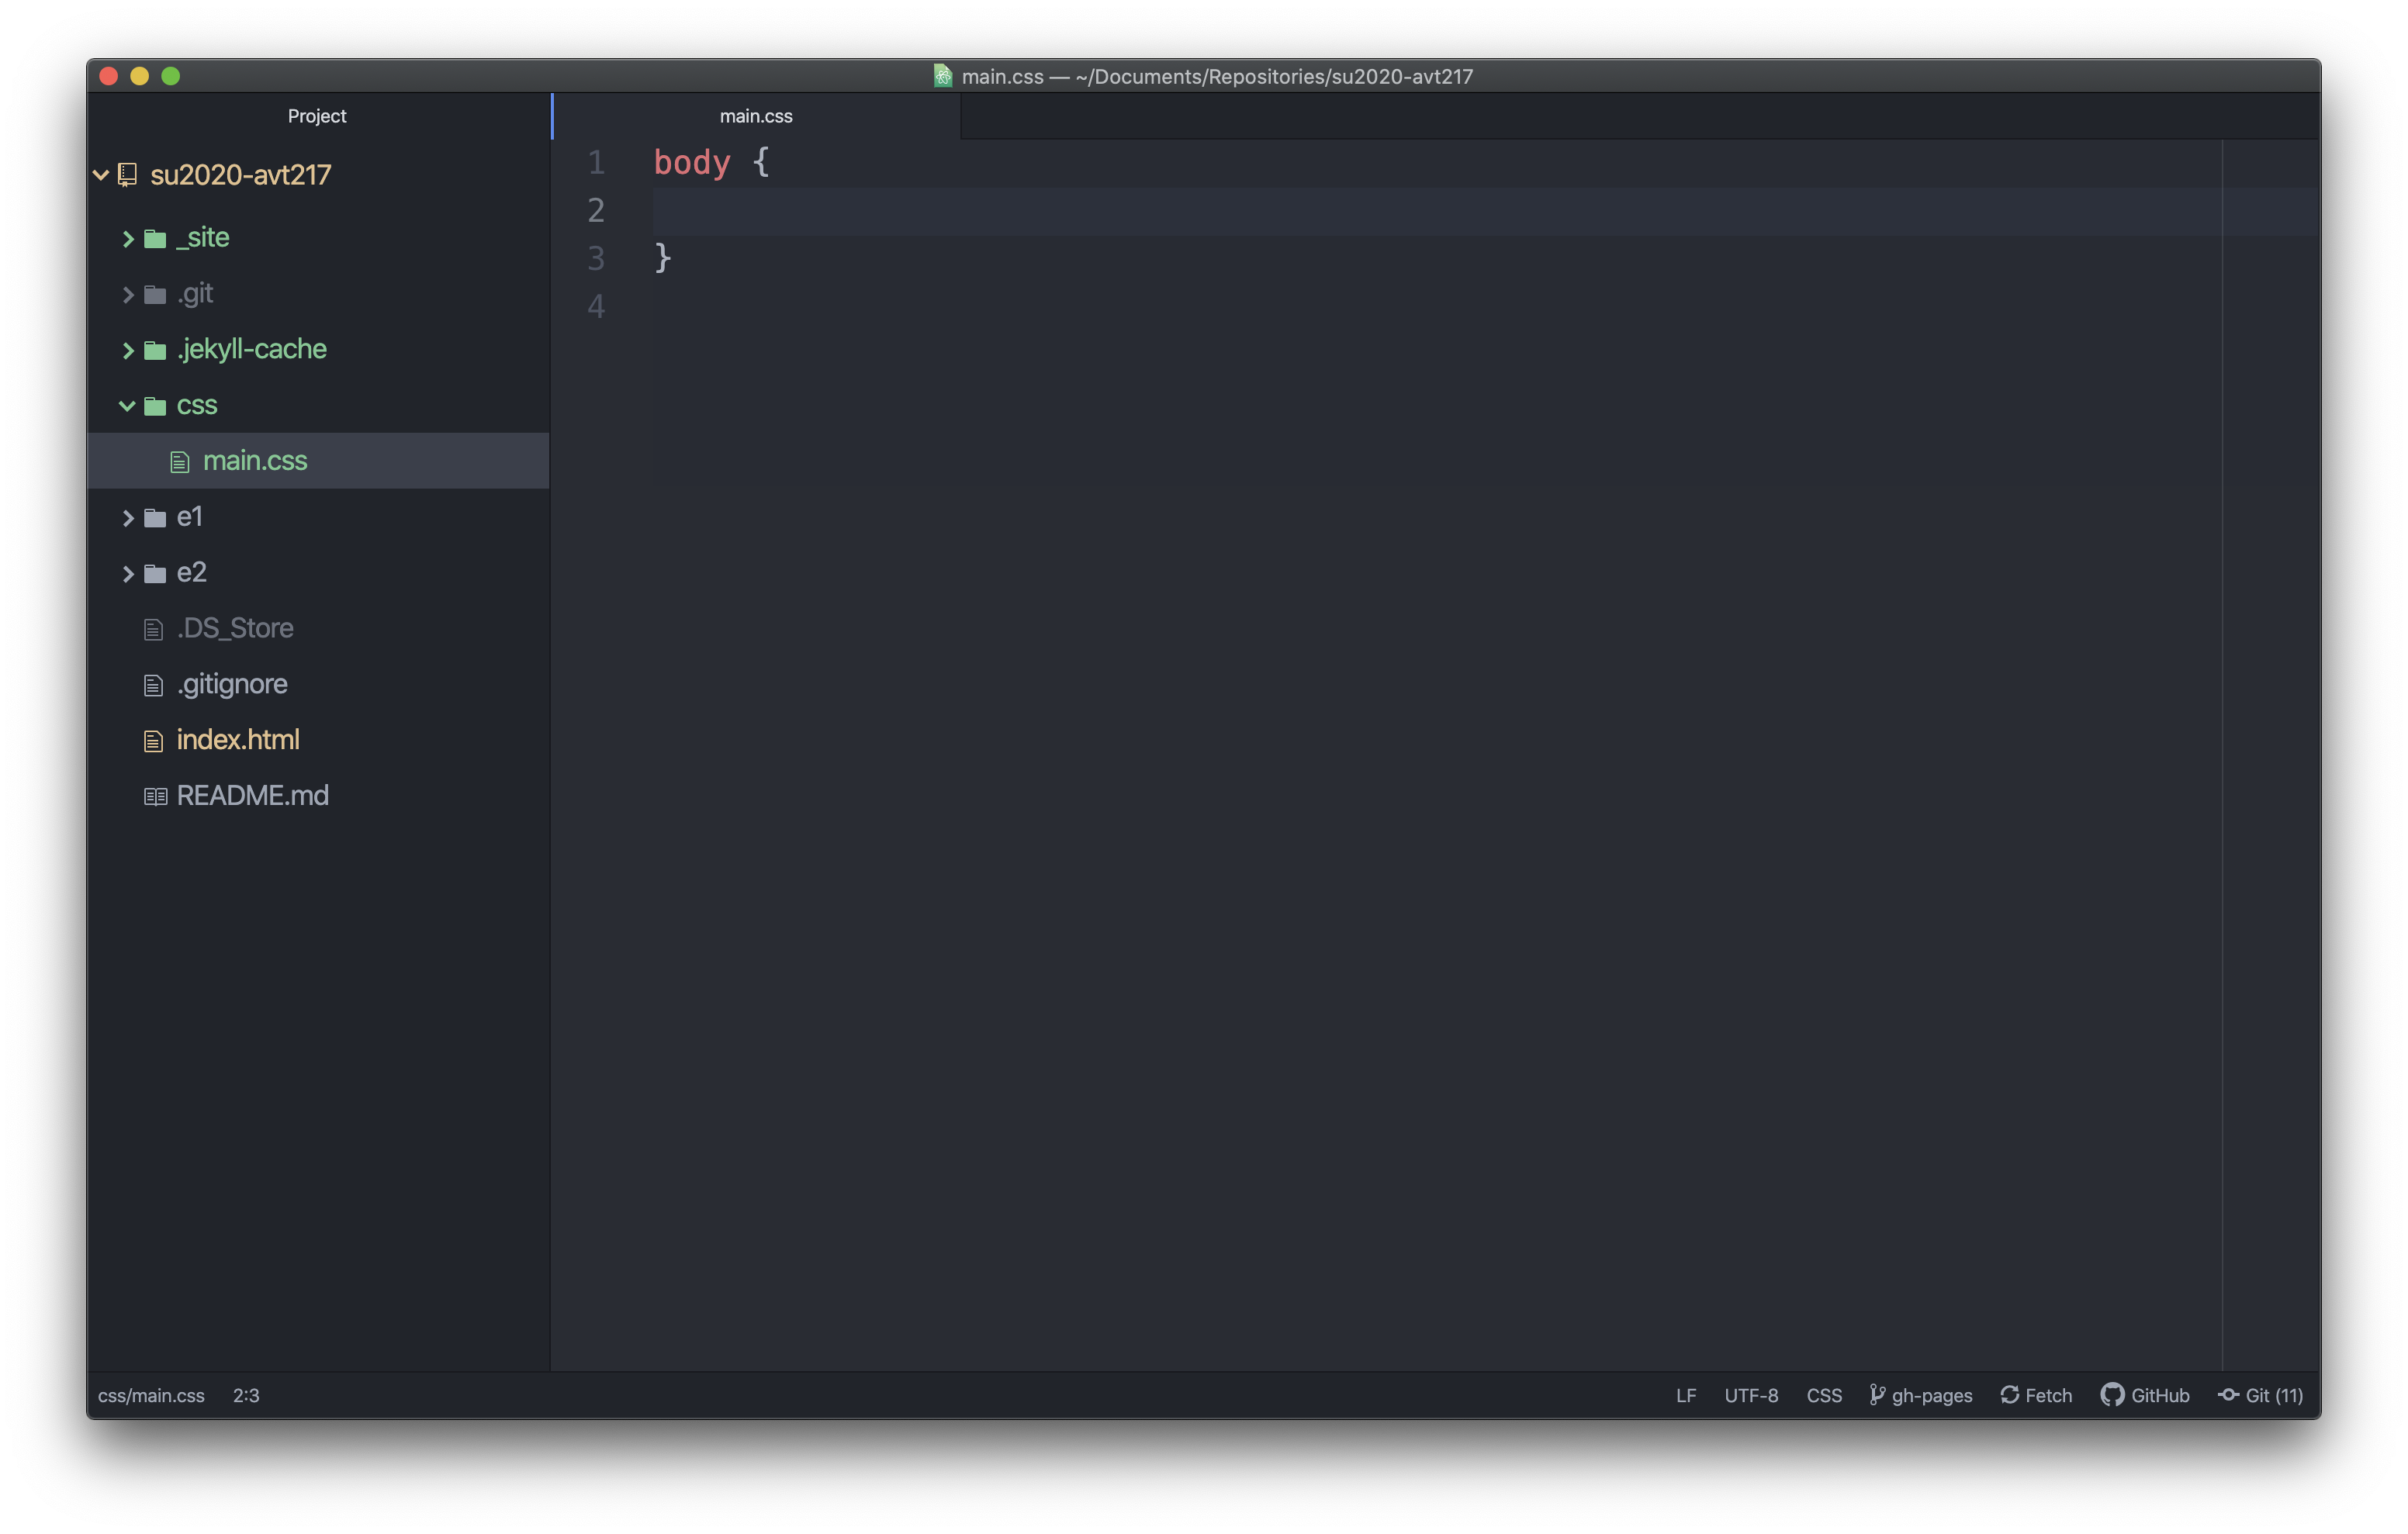
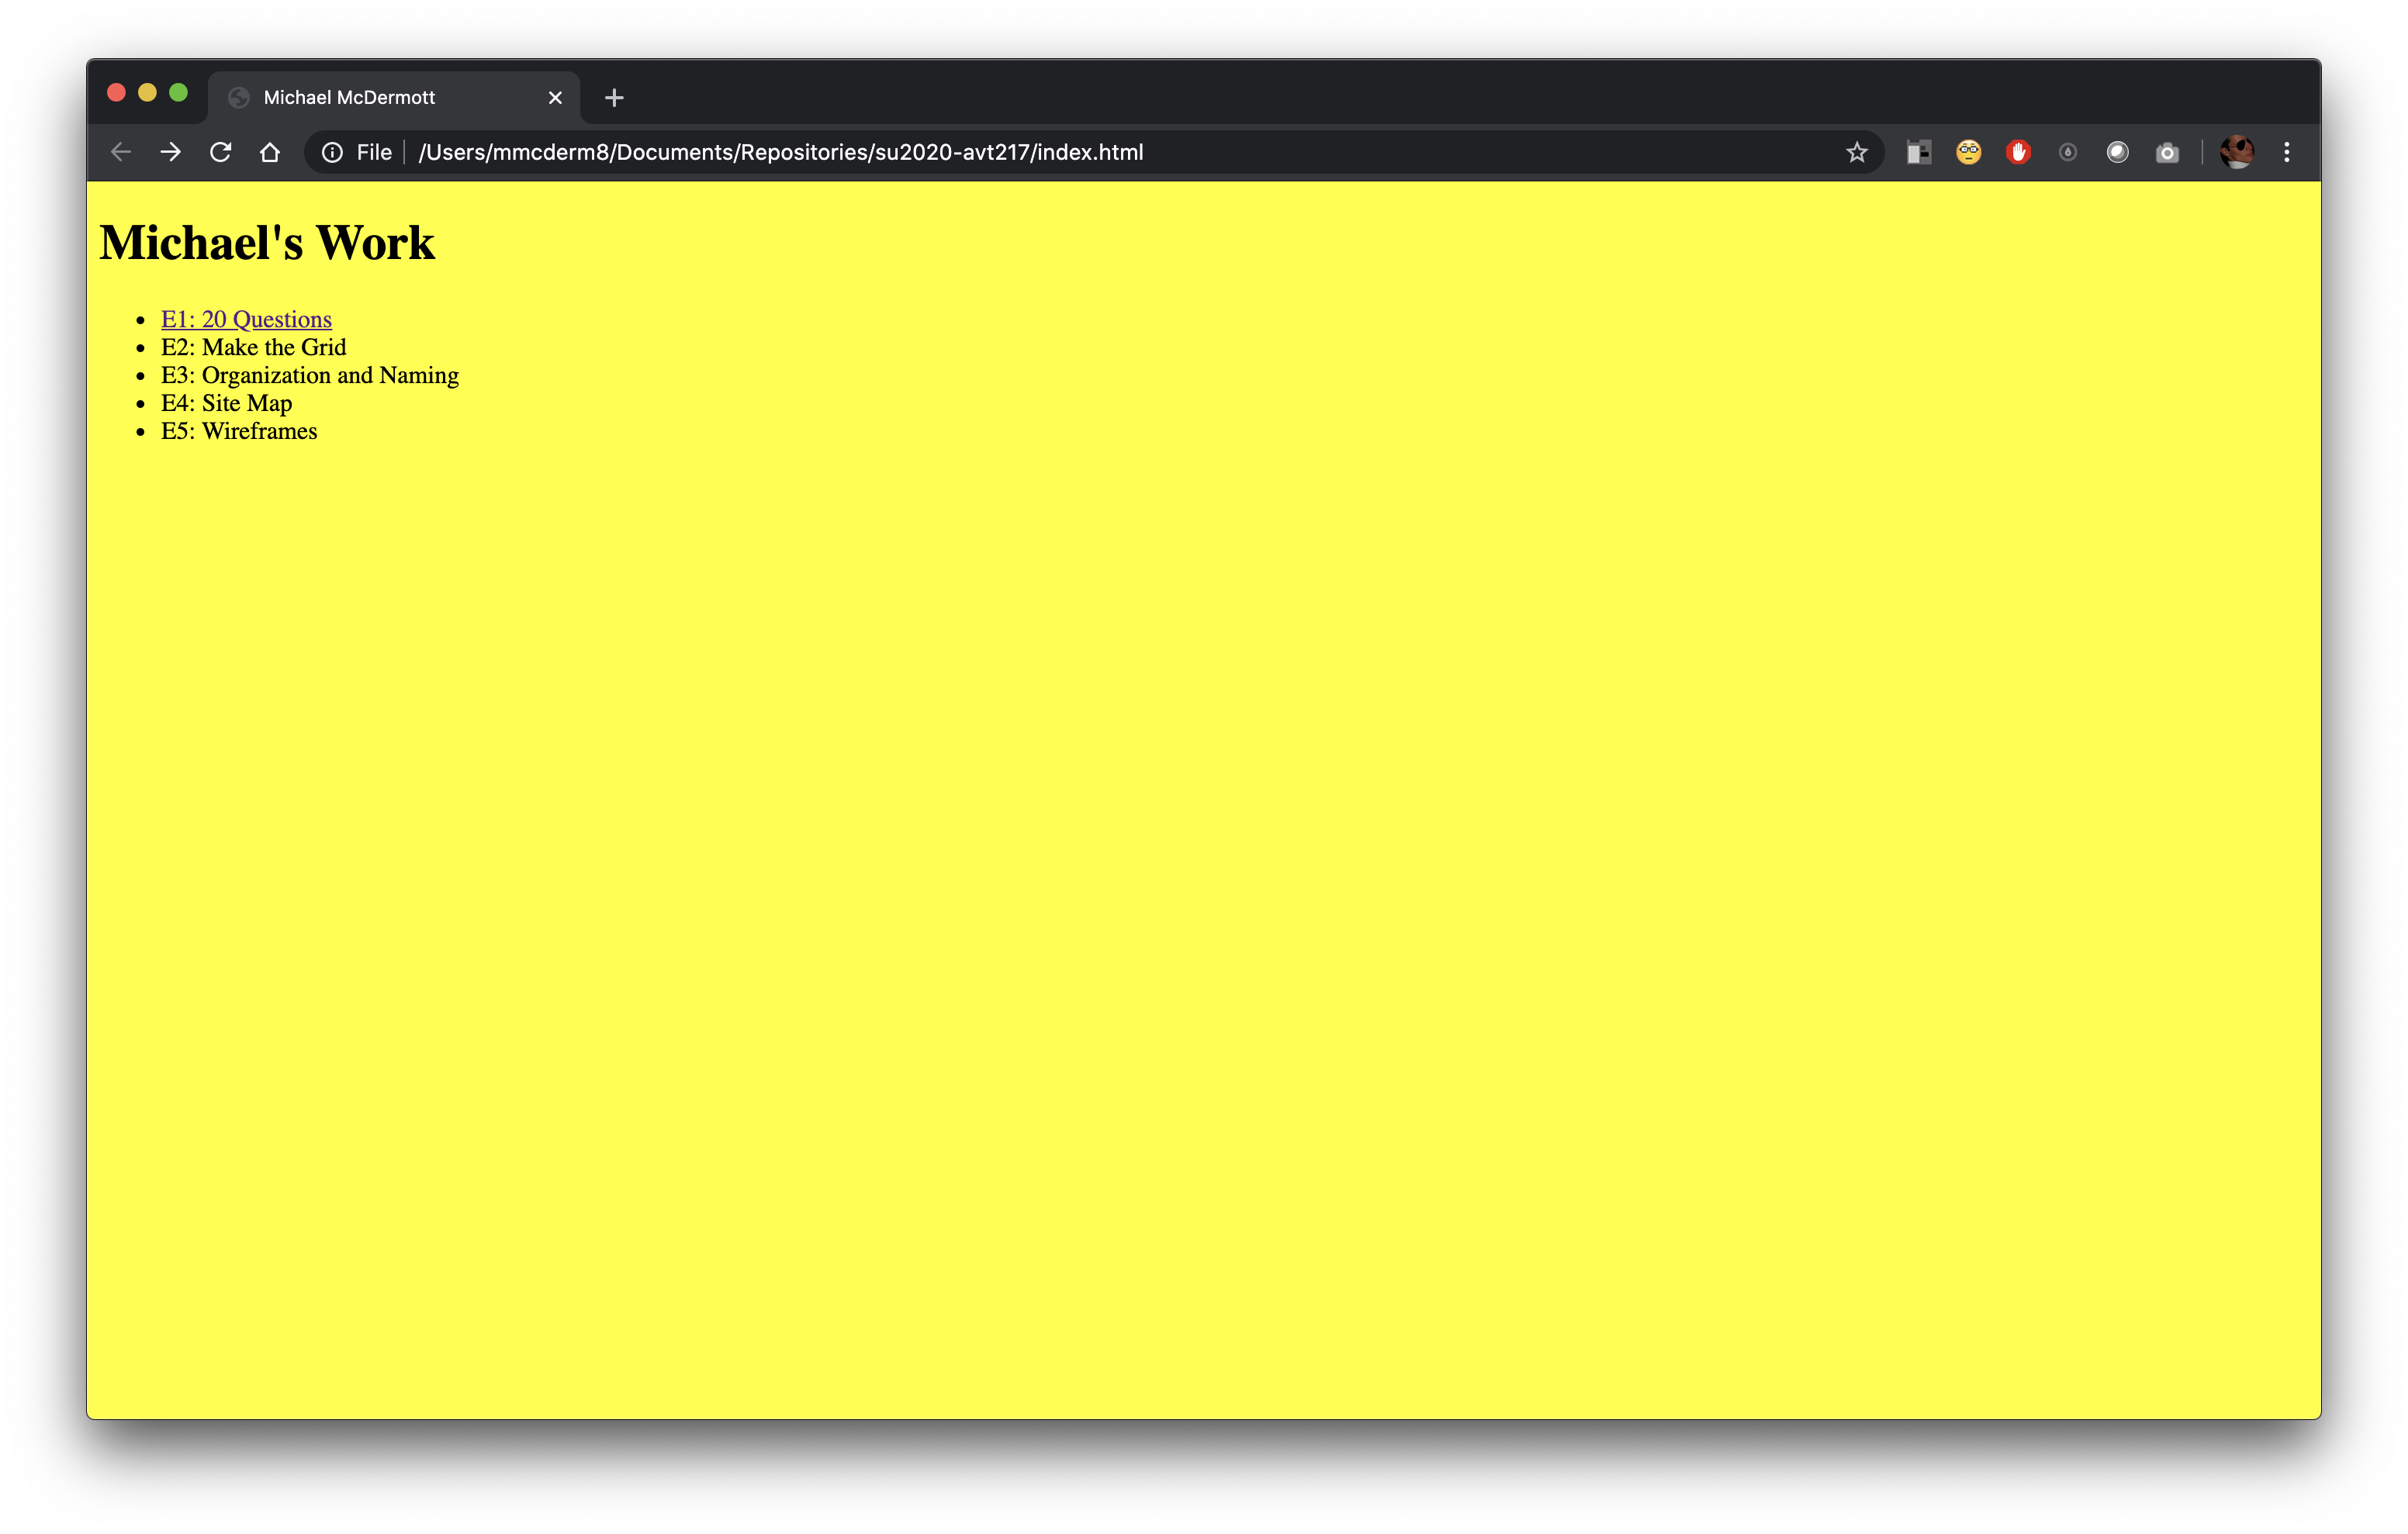
Now add a declation in there (property: value;) to change the background-color for the body. This allows a quick, easy check to see if the CSS file is correctly linked to the HTML file. Add the property background-color with the value of yellow to line two of the CSS file. Make sure it is indented one level because this declaration is inside the body style rule.
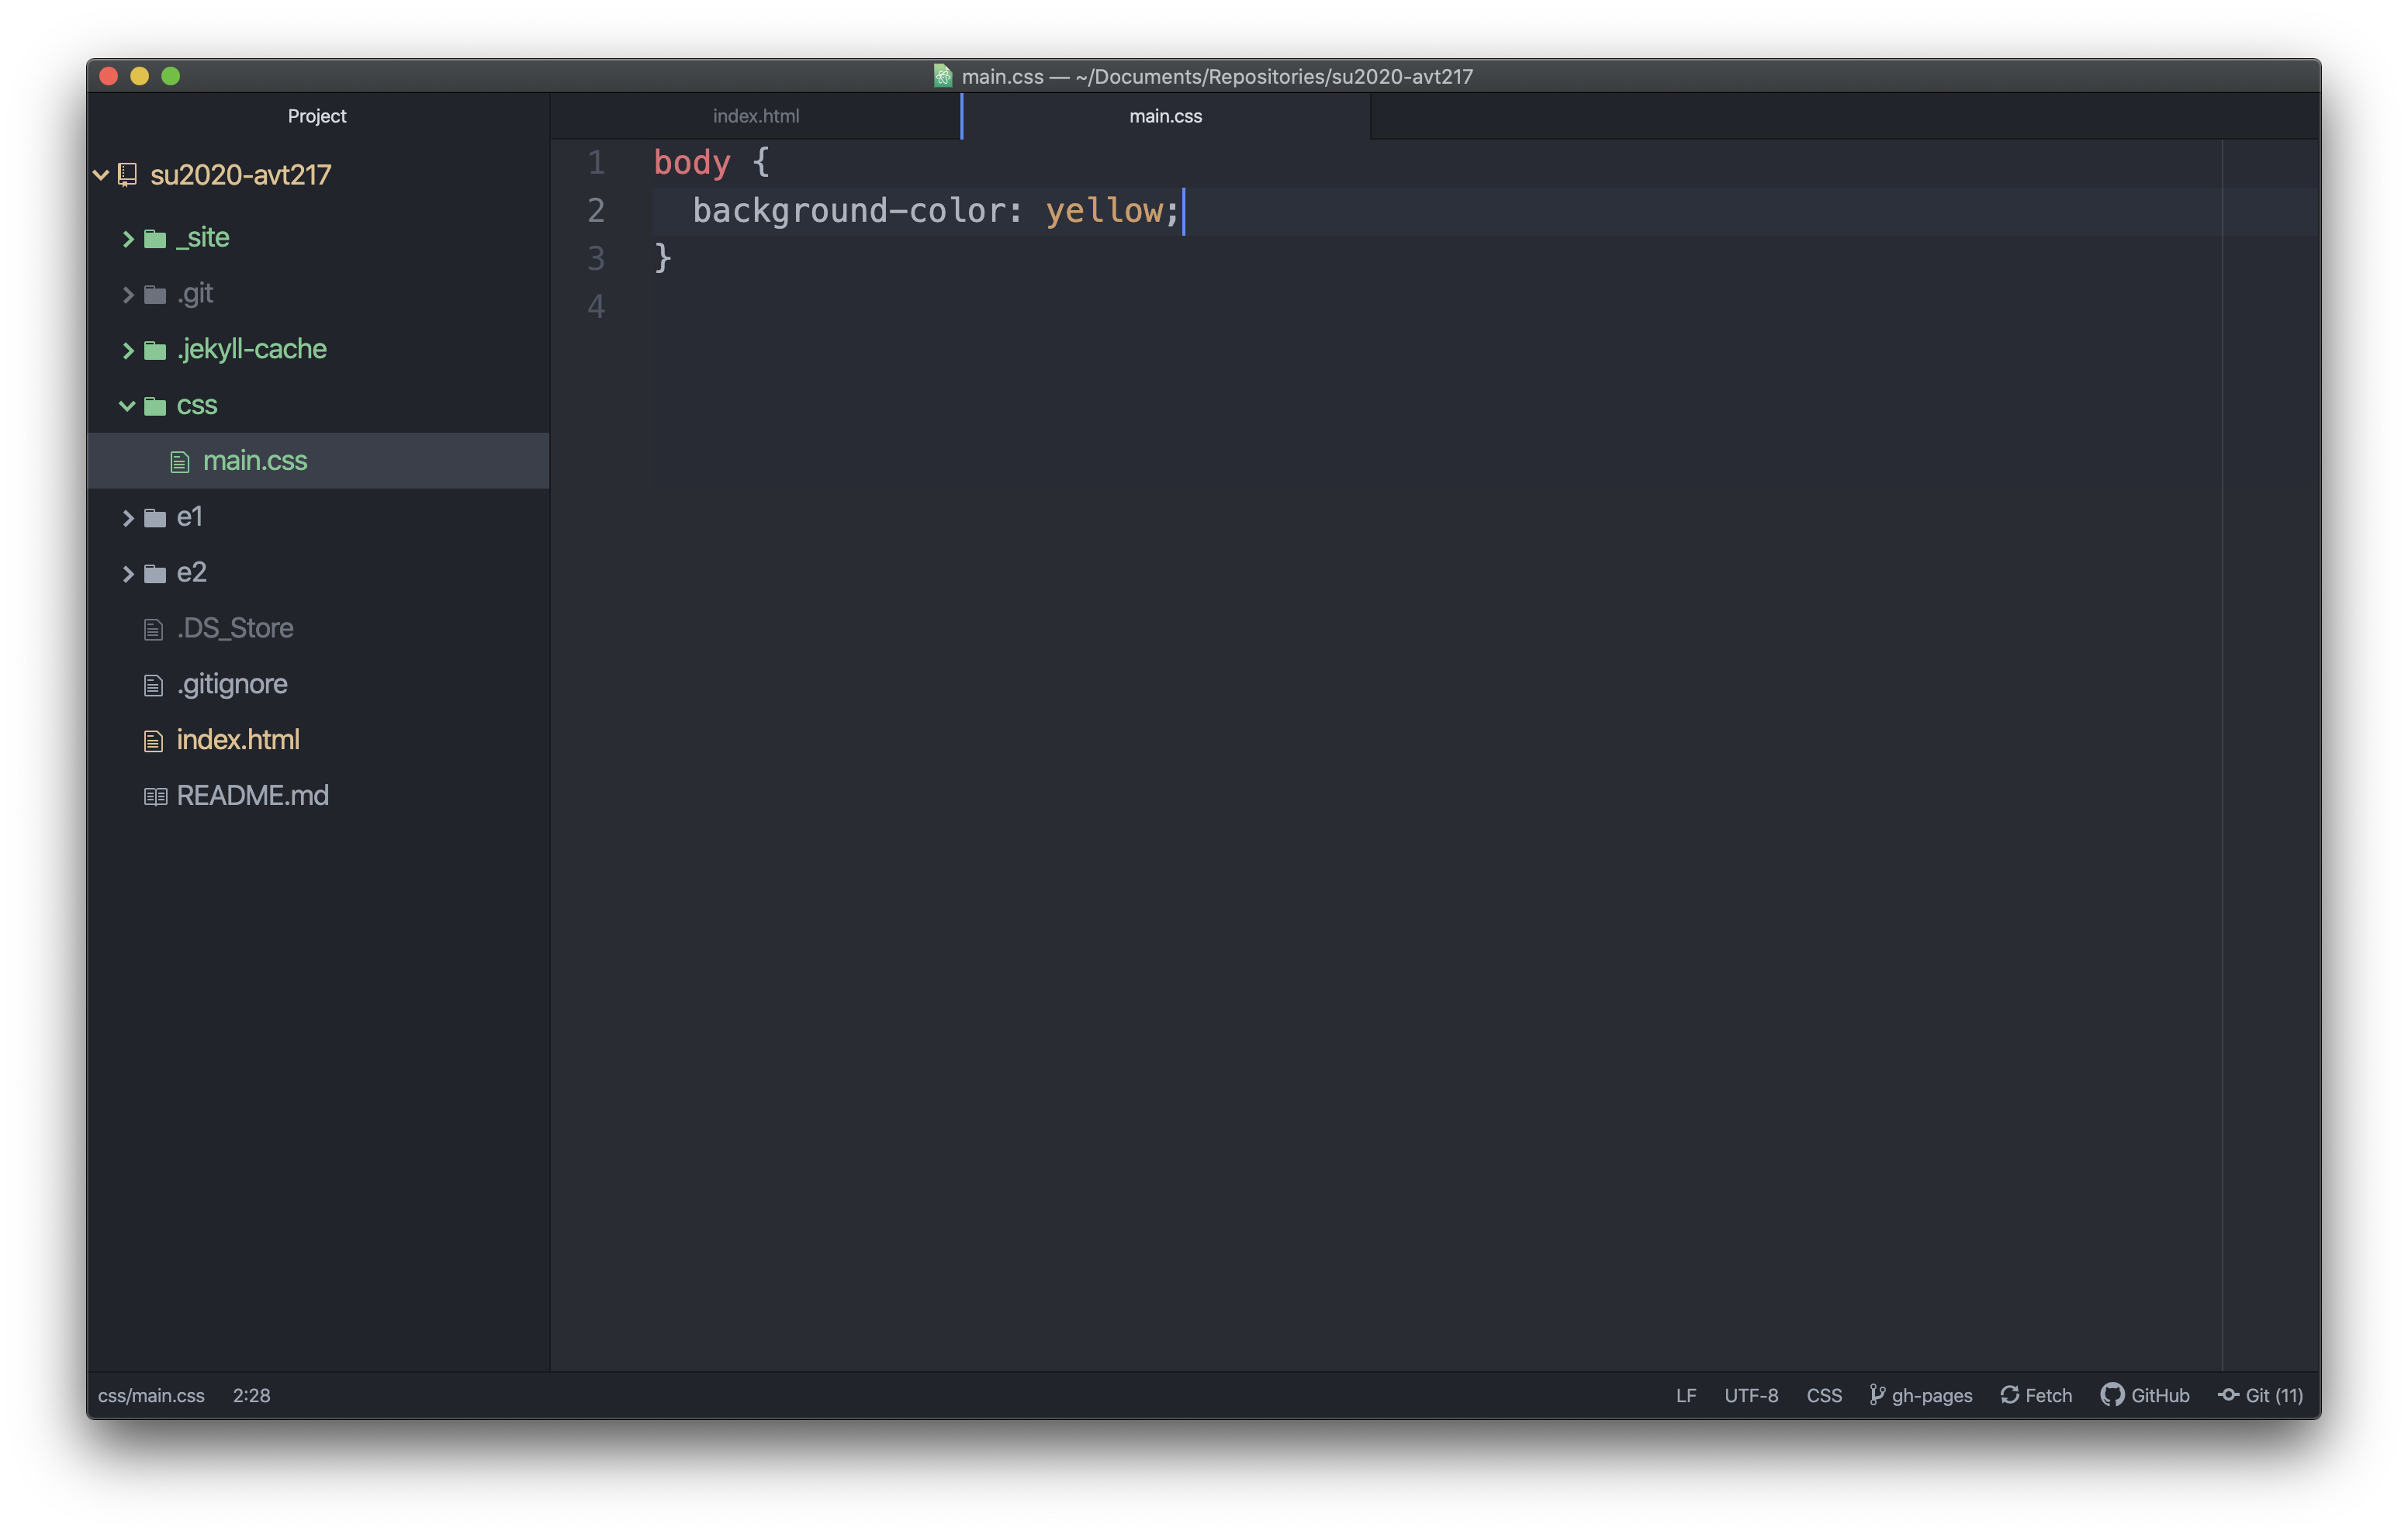
Save the CSS file and preview your main HTML file again. Did anything change? No? Any ideas why? If you guessed that the CSS file isn’t connected to the HTML file yet you would be correct!
Step 6b: Connect CSS and HTML Files
To connect the two files together you need to add the link element to the HTML file. The link element is an empty element that goes in the head of the HTML document and must have two attributes, rel and href.
Open up your main index.html file and add a new line beneath your title element. On that line add the link element, <link rel="#" href="#">. Try and replace the “#” with the appropriate values for each attribute. The rel value should define the documents relationship and the href value should be the path to your css file. rel attribute – rel=”stylesheet”, href attribute – href=”css/main.css”.
Another note: Again this path is for the file and folder names and locations of this tutorial. If you did something different, that path will not work.
Once you have the values, preview the HTML page and see if the background turned yellow. If it turned yellow that means your files are connected and you can add more styles to your CSS file to control the look of your homepage. If it didn’t turn yellow try going back through and comparing your files to the screenshots and see if you can find the issue.
Step 7: Go Crazy
Now that you have a CSS file that is connected to your HTML file you can add all the styles you want. Just remember that in order to style an element in your HTML you need to target that element with the same selector. So if you want to style the list items in your HTML file, the CSS selector is going to be li. If you want to style the level 1 heading, the CSS selector is going to be h1. This allows you to style any HTML element that displays on the page (meaning you can’t style the title element).
If you run into something that you don’t know how to change, try Googling it as if you were asking me. “How do I change the font size in CSS?” or “How do I change the color of text HTML” or “How do I change the hover color of my links CSS?”
Back to Tutorials